Translate

Saturday, August 25, 2018

Lemon Craft Yesterday Birthday Card

Welcome back and hope you are enjoying your summer.  Harvest is good this year despite all of the repairs.

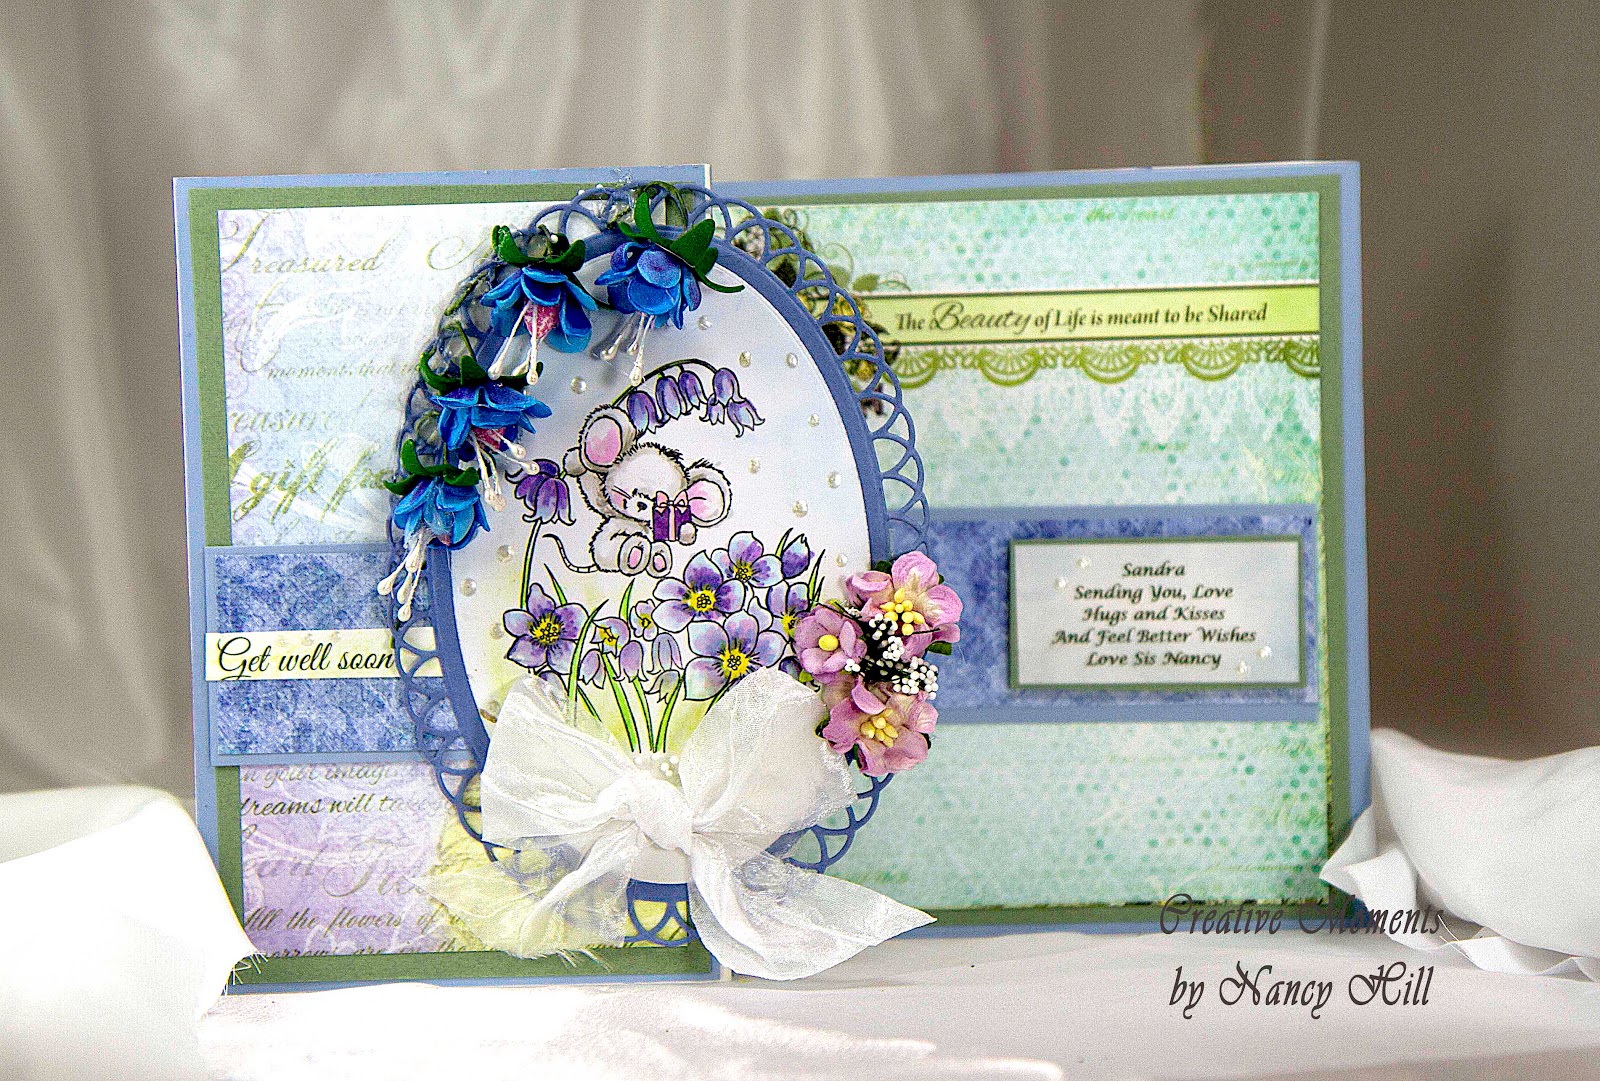
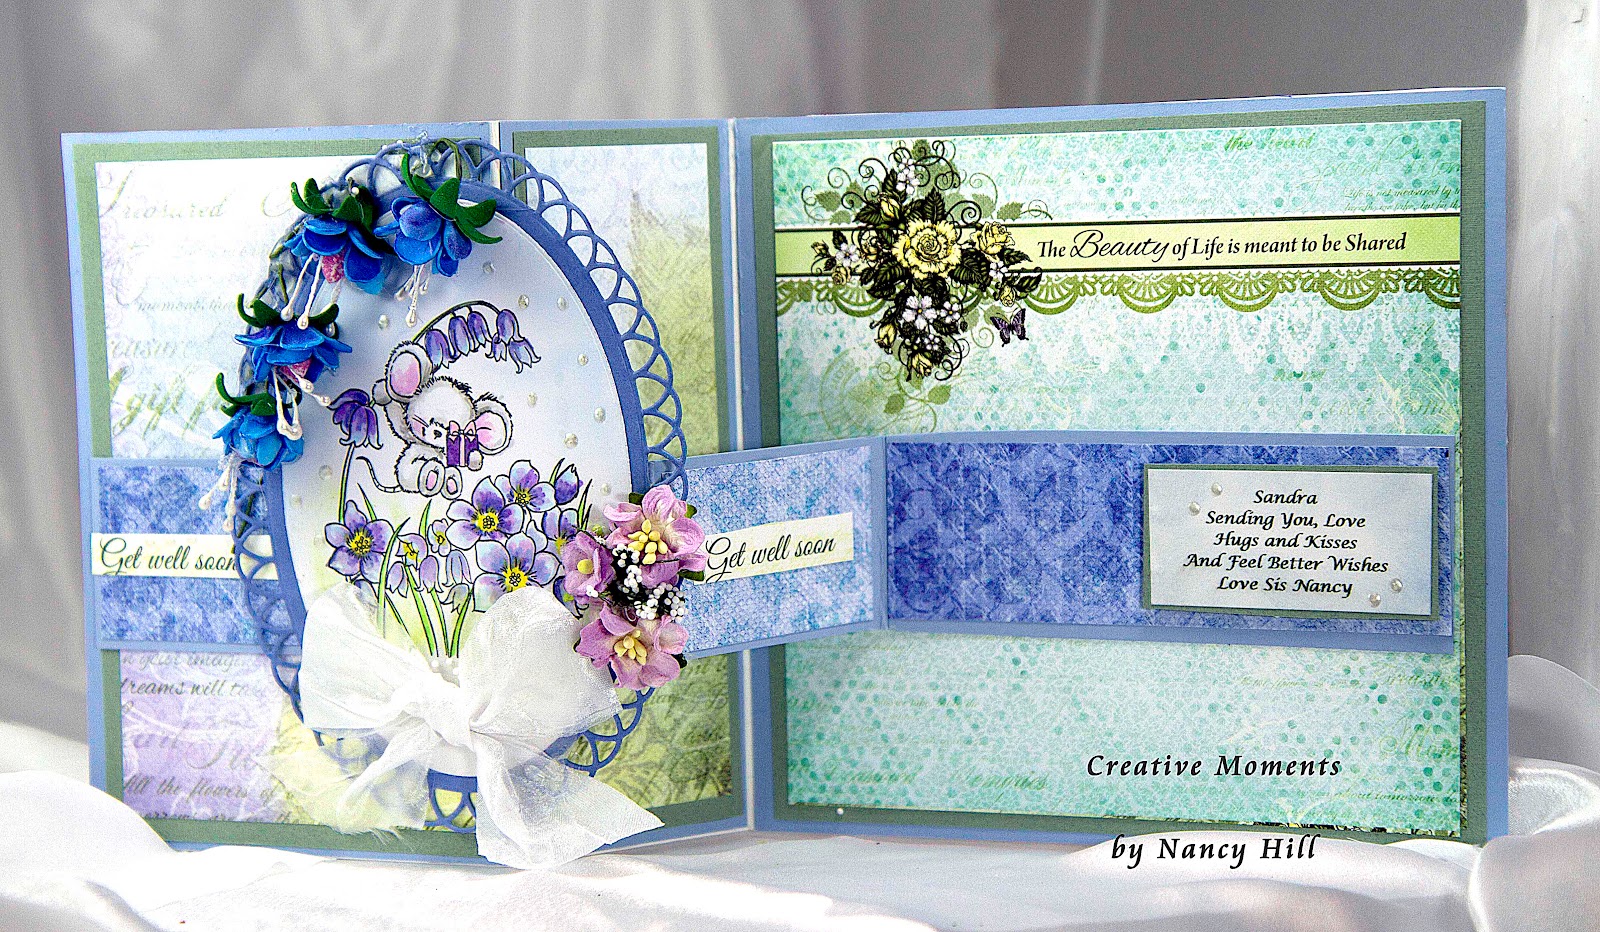
I made this card using the gorgeous Lemon Craft Yesterday paper collection along with the 
Lemon Craft Vintage 021 Butterfly Collection paper.  Love the vintage pastel patterned papers in this paper collection.  The Rubber Buggy has the gorgeous collection of Lemon Craft paper collections for you.  


Also, I have used a variety of fast grab quick drying glues.  I bought the Beacon 3-1 Glue and this glue will  almost stick to anything very nicely on my craft projects at all times.  I highly recommend this.  Not only does it grab very well but it glues quickly and clearly and flows  out of the bottle so well.  

I love all of the variety of butterflies that is found with the variety of Lemon Craft Vintage butterfly papers.  I used the butterfly from the Lemon Craft Vintage 021.  I had a couple other Lemon Craft Vintage butterfly papers that I love for my cards and projects.  I cut out the pink butterfly, shaped the wings with a roundness of the pencil handle to give it a soft curve to make it look like it is flying and used a damp paper cloth and sponged on some soft pink inks around the wings. 
 I used the NUVO glitter pen on the butterfly and roses on the paper to bring out more of the colors.  Hopefully, you can see the gorgeous shimmer on the butterfly from the NUVO glitter pen.

I cut off white floral wire from a paper flower and twisted it to for the body of the butterfly.  I used a hot glue gun to glue the wire on the butterfly.  
I cut out this cone template for the fan by folding the paper and cutting it as shown below.  I align the template to the top of each Lemon Craft patterned paper squares (found in the paper pad) with the lace from the Lemon Craft Yesterday paper pad.  I edge each fan petal with pink from a sponge or paper town and glued the fans together.  I used Prima Marketing Artisan tape to adhere the lace and bow on the fan.  

I found this cameo jewelry charm and used Prima Marketing Clear Gesso.  After the gesso dried, I used my fingers to paint the cameo with Prima Marketing Butterfly Spells Spark paint.  I adhered it to the bow with a hot glue gun.  To see the difference the top charm and metal corner are painted with the gesso and sparks, the bottom charm and corner haven't been painted yet (photo below).  


To finish off most of my cards (see photo above), adhere the crystals found in the Prima Marketing Say It In Crystals sets.  The two SIIC sets are only a small sample of the other gorgeous Prima Marketing Say It in Crystal sets that are available at The Rubber Buggy.  Be sure to check out the new arrivals like Prima Marketing Santa Crystals.


Lemon Craft Yesterday Paper Collection
Lemon Craft Vintage Butterfly 021
Beacon 3 and 1 Glue
Prima Marketing Finnabair Mixed Media Essential Gessos Set
Prima Marketing Sparks Butterfly Spells
Prima Marketing Artisan Tape 1"
Wild Orchid 10mm Baby Pink Roses
Prima Marketing Julie Nutting Say It In Crystals
I hope I have inspired you try out these products available at The Rubber Buggy on-line store.  My cards and projects are always posted on Saturday.  Keep watching and thank you so much for those wonderful comments as well as suggestions. 
Enjoy and Happy Crafting!


Saturday, August 18, 2018

Sympathy Easel Card for Cowboy


Making a personalized sympathy card is wonderful therapy.  It preserve memories of some of the things that we miss about that person as well as cope with their absence.  This card is for our cousin who loved being a cowboy in his spare times.  This picture is of him being honored as a Grand Marshal of the Lewiston Roundup Rodeo.  
The Rubber Buggy has all of the wonderful products and supplies to make gorgeous cards and craft projects for you.  I made this easel card using the Heartfelt Creations Dogwood paper and Dogwood Flower dies.  The flowers were made with the white LeCrea Flower sheet and I colored each petal with mint green Prima Marketing Oil Pastels before using an iron to curl the petals. I used the Beacon 3 In 1 Advanced Glue to apply US Artquest Mini Ribbit green Prills in the center of each flower.  The sentiment on the front is from the gorgeous Heartfelt Creations Courage and Strength stamp set. I stamped it with Memento Tuxedo Black ink and used a NUVO glue pen on "God" and applied NUVO gold glitter.
The metal frame with the Cowboy sentiment is  the Gorjuss Metal Frame.  I typed the Cowboy sentiment using Microsoft Word and cut it out to fit inside the frame.  I used part of a rope and used a glue gun to adhere this rope around the frame to give it that western appearance.  I used another Prima Marketing Vignette Metal Corner on the frame and Prima Marketing Crystals Havana around the front of the cover.
This photo above is when the easel card is folded.  It measures 6 1/2" x 6 1/2". I had this little resin angel and used it for this card.  I colored it with Copic Markers.


Make sure to use heavy cardstock for the easel frame before the patterned paper.  I found that if you don't do this and add flowers, the easel part of the card will droop due to the weight.  


Cut a 6" x 12" cardstock and score at 3" and 6" and fold the score lines.  This is what it may look like gluing or using Prima Marketing 1" double-sided adhesive tape to adhere the front of the card to the fold.  I have a tutorial on how to make this easel card  attached to a box:  https://hillfarmcards.blogspot.com/2017/10/tutorial-on-easel-card-with-drawer.html   

LeCrea Flower sheet Prima Marketing Vignette Metal Corner
NUVO gold glitter
Heartfelt Creations Dogwood Flower dies
US Artquest Mini Ribbit green Prills
Beacon 3 In 1 Advanced Glue
Prima Marketing Crystals Havana
NUVO glue pen
Heartfelt Creations Dogwood paper
Prima Marketing  Artisan 1" Memory Hardware Tape
Gorjuss Metal Frame
Heartfelt Creations Courage and Strength
Prima Marketing Oil Pastels
Heartfelt Creations Courage and Strength

 hope I have inspired you try out these products available at The Rubber Buggy on-line store.  My cards and projects are always posted on Saturday.  Keep watching and thank you so much for those wonderful comments as well as suggestions. 

Enjoy and Happy Crafting!


Saturday, August 11, 2018

Wild Rose Studio Birthday Card with Bella

The Rubby Buggy carries all of your favorite Wild Rose Studio stamps, papers and dies. Wonderful customer service and quickly deliver right to your doorstep.  

 I just love the Wild Rose Studio stamp sets like the Wild Rose Studio Bella Party #2.  This stamp set is also similar to the Wild Rose Studio Bella stamp set which could be used making this card.


I colored the image with Copic Markers and added glitter glue to the balloons.  I used a 1" punch to cut out the Wild Rose Studio Cat and Moon greeting and adhered it to another scallop circle punch.  I used an ole Spellbinder nestabilities rectangle die set for the frame and embossed it with an embossing folder.  

I added the 3mm flat back string pearls using the Beacon 3-1 glue.  I have always used another glue brand but I plan to stick with e Beacon 3-1 glue since it dries so well tacky and clear.  It comes out of the bottle so well and will stick to anything.   I added some ruffled ribbon using this same glue to the back of the frame.  I adhered another scallop border die behind the frame.  I adhered this using Prima Marketing Artisan double-sided self-adhesive tape to a heavy cardstock.

I highly recommend the Uni-Ball White Gel Pen  that comes in a set of 2.  I always had problems in the past with other name brand white pens with clogging and drying up quickly. I almost have given up buying any more white pens.  I gave this a try and absolutely love it.   I have this pen over a year and did it flows immediately upon using it. No more trying to get a white pen to unclog on the point.   I colored the white lines in the ballon over glitter with ease.   


Wild Rose Studio Bella's Party 2 Stamp Set
This stamp set is also similar to the Wild Rose Studio Bella which has the beautiful corner stamps that is also available at The Rubber Buggy on-line store.


Wild Rose Studio Cat and Moon Greeting

Beacon 3 In One
Prima Marketing Artisan Hardware Tape
I hope I have inspired you try out these products available at The Rubber Buggy on-line store.  My cards and projects are always posted on Saturday.  Keep watching and thank you so much for those wonderful comments as well as suggestions. 
Enjoy and Happy Crafting!

Saturday, August 4, 2018

Wild Rose Studio Mouse on Blue Bells

Welcome back and Nancy Hill from The Rubber Buggy Design Team.  I am excited to share another card made with the adorable Wild Rose Studio stamp.  This adorable stamp set is called the Wild Rose Studio Mouse on Bluebells.  I am always to excited to get the Wild Rose Studio stamps because of the fun and joy of coloring these happy little critters.  I try to order at least one of the Wild Rose Studio stamps each month and love the new arrivals at the Rubber Buggy on-line store.  
Wild Rose Studio Mouse on Bluebells


The Heartfelt Creations Blushing Rose paper is so gorgeous behind the image and I love how the colors went to well with the colored image.  I adhered the image to the Heartfelt Creations Eyelet Oval die frame.  Also, I used the LeCrea Design Blue/Violet Foam Flower cut with the Heartfelt Creations Cascading Fuchsia flower die to make these flowers.  Also, I added some Wild Orchid Craft Wild Cosmos flowers by the handmade bow.  I used the 

Prima Marketing - Memory Hardware - Artisan Adhesive Tape - 1"  behind the bow.  


Wild Rose Studio Mouse on Bluebells
LeCrea Design Blue/Violet Foam Flower
Heartfelt Creations Cascading Fuchsia flower
Heartfelt Creations Eyelet Oval 

I hope I have inspired you try out these products available at The Rubber Buggy on-line store.  My cards and projects are always posted on Saturday.  Keep watching and thank you so much for those wonderful comments as well as suggestions. 

Nancy Hill
The Rubber Buggy Design Team


Thursday, August 2, 2018

Rustic Truck

Welcome back Rubber Buggy bloggers.  Take a look at all of the new arrivals at 
The Rubber Buggy.  You'll want to start ordering your Christmas stamps and die sets before these items are soon to be sold out. 


 I am excited to share my steam puck card made with gorgeous supplies, paper, and chipboard available at The Rubber Buggy.  I am still learning about mixed media so would love to hear what you have to say about working with gesso, inks, paste, etc. and any recommendations so that we can all learn together.  If you are new at mixed media, I would suggest the Prima Marketing Finnabair Mixed Media Essential Gesso set of black, white and clear that comes in 2 ounce bottles. I am experimenting with the black, white and clear gesso and really fond of the clear gesso for most of my use. I used a lot of white gesso on my knobs for Shabby Chic gift boxes that I made for a wedding.  

7 Gypsies Architextures Findings Adhesive Embellishments - Red Tow Truck

49 and Market  Chipboard Sets - Timeless White


I used my fingers to spread the clear gesso on the chipboard gears and clock and let dry.   I used my fingers to apply the gorgeous Prima Marketing waxes on the gear, clock and tow truck.  I used a hot glue gun to adhere the metal gears to the card.  The background was embossed with the new Sizzix 3D Gear embossing folder and I applied the same clear gesso and Prima Marketing waxes on it as well.

I hope I have inspired you try out these products available at The Rubber Buggy on-line store.  My cards and projects are always posted on Saturday.  Keep watching and thank you so much for those wonderful comments as well as suggestions. 
Enjoy and Happy Crafting!