Translate

Saturday, March 27, 2021

Steampuck Craft O'Clock Age of Technology


Masculine-themed paper with grungy gears, light bulbs, top hats and classic cars are for the special male cards so start with the Craft O'Clock Age of Technology paper collection.   
Start with 
Age of Technology Extras to Cut II
Prima Marketing Waxes
Metal or paper die cut gears
Frame of card measures 6 1/2" square.  
I used Prima Marketing Finnabair Mechanicals Set Hardware Accent hardware and Prima Marketing black gesso with the Prima Marketing Art Alchemy Metallique waxes or Prima Marketing acrylic paints to cover the gears. I used a paint brush for the gesso and paint and rubbered the wax on the gears with my fingers.  I used a hot glue gun to adhere the metal embellishments on the card.  Otherwise, I used the Beacon 3-n-1 Advanced glue to adhere the layers of paper.   Some of the gears are Prima Marketing - Mechanical Gears.  Also added were embellishments from the Tim Holtz Idea-ology Chipboard Alphabet dies and Graphic 45 Clock and Tag sets.  In the card below, the beautiful amber stone is from the Prima Marketing Finnabair Art Ingredient Melange - Vintage Art Pebbles which I use often for my steampuck cards.  
 I cut out a few images from the Age of Technology Extras to Cut I
Age of Technology Extras to Cut II and added these to the front and inside of the card.  On the left of the inside of my card, I adhered two cardstocks.  I tore one of the edges and distress it as well as sponged on Ranger Distress Ground Espresso ink.  I used the same ink to sponge around the sentiment on the right side  and fussy cut some gears from the Extras To Cut - Age of Technology cardstock and added it to the sentiment.  I always type a personal each sentiment and print it out for the inside of my cards.
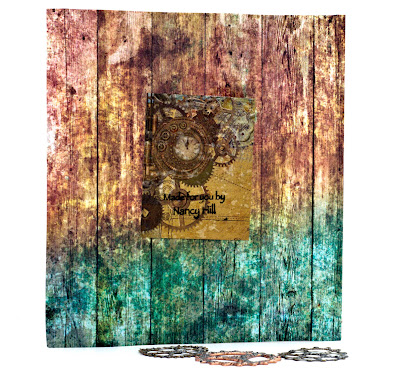
I always love to add these gorgeous cardstock papers from each collection to the back of my cards and use a stamp to add my name to it.  

 Have a fabulous crafting day and thanks for visiting.

 The Rubber Buggy has the crafting supplies for your next project. So have fun crafting this weekend with these products.   My cards and projects are always posted on Saturday.  Keep watching and thank you so much for those wonderful comments as well as suggestions. 

Enjoy and Happy Crafting!


Saturday, March 20, 2021

Shabby Chic Box with Craft O'Clock Vintage Treasure


Welcome back and Nancy, here.   The new arrival of the Craft O' Clock Vintage Treasure papers are a gorgeous with the vintage colors and beautiful pink roses that made for my shabby chic Valentine's gift box.  I have the 8" pads of this paper collection for this box but available in 6" and 12" as well.


I handmade the adorable cherub from a mold and resin.  I cut out the paper to fit the outside and inside of the box adhering with Scor-tape and Beacon 3-in-1 Advanced Glue.  I used a hot glue gun to adhere the heart called Prima Marketing Memory Hardware Fleur Coeur Frame to the center of the box and added a 10mm Wild Craft light pink rose.  I adhered the Venice lace with Scor-tape and used a hot glue gun to adhere the 6mm string pearls around the box.


The inside of the box was lined with this paper.  
Let dry for about 10 minutes before coating the pieces.
I used my fingers to sponge the Prima Marketing Finnabair Metallique Wax Firebird and Mint Sparkle on each strip.  I measured my picture and cut off the excess part of the strip to make the 4 sides to my picture frame.

 I cut a rectangle size from the paper and sponged some Ranger Black Soot ink to the right size to blend more with the left side of the patterned paper.  
I fussy cut this rose and added it to the side of the frame to coordinate with the roses on this patterned paper.

Now, I will fill this box full of chocolate for a Valentine's gift.  


I had so much fun making these gift boxes with these gorgeous paper collections available at 
The Rubber Buggy.   So have fun crafting this weekend with these products and keep watching and buy early when new arrivals are available since it won't be long before it is sold out.   My cards and projects are always posted on Saturday.  Keep watching and thank you so much for those wonderful comments as well as suggestions. 

Enjoy and Happy Crafting!


Saturday, March 13, 2021

Craft O'Clock Happy Birthday Cards

Welcome back and Nancy, here.   The new arrival of the Craft O' Clock Vintage Treasure papers are a gorgeous with the vintage colors and beautiful pink roses that made for my shabby chic birthday cards for my nieces.    I added the gorgeous Wild Orchid Craft flowers to both card.  

My shabby chic cards always have pearls, laces and ribbons.  I had a lot of fun sewing around the edges of the card and distress the sides with sand paper and sponged some with Ranger Distress Antique Linen ink and Ranger Distress Ripe Persimmon ink.  The gorgeous butterflies were cut out from the Craft O'Clock Vintage Treasure - A Sheet of Extra and once adhered to the card, I used the NUVO Crystal Clear Gloss on the butterfly and let dry.  I love how it brings out the butterfly with a little gloss on the wings.  

I added a Lawn Fawn Simple Banner die and stamped with the Lawn Fawn Wavy Saying on this card.  
So have fun making your gorgeous shabby chic cards with the gorgeous collection from Craft O-Clock Vintage Treasure.

 Have a fabulous crafting day and thanks for visiting.

 The Rubber Buggy has the crafting supplies for your next project. So have fun crafting this weekend with these products.   My cards and projects are always posted on Saturday.  Keep watching and thank you so much for those wonderful comments as well as suggestions. 

Enjoy and Happy Crafting!


Saturday, March 6, 2021

Ciao Bella MicroCosmos Thank You Cards

You will love the gorgeous flowers and microcosmos in the beauty of the gardens in the Ciao Bella MicroCosmos collection.  Nancy, here, and excited to share three thank you cards made with this incredible and beautiful paper collection with gorgeous colors and details in the flowers, blades of grass and living creatures in our gardens. 
You

I handmade the foamiran flowers to this card.  

I fussy cut the butterfly from the Ciao Bella MicroCosmos and added NUVO Crystal Glaze that dried overnight before adhering it to the card.  I cut out Thanks from the Graphic 45 Folder and Sentiment die set using gold metallic cardstock.  

 I added doilies and die cut frames behind each frame and added a thank you sentiment to each card.  My favorite frame is the Graphic 45 Staples Policy and Decorative die that was die cut in white cardstock and I cut out a gold metallic rectangle to add to this frame.  I added a Wild Orchid Craft daisy flower to the center of the handmade bow.

The cards were adhered with the Beacon 3-in-1 Advanced Glue

 Have a fabulous crafting day and thanks for visiting.

 The Rubber Buggy has the crafting supplies for your next project. So have fun crafting this weekend with these products.   My cards and projects are always posted on Saturday.  Keep watching and thank you so much for those wonderful comments as well as suggestions. 

Enjoy and Happy Crafting!


Thursday, March 4, 2021

Lawn Fawn Out of This Worl


Your cards will be out of this world by creating a scene with the entire solar system and these cute little aliens!  Nancy, here, and I am excited to share my fun to make birthday card with you.  This Lawn Fawn Out Of This World and Lawn Fawn Beam Me Up stamp and die sets are wonderful for special occasions like birthdays and graduations, and for science and space lovers!  

I sponged the background with Distress Oxide inks:  Black Soot, Chipped Sapphire, Picked Raspberry, Fossilized Amber and Lawn Fawn White Ink.  I mixed a little water with white Perfect Pearl powder but white acrylic paint will do as well and used a toothbrush with my fingers to spray on the card for the galaxy for the front and inside of the card.  Before adhering the Lawn Fawn images and clouds to the card, I used a can of Gloss Spray found in a hardware on the card to have a touch of shimmer on the sky for the front and inside of the card.  I let dry for an hour due to my sensitivity to the smell of the spray before gluing the images.


I stamped the images with the Memento Tuxedo Black ink and colored with Copic Markers.  I cut out two Lawn Fawn Puffy Cloud Border clouds for the front of the card with white cardstock and vellum.  I cut out the Lawn Fawn Pop Up Birthday die and sponged on the same Distress inks.  I adhered the card with the Beacon 3-in-1 Advanced glue.  Also, I added a touch of white Lawn Fawn Ink with a cotton swab to the stamped stars.

I am entering this card in Lawn Fawn Challenge 96:  Happy Birthday

Thanks for your visit today!  So have fun crafting this weekend with these products.   My cards and projects are always posted on Saturday.  Keep watching and thank you so much for those wonderful comments as well as suggestions. 

Enjoy and Happy Crafting!


Lawn Fawn Out of This World


Your cards will be out of this world by creating a scene with the entire solar system and these cute little aliens!  Nancy, here, and I am excited to share my fun to make birthday card with you.  This Lawn Fawn Out Of This World and Lawn Fawn Beam Me Up stamp and die sets are wonderful for special occasions like birthdays and graduations, and for science and space lovers!  

I sponged the background with Distress Oxide inks:  Black Soot, Chipped Sapphire, Picked Raspberry, Fossilized Amber and Lawn Fawn White Ink.  I mixed a little water with white Perfect Pearl powder but white acrylic paint will do as well and used a toothbrush with my fingers to spray on the card for the galaxy for the front and inside of the card.  Before adhering the Lawn Fawn images and clouds to the card, I used a can of Gloss Spray found in a hardware on the card to have a touch of shimmer on the sky for the front and inside of the card.  I let dry for an hour due to my sensitivity to the smell of the spray before gluing the images.


I stamped the images with the Memento Tuxedo Black ink and colored with Copic Markers.  I cut out two Lawn Fawn Puffy Cloud Border clouds for the front of the card with white cardstock and vellum.  I cut out the Lawn Fawn Pop Up Birthday die and sponged on the same Distress inks.  I adhered the card with the Beacon 3-in-1 Advanced glue.  Also, I added a touch of white Lawn Fawn Ink with a cotton swab to the stamped stars.

Thanks for your visit today!  So have fun crafting this weekend with these products.   My cards and projects are always posted on Saturday.  Keep watching and thank you so much for those wonderful comments as well as suggestions. 

Enjoy and Happy Crafting!