Translate

Saturday, December 23, 2017

Little Bear with Poinsettias

Welcome and a day before Christmas eve.  The Rubber Buggy, Design Team and I want to wish you a Merry Christmas. 

I created a Christmas card with this adorable bear from the Wild Rose Studio Teddy With Flowers.  I just love this little bear and will use this stamp for several occasions and holidays besides Christmas.  I colored the bear with a variety of brown colored chalk and used a red Copic marker for the shirt. 
Wild Rose Studio Craft Teddy With Flowers

 I added poinsettias using the Heartfelt Creations Celebrate The Season Ornate Sleigh and Present die set.  I cut out 6 poinsettias using red cardstock and glued two for each flower.  I added five holly leaves that are also in this die set.   I added with glue the US Artquest Mini Prills - You Had Me at Yellow to the center of each poinsettia flower.  Behind the bear is the Heartfelt Creation Decorative Oval die cut out with white shimmer cardstock. 

Heartfelt Creations Celebrate The Season Ornate Sleigh and Present Die Set
I cut out the Poppy Stamp Merry Christmas banner with gold glitter cardstock and used spray adhesive to adhere to card.  I used Scor-Pal 1/2" self adhesive tape behind the bow to adhere to the card.  I love the Scor-Pal tape since I can remove the ribbon a few times for better arrangement and the tape remains sticky.  The Scor-Pal tape comes in a variety of sizes and I use all of the sizes for adhering the ribbons and bows and always for projects like my easel cards with the drawer.

I can't wait to see the possibilities that you will create making using the beautiful Wild Rose Studio Teddy Bear stamp on your cards or projects.  You can purchase these dies and supplies from The Rubber Buggy on-line store.
Enjoy and Happy Crafting!

Nancy Hill
The Rubber Buggy Design Team


Saturday, December 16, 2017

Christmas Sled Card


Creating an explosion card with the Heartfelt Creations sled, is only limited to your imagination. All you need to do is to learn the basics for this design and then fill up the spaces with your own inspirations and creativity!  If you’ve never made 3D cards before, this is an excellent place to start. It looks time-consuming but after the first 3D card like this one, the next one is easier and faster to put together.  You can use a ruler and scissor to cut your strips inside the sled and score the crease lines, or you can use a score board, whichever you prefer. Either way, the results will be a fantastic card for little effort!  I’ve made a few pop up box cards using just a 12" x 12" cardstock but this sled with the pop up tree and presents is surprisingly simple to make and yet still rewardingly impressive to give to a loved one.  

This sled is able to fold down just like any explosion card.  Basically, I used the same technique for this card and created a tutorial on the measurements using this Heartfelt Creations Celebrate The Season Ornate Sled.

Instructions: 

This tutorial is for making the first sled with the presents.  Basically, follow these instructions for making the second sled using the Heartfelt Creations Pampered Pooch collection of dies and stamps.  

Heartfelt Creations Celebrate The Season Ornate Sled 

Using the Heartfelt Creations Celebrate The Season Ornate Sled stamp and die set, emboss two sleds with NUVO Silver Moonlight Glitter embossing powder and die cut.  I like using 110 lb weight cardstock for sturdiness for cards like this one.  If you don't have this heavier weight of cardstock, cut out two extra sleds to glue behind the embossed sleds.

Cut out 10 poinsettia flowers and 4 holly leaves using the Heartfelt Creations Celebrate The Season Ornate Sled die set.  I colored theses poinsettias and holly leaves with Copic Markers and used my fingers to pinch the center of each petal for the poinsettias and holly leaves.  Glue two poinsettias together and apply glue to the center of each poinsettia and add US Artquest Mini Prills - You Had Me At Yellow.  Glue the poinsettias with holly leaves on the sled.

Cut out the label "Enjoy"found in the Heartfelt Creations Celebrate The Season paper.


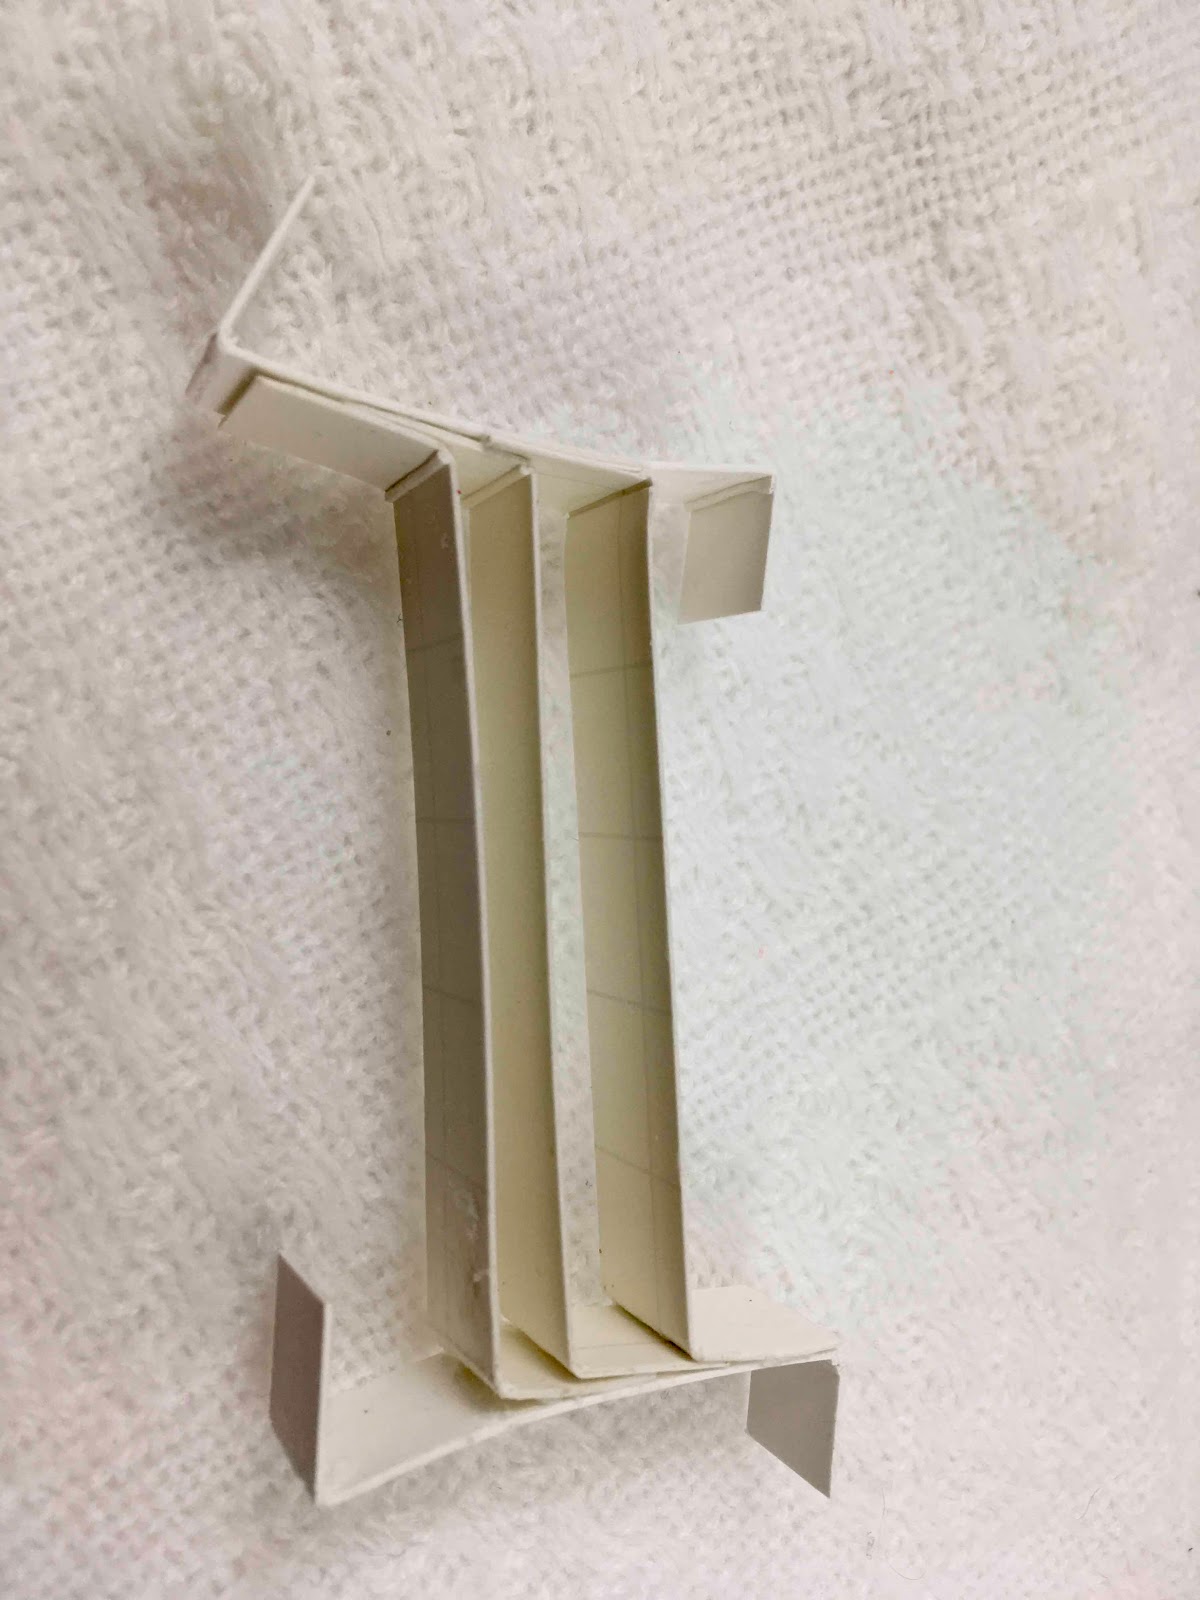
Tutorial For Support for Inside:  


Step 1:  Cut two white card stock strips 1/2" wide and 2 1/2" long. Cut three white card stock strips 1/2" and 3 1/2".  (NOTE:  Most explosion cards have two rows rather than three.  If you don't plan on adding less toppers, I would suggest only cutting out two white card stock strips than three).   Score 1/2" on each side end of the four strips of paper. 


Fold left on one end and fold right on the other end of each strip.  Glue or use 1/2" wide Scor Tape to each end of the strips.  

I like folding the strips down first (photo below) and then apply adhesive such as glue or Scor Tape before sticking the last strip.

Step 2 Gluing Support to Sled:  Adhere the inside support of the card to the sled using glue or two-side adhesive tape.  

When the inside support is glued, the card will be able to fold down even after the toppers.

Step 3 Toppers:   Stamps the presents using the Heartfelt Creations Celebrate The Season - Gift Wrapped Presents stamp set with Memento Tuxedo Black Ink and die cut using the die set.  Color the presents with Copic Markers.    
Heartfelt Creations Celebrate The Season Gift Wrapped Presents Stamp Set
Heartfelt Creations Snow Kissed Spruce stamp

Using dark green cardstock, stamp the medium sized pine tree using the Heartfelt Creations Snow Kissed Spruce stamp with Memento Tuxedo black ink and die cut using the Heartfelt Creations Snow Kissed Frolicky Frosty and Spruce die set.  To attach the presents and tree to support frame on the inside of the sled, cut out 9 strips of white cardstock measuring 1/2" wide and 3" long.  Depending on the size of each present, adhere the end of each strip behind the present and tree.  Before permanently adhering each present and tree to the inside, I use double-side tape that isn't too sticky kept arranging the presents and tree to the support until I got the arrangement I wanted as well as making sure the card is still able to fold.  When I was satisfied with the arrangement, I used permanent adhesive to the ends of the strip and glued each one to the support frame on the inside of the sled.  I cut off any strip that extended below the support frame.

I hope you'll give this card a go. It might be a little bit of a challenge but it's definitely worth the effort.


Nancy Hill, Design Team for The Rubber Buggy


Saturday, December 9, 2017

Merry Christmas To You


 Welcome back and Nancy Hill, design team member for The Rubber Buggy.  Take a look at this gorgeous Tattered Lace Merry Christmas Vintage die at The Rubber Buggy and also on sale while supplies last. I highly recommend that you use my tutorial, click HERE,  on cutting this die out with cardstock behind the die and fabric softener sheet behind the cardstock to take the pieces out of this die cut or keep these pieces that will stick on the fabric softener sheet to insert in another Tattered Lace Merry Christmas Vintage cut out with a different color.  Previously, I had cut out this die using fabric softener sheet behind white cardstock and then cut it again with red glitter cardstock.  I peeled off the pieces and glued it with the red glitter cardstock die cut. 
I glued the Merry Christmas with spray adhesive glue and stuck the die cut on embossed shimmer cardstock using the Crafter Companion Lace 3D embossing folder.  The beautiful patterned paper is from the Heartfelt Creations All Glammed Up paper

I used the Scor-Tape 1" wide, to adhere the patterned paper on the Bazzill Peppermint cardstock.  On smaller cards, I will adhere layers with glue but for larger cards like this one above, I use Scor-Tape to keep it from warping.  I love the Scor-Tape for adhering bows and ribbons to my card.  If I am making a paper crafted project, I prefer using Scor-Tape over glue.

Bazzill cardstock is quality paper and the colors are just beautiful.  Heartfelt Creations has beautiful patterned paper and I love using it since the stamps and dies coordinate with this top-quality paper. 

I can't wait to see the possibilities that you will create making your card with the gorgeous Tattered Lace Merry Christmas Vintage die.  You can purchase these dies and supplies from The Rubber Buggy on-line store.

Entering challenge:

Winter Land Challenge:  Anything Christmas Goes

Enjoy and Happy Crafting!

Nancy Hill
The Rubber Buggy Design Team


Saturday, December 2, 2017

Hailey's Happy Birthday Easel Drawer Card


Welcome back to The Rubber Buggy blog for Nancy Hill, Design Team member.  I love personalizing my easel cards with the drawer for each person.  Sometime the drawer is filled with chocolates, dies, gift cards or money and on top of the drawer could be a Post-It or calendar.  The sentiment is inside the drawer.  I have samples of other cards similar to this one in my tutorial.  To see my tutorial on how to make an easel card with a drawer, click HERE.

The easel card with the drawer measures 7" x 7".   I used a heavy weight 110 lb cream cardstock and adhered the drawer and easel card with Scor-Tape. This card was made mostly of the Heartfelt Creation collection All Glammed Up stamps and die sets besides other Heartfelt Creation dies and stamp sets from The Rubber Buggy.  

On top of the drawer is a Post-It.  I made a cover for it with the Heartfelt Creations All Glammed Up paper.  I cut out a sentiment found in this  paper collection and adhered it to a banner that was glued on top of the cover.

The background behind the photo is the Heartfelt Creation Fashionista stamp that was embossed with NUVO Gold Enchantment Glitter embossing powder.  I cut out the shoe from the Heartfelt Creations Lift Your Sole die and stamp set  and used 3D foam dots to stick on top of identical shoe in the Heartfelt Creations Fashionista stamp set.  I used Copic markers on the flowers of this shoe.  


Using the Heartfelt Creations Classic Rose die and stamp set, I stamped and embossed the flower with the NUVO gold embossing powder and cut the petals out.  I used a flower shaping tool for the flower before gluing it together.  I cut out the Heartfelt Creations Classic Rose leaf with gold metallic cardstock and glued it on back of the rose.  I took a branch die cut and added glue to the tip of the branches and dipped it in a small packet of star foam balls.  I glued this behind the leaf.  I made the bow from seam binding ribbon and glued it on the back.  I cut out the label "Treasured" from the Heartfelt Creations All Glammed up paper collection and glued it next to the ribbon.  

I stamp the inside drawer with the Heartfelt Creations Botanic Orchid Wish Stamp and colored it with colored pencils.  I added a decorative brad in front of the drawer.  

This is when the easel card is folded down on the drawer.  The photo of my grand daughter was adhered to an oval that was cut out with gold metallic cardstock. I used the Heartfelt Creations Eyelet Oval die and cut it out with gold metallic cardstock and trimmed the scallops off of the die cut.  I cut out another Heartfelt Creations Eyelet Oval die cut that is shown behind the photo  with the Heartfelt Creations All Glammed Up paper and glued the photo with the gold oval on top.  

Supplies:
Heartfelt Creations All Glammed Up paper collection
Heartfelt Creations All Glammed Up Shoe die
Heartfelt Creations Lift Your Sole stamp set
Heartfelt Creations Fashionista stamp
Heartfelt Creations Eyelet Oval die set
Heartfelt Creations Classic Rose die
Heartfelt Creations Classic Rose stamp
1" wide Scor-Tape
Scrapbook Adhesive 3D Foam Tape
NUVO Gold Enchantment Glitter Embossing Powder

I can't wait to see the possibilities that you will create making an easel card with a drawer. wreath.  You can purchase these dies and supplies from The Rubber Buggy on-line store.
Enjoy and Happy Crafting!

Nancy Hill
The Rubber Buggy Design Team