Translate

Saturday, July 27, 2019

Lawn Fawn Christmas Card

Welcome back crafters.  Nancy Hill, here, and I am excited to share with you Christmas cards with new techniques and step-by-step tutorial with the Lawn Fawn Winter Skies stamp and die set along with the Lawn Fawn Starry Skies die set.  The Rubber Buggy has all of the name-brand products to make your next project.  Have fun with my tutorial that I have created for you and if you have questions, please message me!


Below is another example of a birthday card using the same techniques described above.
Additional supplies:

Prima Marketing Melange-Sugar Art Pebbles


I am entering this card in the challenge:

I hope I have inspired you try out these products available at The Rubber Buggy on-line store.  My cards and projects are always posted on Saturday.  Keep watching and thank you so much for those wonderful comments as well as suggestions. 
Enjoy and Happy Crafting!


Saturday, July 20, 2019

Lawn Fawn Make A Wish

Welcome back crafters.  I am excited to share with you another card made with some very fun Lawn Fawn dies and stamps set.  I made this birthday card for my nephew who loves to camp in the forest. 

This Lawn Fawn Winter Skies stamp and die set  along with the Lawn Fawn Starry Skies die set makes for an adorable Christmas or birthday card.  The Rubber Buggy has all of the name-brand products to make your next project.  


The card measures 5 3/4" x 6 3/4".  The center of the card was cut out a 4" x 5" white cardstock.  I sponged on Tim Holtz Distress Oxide Inks:  Chipped Sapphire, Tumbled Glass, and Black Soot with the Lemon Craft Sunflower ink to create the background before adhering the mountains, etc.  I brushed on the clear glitter with the NUVO Glitter Gloss pen to create shimmering sky around the falling star.  Then I used the Lawn Fawn Starry Skies die around the top along with the falling star in this set towards the center.   I adhered the picture to the Lawn Fawn Scallop Rectangle Frame that was cut out with white glitter paper which really brings out the stars with the white glitter.    I cut out another 5" x 6" frame with blue glitter paper  and used a punch for the four edges.  Cut out another 5 3/4" x 6 3/4" for the outside frame.

 I used the Beacon 3 in 1 Advanced glue to adhere the Lawn Fawn Stitched Mountains Border die set with purple cardstock with the Lawn Fawn Stitched Hillside border.  


I used Copic Markers to color the bears and trees in the Lawn Fawn Winter Skies  and this time fussy cut it out but the Lawn Fawn Winter Skies die set will be used in other cards. 

I hope I have inspired you try out these products available at The Rubber Buggy on-line store.  My cards and projects are always posted on Saturday.  Keep watching and thank you so much for those wonderful comments as well as suggestions. 
Enjoy and Happy Crafting!


Saturday, July 6, 2019

Prima Marketing Havana Collection Gift Box


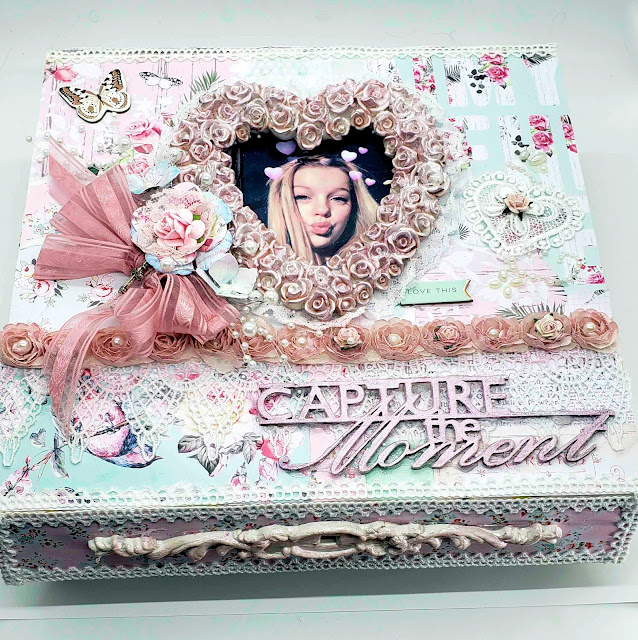
Welcome back and Nancy, here, to share another altered gift box made with the gorgeous Prima Marketing Havana paper, Havana chipboard and Prima Marketing Havana Rose Words and Stickers.  Below, I also embellished the inside of the box with the same Havana collection to make fun statements to personalize my grand daughter's gift box.  I used the gorgeous Prima Marketing Memory Hardware Fleur Coeur frame and painted it with  Prima Marketing - Art Alchemy-Acrylic Paint - Metallique Vintage Rose.  Also, I applied the Vintage Rose paint to the Prima Marketing Vintage Art Decor Louise Mould made with the Stamperia Soft Paper clay and same paint to the chipboard. 

  I tried using the Prima Marketing paper clay but it was so hard for this mould and came out in pieces.  Make sure to always coat your mould using baby powder or corn starch with a brush or sprinkle it on and tap away the excess before putting the clay into the mould for these detail moulds.  Otherwise, the decor comes out in pieces.  If it comes out in two pieces but still in great detail, I use Beacon 3 in 1 Advance glue or a hot glue gun to stick the pieces together before gluing on the project.  
I used a pink ink to color the rosette chiffon lace trim and use a hot glue gun to insert the 5mm flat back pearls and 10mm Wild Orchid pink roses in the center of each rose. I wet the rosette lace and then applied the pink ink.  I used the embossing gun to dry before taping the lace with Scor Tape across the box.     I used 1" Scor Tape to across the box and then taped the gorgeous Venice white lace which is very similar to Venice ivory lace in the store.

I used the photos of my granddaughter for the inside of the box with the Prima Marketing Havana paper, stickers and chipboard.  Fun Fun Fun!

I made my shabby chic flower with the Prima Marketing Havana paper.  I cut out two sizes of the flower petals.  I used 1/2" x 1/2" double sided Scor-Tape to the center of the flower and then stuck pink lace in the center and glue the other patterned paper flower for the next layer of the flower. Then  I used a hot glue gun to adhere the 10mm pink Wild Orchid Craft flower in the center.  The two other flowers on this box were made with foamiran and colored with NUVO Mousse Aquamarine and NUVO Mousse Peony Pink.  I used my fingers to sponge the colors on the flowers for a very soft pastel.  These two colors coordinate well with the paper.
Sample of shabby chic flowers made with the same patterned paper of Prima Marketing Havana.  Some flowers have the rose in the center of the flower with lace and other ones have the stamen.  


I hope I have inspired you try out these products available at The Rubber Buggy on-line store.  My cards and projects are always posted on Saturday.  Keep watching and thank you so much for those wonderful comments as well as suggestions. 
Enjoy and Happy Crafting!