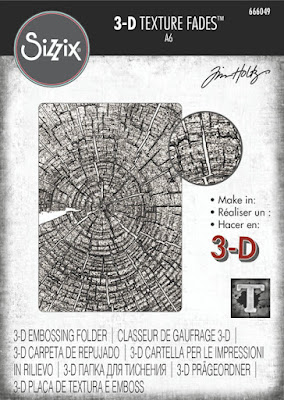
Welcome back and Nancy, here. If you love nature like our family and friends, then you'll love the Sizzix Tree Rings 3D Texture Fades Embossing Folder by Tim Holtz with this bold tree-inspired embossing folder. This embossing folder has incredible depth of detail, making it perfect for creating rustic looking cards throughout the year. I cannot wait for you all to get your hands on these new Sizzix Tim Holtz 3D embossing folders like this one and The Rubber Buggy has all of these arrivals from Sizzix/Tim Holtz for creating your stunning card and projects.
The embossed area was trimmed to 4" x 6" before adding the background layers.
I am loving the Sizzix Tim Holtz Lucky Love Impresslit die that embosses and cuts at the same time a heart and a 4-leaf clover. I stamped a piece of Tim Holtz Kraft Gold Metallic cardstock in my stamp tool and applied embossing powder to keep the ink from smearing on the metallic paper and then centered it in the heart in the Sizzix Lucky Love Impresslit die through the Sizzix Big Shot. I sponged on Ranger Ground Espresso and Gathered Twigs before embossing with the Tree Ring embossing folder. Just a reminder, I sponged the black ink inside the embossing folder, lightly sprayed the cardstock with a mist of water and ran the embossing folder 3 times in the Big Shot. I love this technique since it brings out the wood grain so well. I used a hot glue gun to adhere the Tim Holtz key to the card. I found an ole sticker to add to the card.
I just love the shimmer of this rustic red card. For the center of the card using silver metallic cardstock, I used an ole Sizzix Tim Holtz embossing folder and sponged the inside of the embossing folder with black ink, layed a piece of Tim Holtz Kraft Silver Metallic cardstock and ran it through the Sizzix Big Shot about 3 times. I used an heart die and cut the center of the tree ring and glued the embossed silver piece behind the embossed tree ring. I found a Tim Holtz sentiment chipboard and used Beacon 3-n-1 glue to adhere it and used a hot glue gun to adhere the metal gears to the card. Found an ole metal button and added it to the center of the gear.These are my samples I experimented with different colors of Ranger inks and cardstock paper as well as tried out using the back embossed piece of cardstock which was an interesting look. I prefer using heavy weight cardstock. My favorite was the copper brown shimmer cardstock as well as the cream cardstock that was sponged with Distress warm inks before embossing. The patterned cardstock that was embossed definitely was an interesting look. When embossing, you only need 1 Cutting Pad since these folders are so thick. Mist your cutout cardstock, especially if it is a heavy weight cardstock, with water on both sides prior to placing the material inside of your embossing folder and running it through your machine three times to achieve full embossing.
Supplies:
Tim Holtz Chipboard Set
That’s it for me today! I’m still trying to get back on track after the New Year! Now it is crafting our Valentine's cards and other occasions to keep up busy.
The Rubber Buggy has the crafting supplies for your next project. So have fun crafting this weekend with these products. My cards and projects are always posted on Saturday. Keep watching and thank you so much for those wonderful comments as well as suggestions.


1 comment:
This is a good embossing folder for making masculine cards. I like the way you tried different colors.
Post a Comment