Translate

Showing posts with label Tutti Designs. Show all posts

Monday, December 5, 2016

Get Well Soon Card


 Welcome Back!  Hi, I am Nancy Hill and every Tuesday, I am sharing an inspirational card made with a Tutti Designs die.  Today, I made this card using a new November released Tutti Designs die called the Flower Orchestra Corner.  Isn't this another gorgeous Tutti Designs die that you would love to have for your next cards or projects.


I cut this die out with white card stock and colored the leaves and flowers with Copic markers.  I saved the flower pieces after cutting this die out and used tape to glue the pieces behind the three large flowers in this die.  I colored the pieces with Copic markers and added some streaks to make it look more of a flower.  I added  NUVO Crystal Drops to the center of each flower to add some dimension.  


 Most of the time, the die cuts are easy to get out of the Tutti Designs dies.  I just tap the die on top of a trash can or use a tool such as the Spellbinder Tool N One to get most of the pieces out of the die or die cut.   If you are having some problems, just put wax paper between the paper and die before cutting it out.  

Afterwards, I use a spray adhesive like Aleene's Spray Adhesive for intricate die cuts rather than using a fast tacky glue.  Therefore, all of the parts of the die cut will stick to the card.

Normally, I add a bow or ribbon to most of my cards along with a sentiment.  I found a gorgeous antique gold seam binding ribbon and made this bow using a bow maker.  I made a rose with a rose/coral colored card stock to match the flowers on the pattern paper and die cut and glued it in the center of the bow. 

To explore more ways of using this die as well as other Tutti Designs dies, visit our Tutti Designs designers on the Tutti Designs Pinterest or Tutti Designs Facebook .

You'll want to be sure to pop over to the Tutti Designs Store and check out all the beautiful diesYou can order these gorgeous dies from Tutti Designs on-line store or the wonderful stores and companies that carries Tutti Designs dies. 


Click HERE to see the new Tutti Designs releases

Reminder to visit the Tutti Designs Blog to see what our other designers have created for you and I would appreciate a comment and if you have any questions, don't hesitate to ask.


Thank you again!

Nancy Hill, Design Team 


Monday, October 31, 2016

Heart Tree


This is the new September Tutti Designs released die called Heart Tree.  Isn't this just a beautiful die.  
This die is easy to cut out and could be used for several occasions.  I cut this die using red metallic card stock and sprayed the back some adhesive spray like the Elmer's Adhesive spray to stick to the embossed white/gold shimmer card stock.  If you use tweezers to hold the die cut while spraying it with the spray adhesive, the adhesive doesn't get on the fingers which isn't easy to get off. 

I added 4mm flat back pearls to the flowers in the die cut and 5mm flat back pearls around the gold frame.   I added white ribbon with a rhinestone heart slider buckle and glued it with adhesive tape.  I thought of adding the Love that was cut out with gold and white card stock to go with this gorgeous Tutti Designs Heart Tree die cut.  Lately, I have been gluing two sentiments together to give it some definition. 

To explore more ways of using this die as well as other Tutti Designs dies, visit our Tutti Designs designers on  the Tutti Designs Pinterest or Tutti Designs Facebook .

You'll want to be sure to pop over to the Tutti Designs Store and check out all the beautiful dies. You can order these gorgeous dies from Tutti Designs on-line store or the wonderful stores and companies that carries Tutti Designs dies. 


Click HERE to see the new Tutti Designs releases

Reminder to visit the Tutti Designs Blog to see what our other designers have created for you and I would appreciate a comment and if you have any questions, don't hesitate to ask.

Thank you again!

Nancy Hill, Design Team 


Monday, October 17, 2016

Lily of The Valley Frame


This is one of the new releases of the September Tutti Designs dies called 
Lily of the Valley Frame.  What a gorgeous die and easy to cut out.  This die could be used for many occasions.  

I cut this die out with white shimmer card stock and colored the leaves and stems with a soft green marker.  I cut out the center with an oval die and stamped the sentiment.  Before gluing the die cut on this card, I used a large 6mm ball stylus and paper molding pad and pressed down and rolled the stylus around in the center of each lily and leaf until it cups up. 

I cut out additional leaves from the die and colored these leaves with the same soft green marker and used 3D foam under each leaf and stuck them on top of the leaves to give it dimension.  

I added two square frames on top of the printed card stock.  I made my angel from a mold and made this bow using a bow maker.  Now this card is ready to send to a special person.

Also, Tutti Designs has another gorgeous lily die called  Lily of the Valley Bunch die that would be used on this card.

To explore more ways of using this die as well as other Tutti Designs dies, visit our Tutti Designs designers on  the Tutti Designs Pinterest or Tutti Designs Facebook .

You'll want to be sure to pop over to the Tutti Designs Store and check out all the beautiful dies. You can order these gorgeous dies from Tutti Designs on-line store or the wonderful stores and companies that carries Tutti Designs dies. 


Click HERE to see the new September Tutti Designs releases

Reminder to visit the Tutti Designs Blog to see what our other designers have created for you and I would appreciate a comment and if you have any questions, don't hesitate to ask.

Thank you again!

Nancy Hill, Design Team 


Monday, September 19, 2016

Thanks with the Frilly Flower Frame from Tutti Designs


Happy Tuesday and I am so excited to share with you this new released Tutti Designs die called Frilly Flower Frame.  Think of the possibilities of how you would use this gorgeous die on your cards or projects.  

I used lavender card stock to cut this die out and glued it on the oval which was cut with an oval die before gluing the flower die cut on this vintage pattern paper.   I love adding ribbon and bows to my cards with a ribbon buckle slider or flat back pearl brad in the center of the bow.

I would encourage you to check out the Tutti Designs Pinterest or Tutti Designs Facebook to get other ideas of how our other talented designers used this gorgeous die along with seeing other Tutti Designs dies on cards or projects.  

You'll want to be sure to pop over to the *NEW* Tutti Designs Store and check out all the beautiful dies 

Click HERE to see the new Tutti Designs releases
Reminder to visit the Tutti Designs Blog to see what our other designers have created for you and I would appreciate a comment and if you have any questions, don't hesitate to ask.


Thank you again!

Nancy Hill, Design Team 


Monday, July 25, 2016

Autumn Card

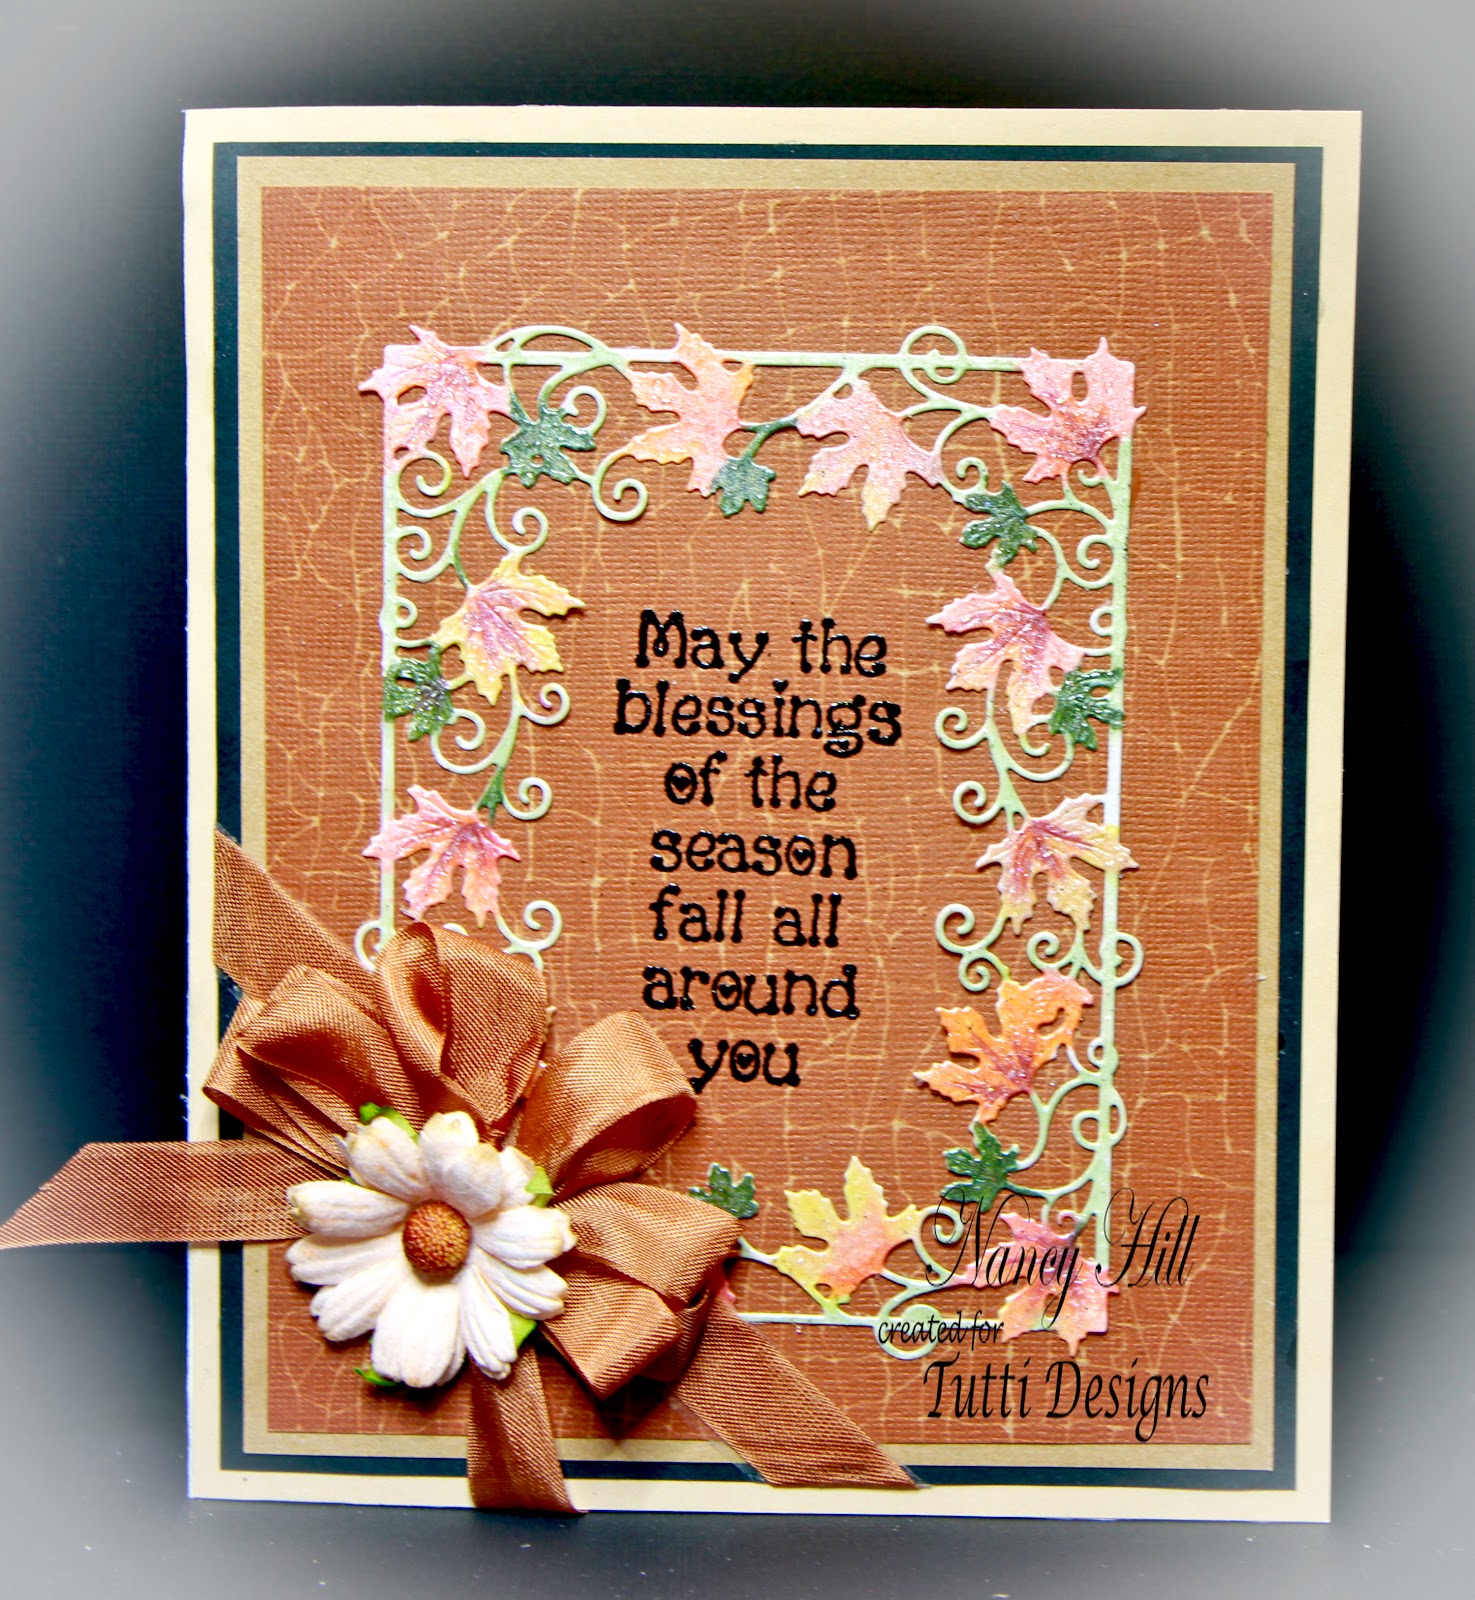
Welcome back Tutti bloggers.  I am excited to share with you this gorgeous Maple Vine Frame from Tutti Designs.  It was easy to cut out and I used Copic markers to color the leaves and vines.  Afterwards, I used a clear embossing powder over the leaves and vines to give it a little shimmer.  

I added an Antique Gold seam binding ribbon bow and Wild Orchid Craft daisy in the center of the bow.  


You'll want to be sure to pop over to the *NEW* Tutti Designs Store and check out all the beautiful dies in their first release.  

Click HERE to see the new Tutti Designs releases
Reminder to visit the Tutti Designs Blog to see what our other designers have created for you and I would appreciate a comment and if you have any questions, don't hesitate to ask.


Thank you again!

Nancy Hill, Design Team 

Wednesday, July 20, 2016

Merry Christmas


 Welcome to our exciting Scrapy Land Challenge, "Emboss It" using a die.  
Scrapy Land on-line store is carrying the new and gorgeous Tutti Designs dies.  This is the beautiful Tutti Designs Dove Circle die.  Isn't this Tutti Designs Dove Circle a beautiful die! This die would also be beautiful on a wedding card, Easter or just any card.
Tutti Designs Dove Circle Die


 I used a gold mirror card stock for the Tutti Designs Dove Circle and  Sue Wilson Noble Square die frame around the card.  I love the Sue Wilson pierced die sets.

Sue Wilson Noble Square
I embossed the Merry Christmas sentiment with Ranger Gold Detail embossing powder on a separate circle before gluing the Tutti Designs Dove Circle on the circle and then addingTombow 3D foam tape on the back to stick it on the card.  I added the 1.5" wide May Arts Silky Crushed white ribbon and added an antique pearl brad in the middle of the bow.  The embossing folder is my favorite and it is the 

Sue Wilson Snow Lattice embossing folder.

Scrapy Land has over 40 brands of dies.  You can see them all here.  


Thank you for joining us at Scrapy Land and keep visiting the 
Scrapy Land Face Book and Scrapy Land Blog to continue to see the wonderful projects and cards that the designers have for you.  Come join the fun and post your card.  


Can't wait to see what you have created for our current challenge at Scrapy Land -Emboss It.  Also, a big Thank You for all of you who have visited the designers blogs and left comments.  We really appreciate all of you!!!

Nancy Hill
Scrapy Land Design Team

Monday, July 18, 2016

Get Well Soon

Today is Tuesday and my day to share with you my card that I made with the gorgeous Tutti Designs dies.  


I will explain in step-by-step how I made this card using the gorgeous Butterfly Arch  and Dove Circle from Tutti Designs.


1.  Cut a rectangle 5" x 6 1/4"  using a pink card stock for the back.  
2.  Cut a rectangle of pattern paper like the Maja Design cardstock of 4 3/4" x 11"
3.  Score the pattern card stock on each side 2 3/4" and fold.
4.  Glue the back of the pattern card in the center of the pink card stock.
5.  Cut out two Butterfly Arch die cuts.
6.  Glue the tips of the Butterfly Arch on the front card, do not glue the entire Butterfly Arch on each side of the card since you will want some 3D appearance.  
7.  Cut out two small magnetic strips on the tips of the butterfly arch (Optional) if you don't want to slide the other end of the card into one tip of the Butterfly Arch on the card to keep the card closed.
8.  Make a bow and glue it on the left side of the card on the tip of the Butterfly Arch.  
9.  Stamp in the center on the inside of the card.
10.  Cut out one Dove Circle and glue it around your stamp.
11.  I took a strip of Maja Design card stock and glued it on the top and bottom of the inside.  
12.  Optional:  Add a sentiment to the front of the card.


You'll want to be sure to pop over to the *NEW* Tutti Designs Store and check out all the beautiful dies in their first release.  

Click HERE to see the new Tutti Designs releases
Reminder to visit the Tutti Designs Blog to see what our other designers have created for you and I would appreciate a comment and if you have any questions, don't hesitate to ask.


Thank you again!

Nancy Hill, Design Team 

Tuesday, June 28, 2016

Tutti Designs Butterfly Arch

 Welcome back bloggers.  I will always be posting on Tuesdays and look forward reading your comments.  Be sure to check each day to see what our talented Tutti Designers have created for you on the Tutti Designs Blog and see more cards and projects visiting the Tutti Designs Facebook and Tutti Designs Pinterest.


Aren't you loving your new Tutti Designs dies!  Aren't they gorgeous.   I have the stunning Tutti Designs Butterfly Arch die.  I just love the beautiful butterflies in this die.  You can cut these butterflies out and use it on your card with the Butterfly Arch die cut or glue it on top of the butterflies to give a 3D look.


Tutti Designs Butterfly Arch


I cut out two Butterfly Arch die cuts with Crafter's Companion gold/white glimmer card stock and sprayed it with Cosmic Shimmer Vintage Mist Antique Rose. After the ink dried on the die cuts, I bent the tips and used 1/2" wide Scor-Tape to tape the wings on the card.  

Using the Scor-Tape, I am able to take the die cuts off the tape  a few times until I get the position of the wings the way I like it.  Also, I arrange the Wild Orchid Craft flowers on this tape and when I get that arrangment the way I like it, then I glue the flowers on the card.   I don't have to glue the wings since there is enough glue on the flowers to keep the wings in place and this Scor Tape remains sticking to the wings.  


I make a hat pin out of jewelry beads and stuck it in the flowers and used some tiny rhinestones for the top of the butterfly.

I stamped the sentiment with Versa Mark and then used detail gold embossing powder.

Other supplies:  3mm flat back pearls, Bazzille orchid card stock, Crafter's Companion gold/white glimmer card stock, Stampin Up sentiment, Pion Designs Scent of Lavender cardstock, Wild Orchid Craft Flowers and Cosmic Shimmer Vintage Mist-Antique Rose.

You'll want to be sure to pop over to the *NEW* Tutti Designs Store and check out all the beautiful dies in their first release.  

Click HERE to see the new Tutti Designs releases
Reminder to visit the Tutti Designs Blog to see what our other designers have created for you and I would appreciate a comment and if you have any questions, don't hesitate to ask.


Thank you again!

Nancy Hill, Design Team 

Monday, June 20, 2016

Merry Christmas

Lipstick Red Seam Binding Ribbon
This is my posting day for Really Reasonable Ribbon.  Hi, I am Nancy Hill and very excited to share with you my card as well as this gorgeous Lipstick Red seam binding ribbon from Really Reasonable Ribbon at $.30 a yard.  This color is deep red to match perfectly with the poinsettia and colors in the Graphic 45 paper.  Soon,  I will be ordering the roll of this gorgeous Lipstick Red seam binding ribbon for my Christmas cards and Valentine cards.  

I made this bow using the Zutter Bow It All bow maker which I have been recommending to everyone since I bought mine over a year ago from Really Reasonable Ribbon.  I had given the Zutter Bow It All  bow maker as Christmas gift to my friends and now they are recommending it to everyone as well.  I always attach my ribbons and bows to my cards or projects using the Scor Tape from Really Reasonable Ribbon.  This tape is a must for me and Really Reasonable Ribbon carries various sizes.  

I added a pearl antique brad for the center of this bow since I wanted the bow to bring out the poinsettia.  I added the new Tutti Designs Dove Circle die that was cut with gold mirror card stock.  The embossing folder is the Creative Expression-Sue Wilson-Snow Flake Lattice on white/gold shimmer card stock.  The Merry Christmas is a die cut from Cheery Lynn Designs.

Come join the fun with Really Reasonable Ribbon challenges and our Blog Hop every month on the 13th and you might become the next winner.  The Really Reasonable Ribbon design team really appreciates all of your comments as well as seeing your beautiful cards posted on these challenges.  Our design team members have new cards posted each day on the Really Reasonable Ribbon Facebook and Really Reasonable Ribbon Blog of inspiring ways of using these gorgeous ribbons along with the other stunning flowers and supplies to give your card that "WOW!" look.  

Nancy Hill

Tuesday, June 14, 2016

Poppy Thank You Card

Welcome bloggers to my Tutti Designs blog.  Hi, I am Nancy and I am so excited to share with you here each Tuesday, my cards and projects using another Tutti Designs die.

Today, I am using the gorgeous Tutti Designs Poppy.  Isn't it gorgeous. I cut out two poppy flowers using a pink card stock and two poppy flowers using a pink texture cardstock. 


 I colored the stamens inside the poppies with a black Copic marker.  I glued the pink poppy onto the green die cut and the pink texture outline of the poppy on top of the pink poppy to give it more of a 3D look.  I used Ranged Gold Liquid Pearl for the center of the poppy.   Since the die has one poppy, I cut out the poppy flowers with the same pink card stocks and another cut with the stem using green card stock and glued it on the green die cut.
    
Tutti Designs Poppy

Other supplies:

Pion Designs card stock and butterfly cut from this card stock
Rose Pink seam binding ribbon
Pearl and rhinestone button 

 Be sure to check each day to see what our talented Tutti Designers have created for you on the Tutti Designs Blog and see more cards and projects visiting the Tutti Designs Facebook and Tutti Designs Pinterest.

You'll want to be sure to pop over to the *NEW* Tutti Designs Store and check out all the beautiful dies in their first release.  

Click HERE to see the new Tutti Designs releases
Reminder to visit the Tutti Designs Blog to see what our other designers have created for you and I would appreciate a comment and if you have any questions, don't hesitate to ask.


Thank you again

Nancy Hill, Design Team