Translate

Saturday, August 27, 2022

Stamperia Romantic Garden of Promises Birthday Card


Welcome back and Nancy, here, to wish you a good morning to our Rubber Buggy crafters and bloggers.  Today, I want to share a Criss Cross Envelope with a birthday card for my daughter-in-law using the Stamperia Romantic Garden of Promises collection.  What a gorgeous collection and I certainly had a great time playing with it as well as making the criss cross envelope!  

I love making a gorgeous envelope that is as pretty as the card to give to a special person. I love to wrapped my cards in tissue paper to give people in person.


I just love the goreous chipboard die cuts in this collection to add embellishments to the card and envelope.

I scanned the 6 x 6 label in the Stamperia paper pad and then used my Photoshop to type in the sentiment and print out on my ink jet to personalize the card.  I cut the printed out label 5 3/4" square and glued to inside of card.  I cut out the sentiment on the right side and glued to the cut out section found in the paper pad.


Instructions:

The Criss Cross card is fairly easy to make.  I cut out two 6" x 12 " with  white cardstock and score at 6".  Glue one 6" to the other 6".  Cut the front at a 45 degree angle and decorate by cutting two 6" squares of patterned.  Take one square for the center of the card.  The one 6" will be cut at a 45 degree angle and glue each part to the front of the card.  If you google by typing "images of criss cross cards" you will see lots of these cards and a few tutorials to help you.  I thought this card was easier to make than my normal cards and plus you made a decorative envelope.  If you are giving this to a person by hand, just use tissue paper to cover it up plus a ribbon on top and what a gorgeous card to give to your special person.   I added an ole metal frame to the front of the envelope and cut out the label from the Stamperia collection and glued behind the metal frame.  I used a hot glue gun to adhere since regular glue doesn't work well with metal.


Supplies:

So get crafting and have a fabulous  day and thanks for visiting.

 The Rubber Buggy has the crafting supplies for your next project. So have fun crafting this weekend with these products.   My cards and projects are always posted on Saturday.  Keep watching and thank you so much for those wonderful comments as well as suggestions. 

Enjoy and Happy Crafting!


Saturday, August 20, 2022

Graphic 45 Charmed Tombstone

Welcome back and Nancy, here.  Halloween is just around the corner, and I have a tombstone shaped card with fabulous treats and I hope you will enjoy making it as much as I did! Graphic 45 Charmed is full of spooky haunted houses, light-hearted witches, black cats and jack o’lanterns with stunning color purple, orange, red, frightful black and ivy green. 

I loved playing this the Graphic 45 Charmed collection of coordinating die cuts and journal card with the paper to make this card.  I added the Tim Holtz Halloween Creepy eyes for the center of this flower.

Also, there is a pocket using the die cut in the collection of "No Tricks All Treats" on the inside of this card on the right for a gift card or treats.  I fussy cut the pumpkin and cat for the top of the pocket and black and white blocked trim for the sides of the pocket.

Instructions
Here is how to cut a basic coffin shape. Fold a piece of copy paper in half and measure as per below and cut.  When unfolded, you will have a basic coffin shape to begin. Trace this coffin on orange cardstock and cut out for the base of your card.

Next, take a 8" x 11" orange cardstock and score lengthwise 1/4" and use your bone tool for a good fold.

Take the coffin template and lay the one side on the fold and trace the coffin.  Cut this out and glue the two coffins together with the one coffin side glued to the fold.

I used another template to cut out the Graphic 45 Charmed cardstock and put each side in my trimmer, aligned, and cut out each side to get a smaller coffin shape to glue on the card base.  I did the same with the black cardstock to frame the Graphic 45 Charmed cardstock. 

To finished the card, I used ole embellishments and dies from my stash to finalize the card.

The Graphic 45 Charmed collection includes 8 double-sided papers, 12×12 collection pack (includes 16 sheets, 2 of each 8 designs & decorative sticker sheets),  8×8 paper pack12×12 Patterns & Solids pack, coordinating ChipboardJournaling CardsEphemera Assortment, and decorative Cardstock Stickers.  Each of The Graphic 4 Charmed cardstock is also available separately besides in the cardstock paper pads.


Additional Supplies:

Beacon 3-n-1 Advanced Glue


So get crafting and have a fabulous day and thanks for visiting.

The Rubber Buggy has the crafting supplies for your next project.  So have fun crafting this weekend with these products.  My cards and projects are always posted each Saturday on The Rubber Buggy.  Keep watching and thank you so much for those wonderful comments as well as suggestions

Enjoy and Happy Crafting!


Saturday, August 6, 2022

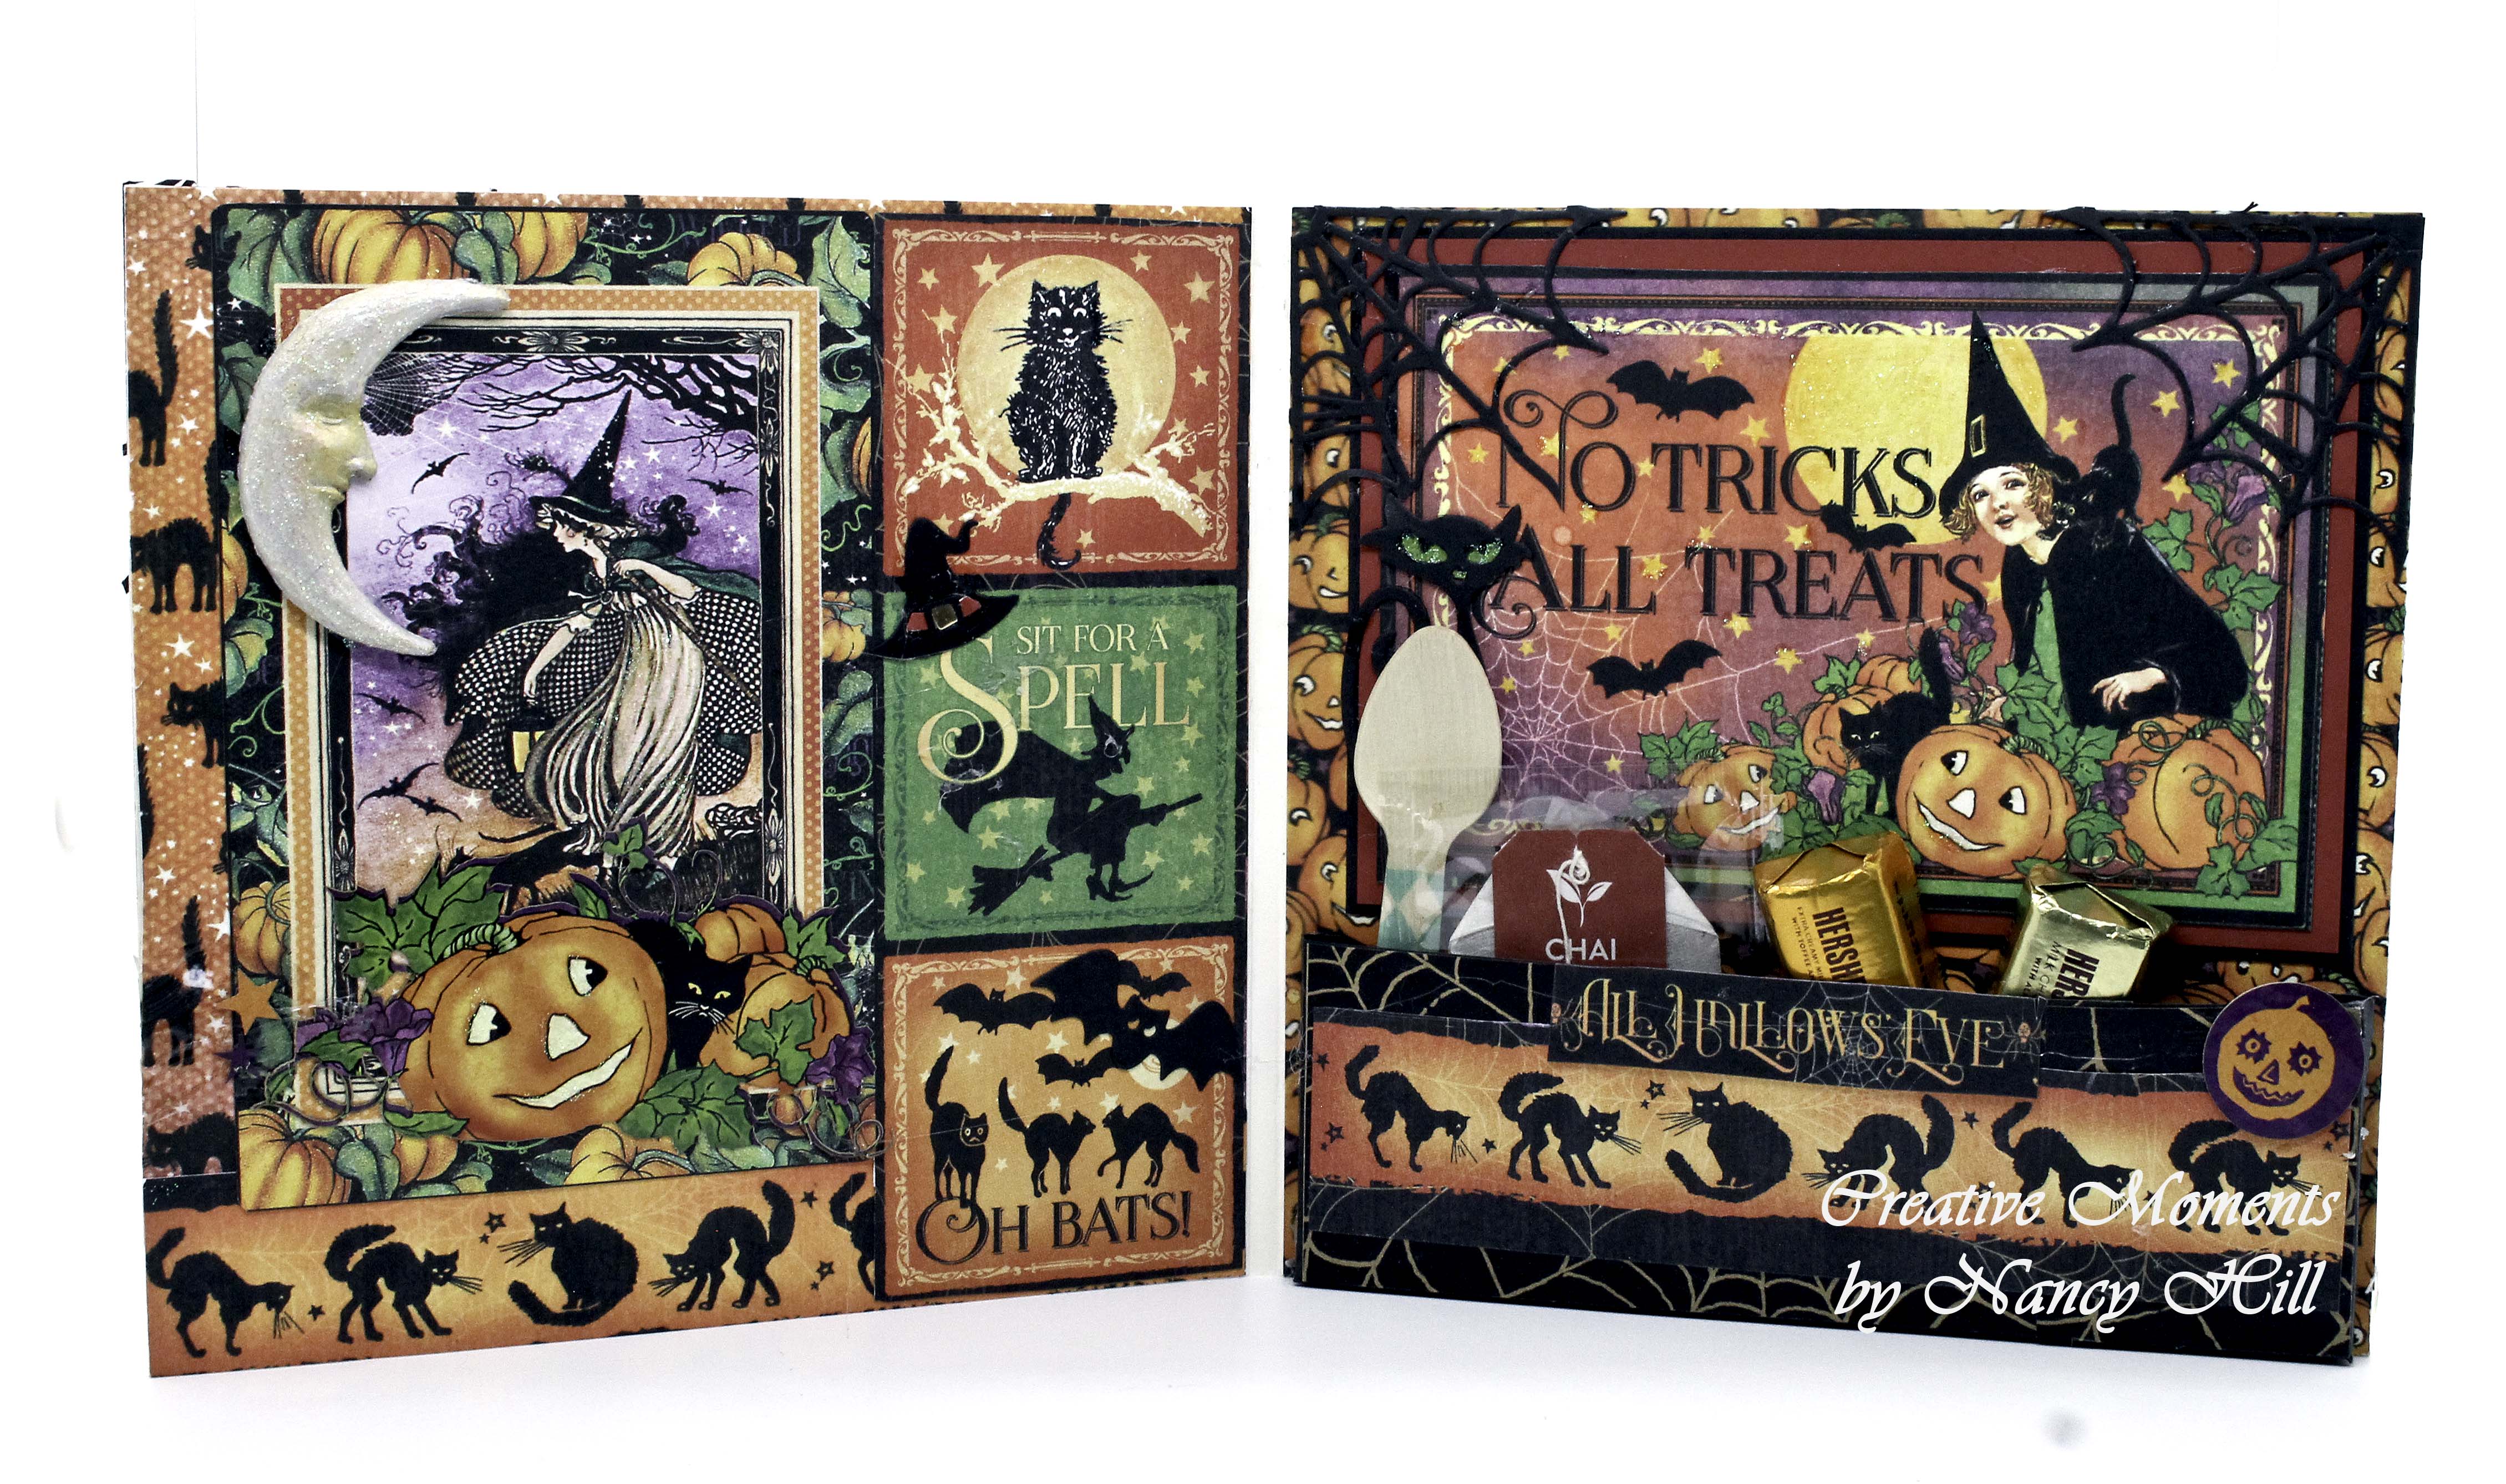
Graphic 45 Charmed Halloween Card

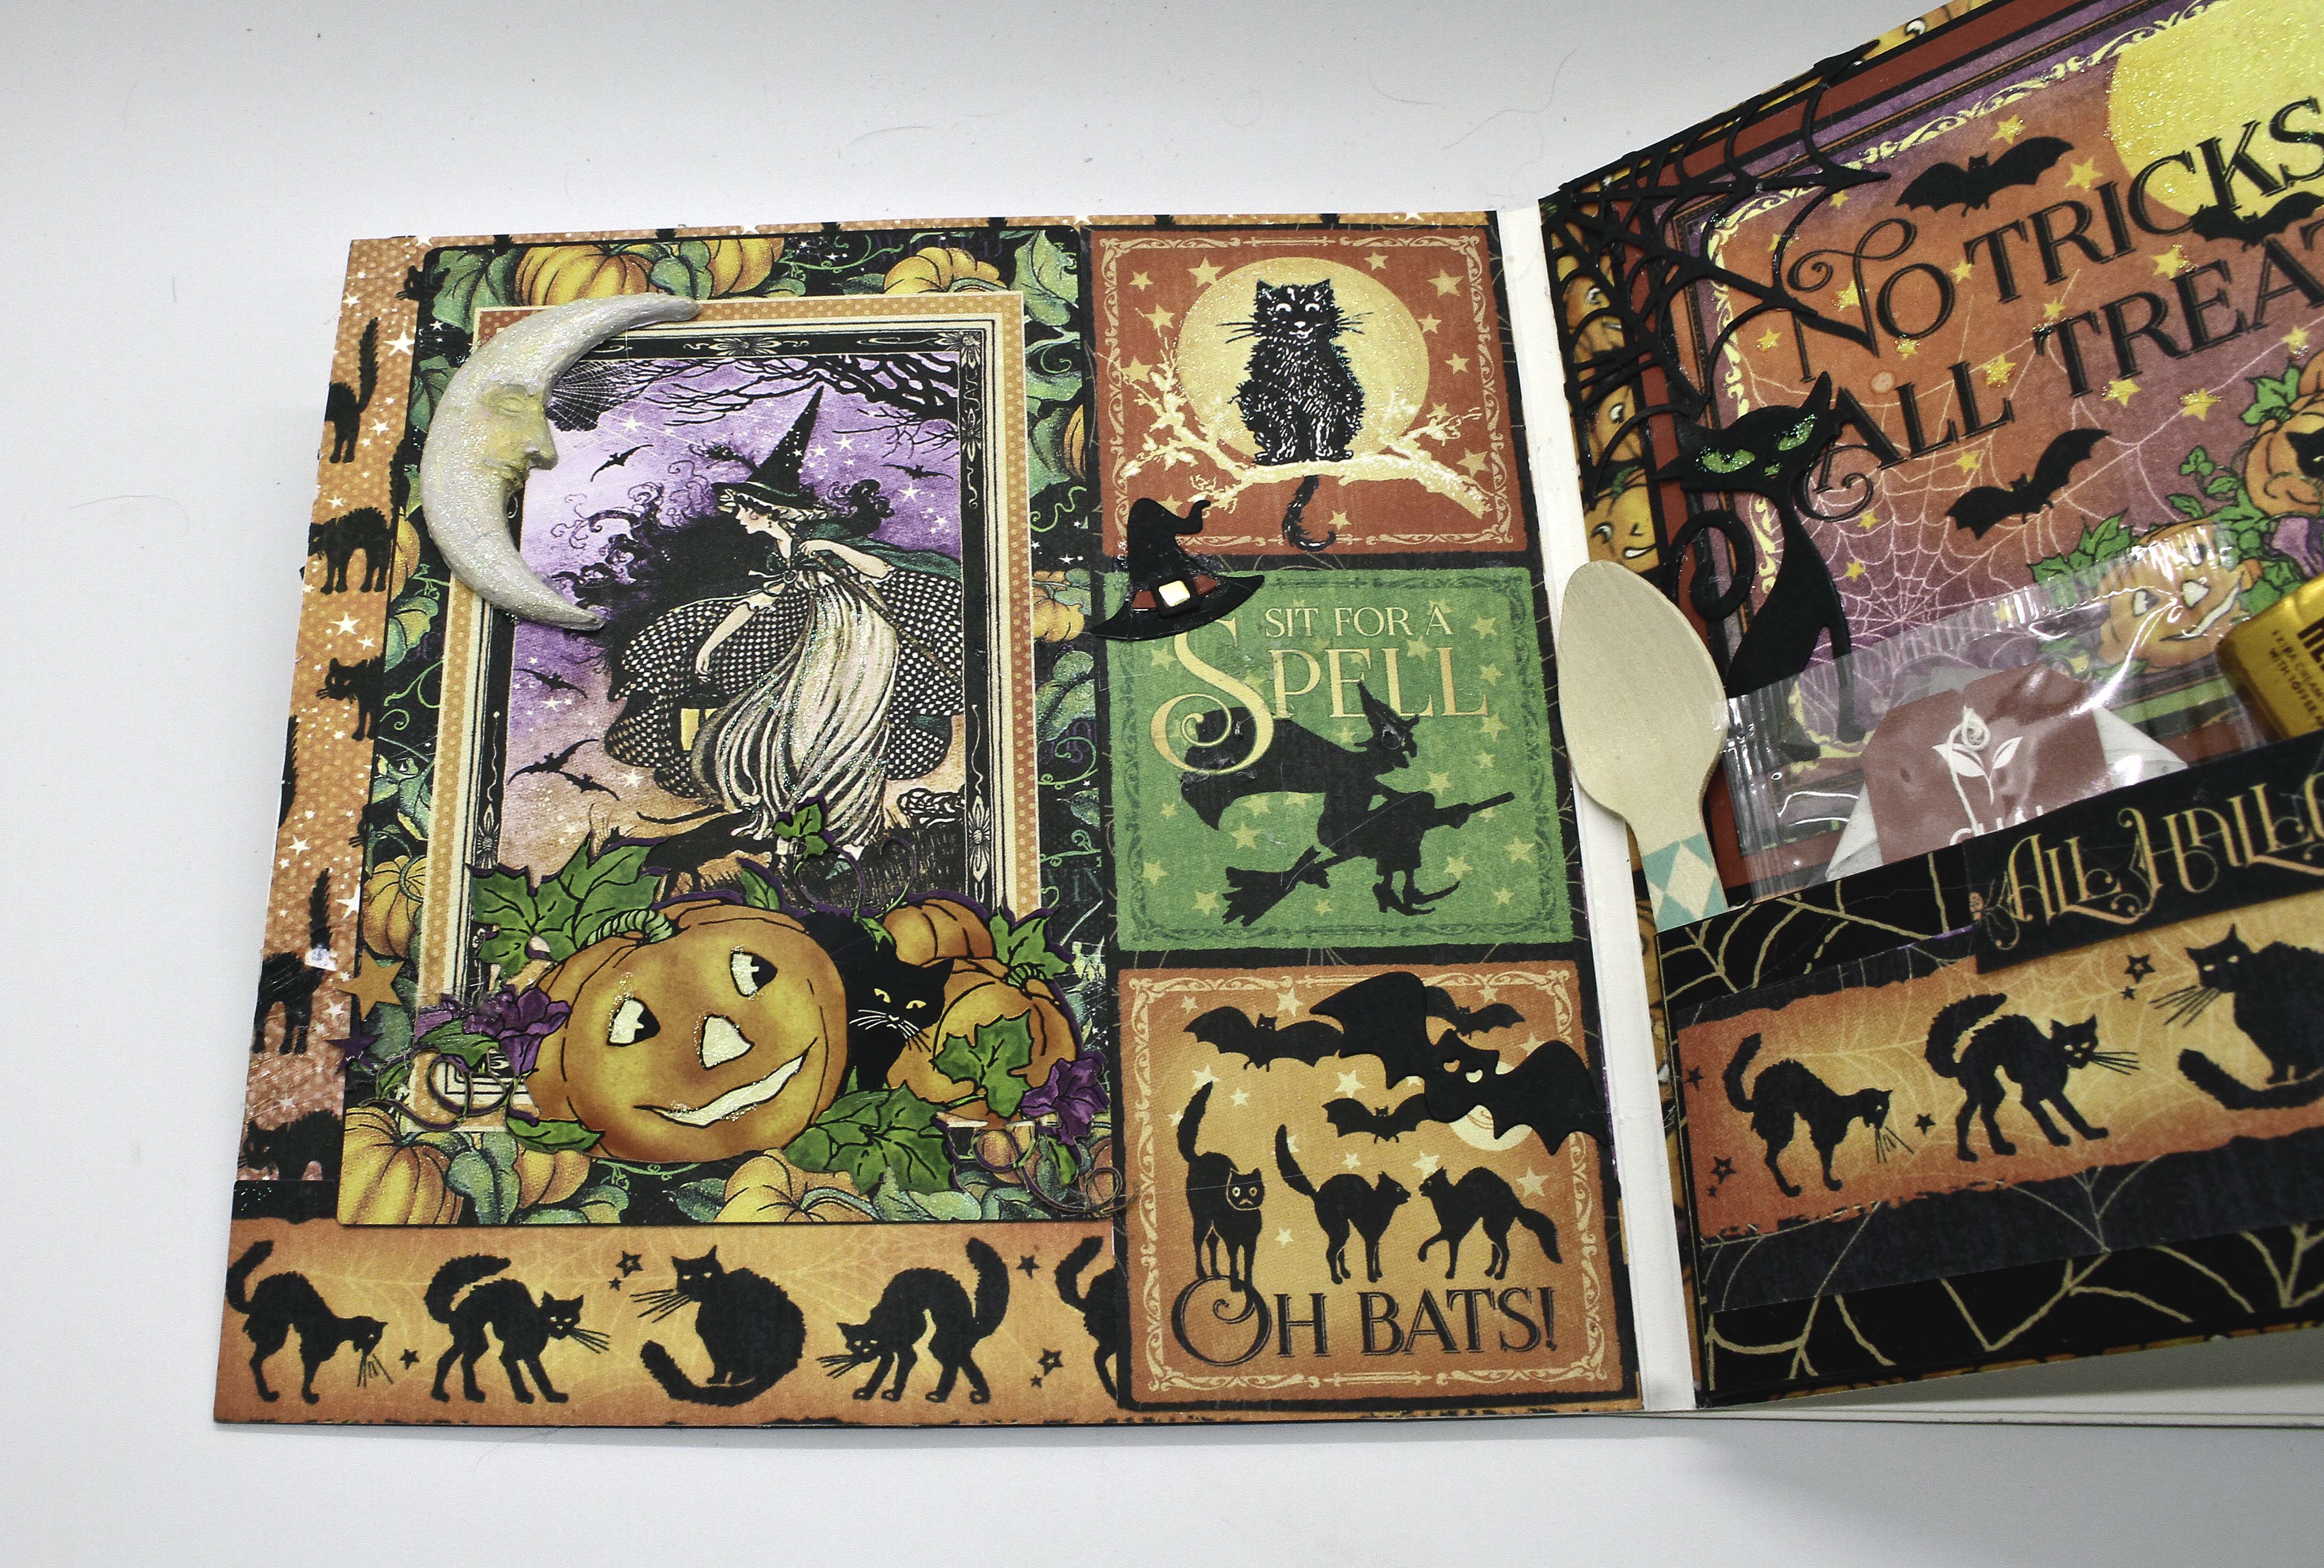
 Welcome back and Nancy, here.  Because Halloween is creeping up around the corner, I have a Halloween card with fabulous treats and fun-loving Halloween spirits.  It was a Spooktacularly fun creation! I hope you enjoy it as much as I enjoyed making it! Available at The Rubber Buggy for you today, Graphic 45 Charmed is full of spooky haunted houses, light-hearted witches, black cats and jack o’lanterns with stunning color purple, orange, red, frightful black and ivy green. 


Also, I made up the moon and stars with the Prima Marketing - Finnabair - Moulds - Nocturnal Elements.  for that addition setting.  I used the Art Resin epoxy for the mould.  I sprayed the moon first with Rustoleum white primer and let dry.  I brushed on the Prima Marketing Metallic White Pearl acrylic paint and then used my fingers sponging on a little yellow from the Ranger Vintage Photo ink pad to bring out the moons face.  I used the NUVO Glitter dots to the stars, moon and parts of the card to make it a little glitzy and shine. 

I had this gorgeous Graphic 45 Midnight Tales from last year and used it on parts of the card which I thought coordinated so well.  I made a pocket for the inside of the card for those special treats for our Halloween trick or treaters.  
Graphic 45 Midnight Tales 


I added the Graphic 45 Flower Assortment Pink which coordinated so well with the background.   I sponged around the flowers some of the colors of Ranger Distress ink Vintage Photo for that worn out look and added a handmade seam binding bow using a hot glue gun.


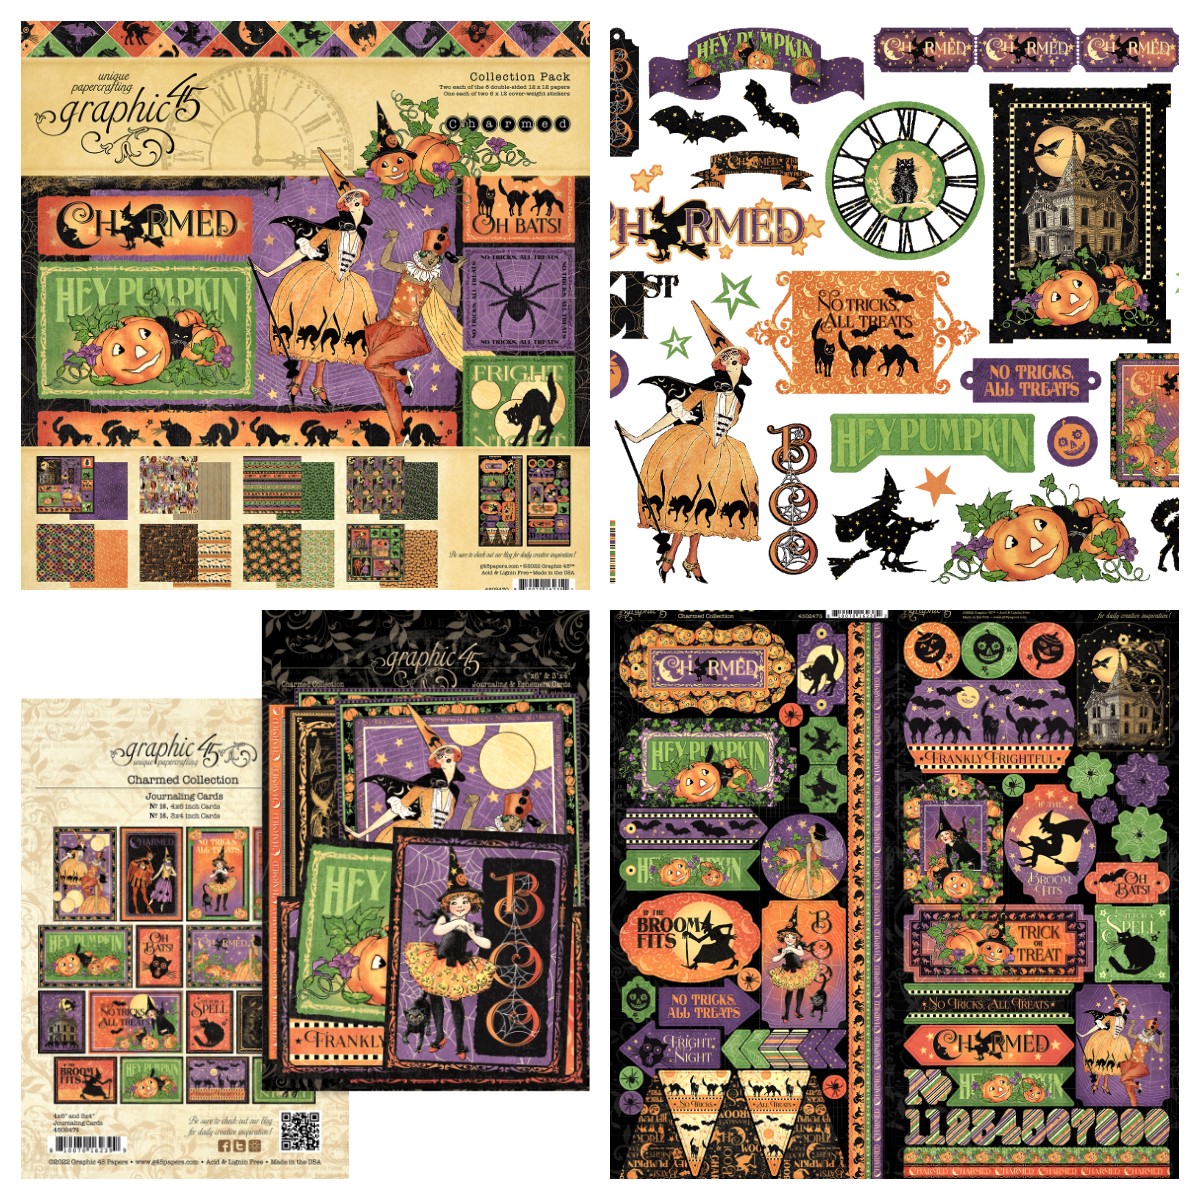
The Graphic 45 Charmed collection includes 8 double-sided papers, 12×12 collection pack (includes 16 sheets, 2 of each 8 designs & decorative sticker sheets),  8×8 paper pack12×12 Patterns & Solids pack, coordinating ChipboardJournaling CardsEphemera Assortment, and decorative Cardstock Stickers.  Each of The Graphic 4 Charmed cardstock is also available separately besides in the cardstock paper pads.

Additional Supplies:

Beacon 3-n-1 Advanced Glue

Hot Glue Gun

So get crafting and have a fabulous day and thanks for visiting.

The Rubber Buggy has the crafting supplies for your next project.  So have fun crafting this weekend with these products.  My cards and projects are always posted each Saturday on The Rubber Buggy.  Keep watching and thank you so much for those wonderful comments as well as suggestions

Enjoy and Happy Crafting!


You Croc My World

Nancy, here, and  I have a card to share using this cute mini Lawn Fawn Croc My World set. I never thought I would call a crocodile cute but this couple of love croc are here to steal your heart.   I stamped out two crocodiles so I could have a cute couple and paired it with the the Lawn Fawn Grassy Border die from My Colors Crisp Green cardstock and Lawn Fawn Easter Party Stamp Set of flowers to frame up my little swamp scene. This stamp set features a cute crocodile, the phrase "YOU CROC MY WORLD!", and two hearts. 

I sponged on the Ranger Distress Tumbled Glass for the sky and Ranger Salt Water Taffy for the hearts..  I used the Spellbinder Nestabilities rectangle dies to create the green frames.

Supplies:
Copic Markers

So get crafting and have a fabulous day and thanks for visiting.

The Rubber Buggy has the crafting supplies for your next project.  So have fun crafting this weekend with these products.  My cards and projects are always posted each Saturday on The Rubber Buggy.  Keep watching and thank you so much for those wonderful comments as well as suggestions

Enjoy and Happy Crafting!


Saturday, July 30, 2022

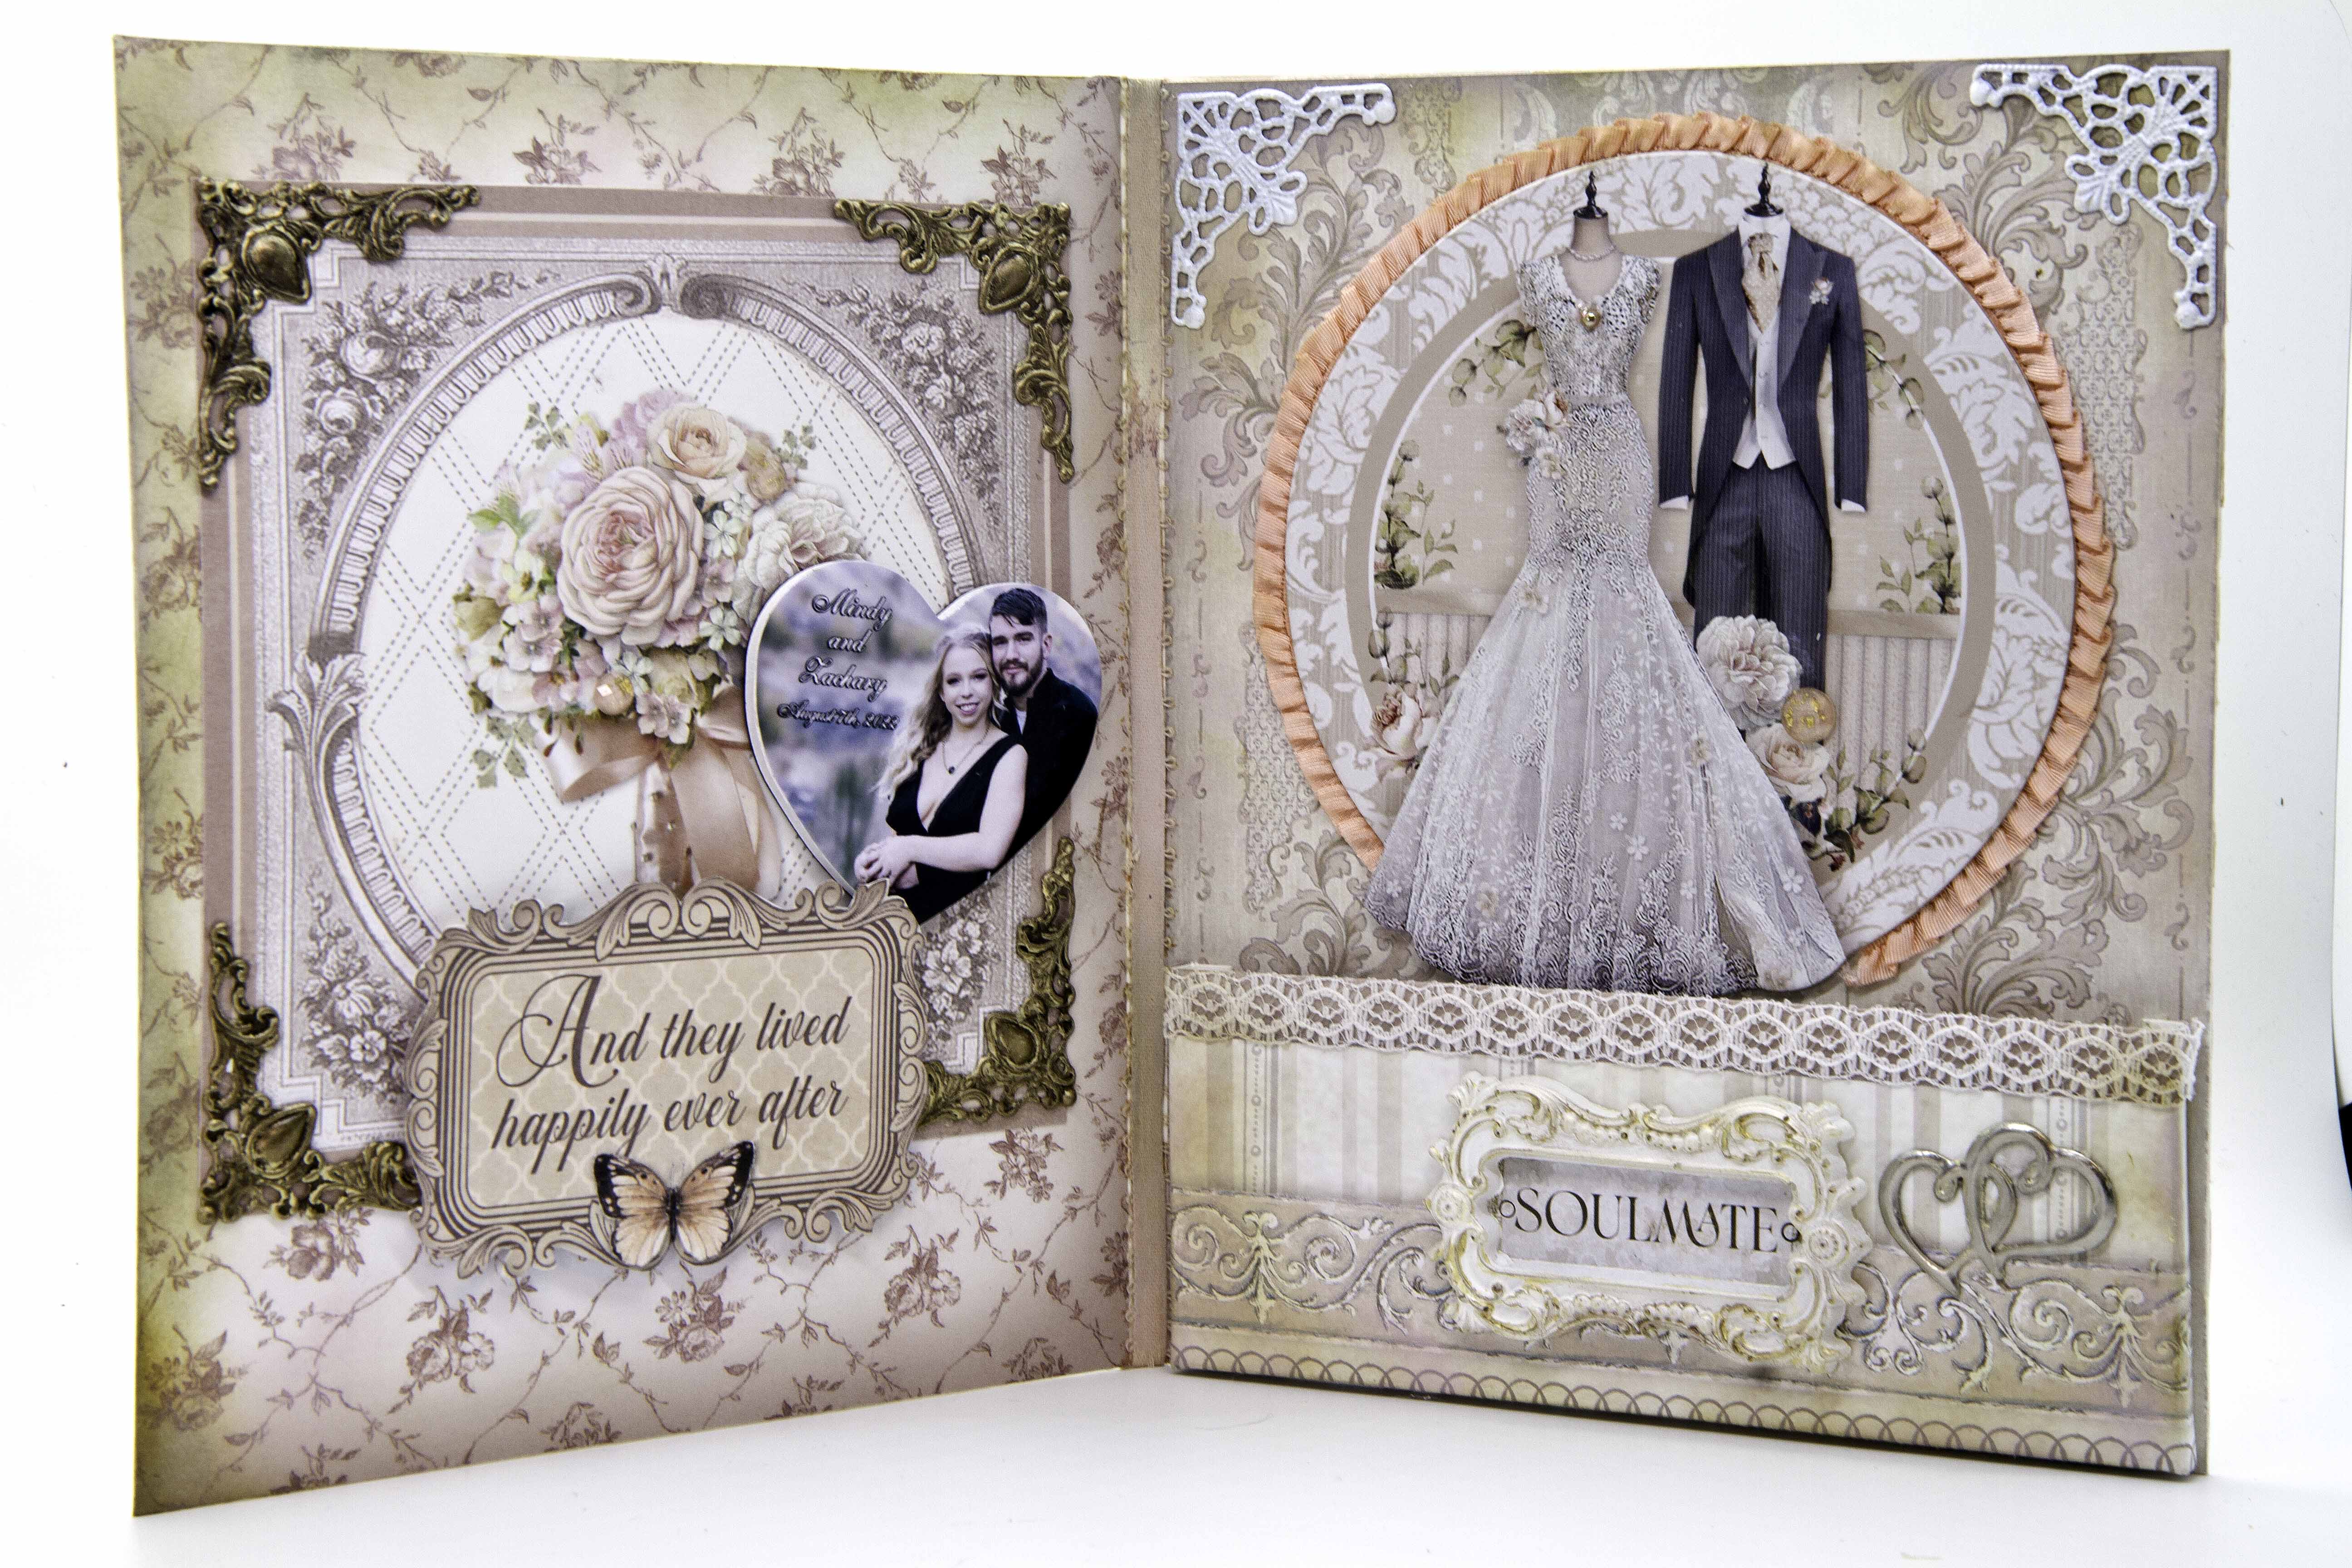
Stamperia You and Me and Mintay Yes I Do Wedding Card

 Welcome back and Nancy, here.  This week, I have been creating a wedding card with the  gorgeous Stamperia You and Me, Mintay, Yes I Do collection along with the Prima Marketing Baroque Fame mold available at The Rubber Buggy.  

These two beautiful paper collections are dedicated to weddings and ceremonies and are the perfect sets for adding elegant embellishments to your wedding projects or stunning wedding themed cards, scrapbooks, journals These sets contains designs including bridal dresses, wedding cake, flowers, tags and labels. 

Also, I am showcasing the gorgeous Prima Marketing Baroque Frame silicon mold which is perfect to make gorgeous frames with amazing intricate details that I used for the front and inside of this card.


I fussy cut this label out of the Stamperia You and Me paper collection and used Scrapbook Adhesive 3D adhesive foam behind it.
On the inside of the card, I created a pocket below the bride and groom for money or gift card. I glued on laced ribbon across the pocket.  I glued on Soulmate on the inside of the Prima Marketing baroque frame.
I used Art Resin Epoxy Resin for the mold and left over night to dry.  I sprayed the Rust-Oleum White Primer and let dry for about 30 minutes.  I brushed on the Prima Marketing White Pearl Acrylic paint and let dry for about 10 minutes and then used my fingers to tap on Prima Marketing Vintage Silk and Prima Marketing Rose Gold on parts of each mold detail.  I used a hot glue gun to adhere to card.
Since I didn't have a rustic brown ribbon, I used the Ranger Distress Vintage Photo ink and rubbed it across the ribbon and used glue to adhere to inside of card.
I sprayed each bronze metal corner with primer which is in the center and then rubbed on the Vintage Silk wax.  You can see the beautiful white gold on the bottom corners after applying the wax.

After the molds were sprayed with the primer, I painted each frame with Prima Marketing White Pearl paint and then rubbed on the Prima Marketing Vintage Silk wax.  I added the butterfly chipboard from the Stamperia You and Me along with the Prima Marketing glitter dots. For each corner on the frame, I used glue to adhere the Pink Fresh Champagne flat back pearls.


Supplies:
Venice Lace Ribbon
Additional lace, feathers, doily
Rustoleum Primer Spray - white

So get crafting and have a fabulous  day and thanks for visiting.

The Rubber Buggy has the crafting supplies for your next project.  So have fun crafting this weekend with these products.   My cards and projects are always posted on Saturday.  Keep watching and thank you so much for those wonderful comments as well as suggestions. 

Enjoy and Happy Crafting!


Saturday, July 23, 2022

Stamperia You and Me Wedding Card Box

Welcome back and Nancy, here.  For the next few weeks, I have been using making  wedding decors for my grand daughter's wedding and creating these with the gorgeous new products at The Rubber Buggy.  

I designed this wedding card box with the gorgeous Stamperia You and Me collection which is dedicated to weddings and ceremonies, though much can be used for any event.  The Stamperia You and Me collection include paper pads, stencils, stamps, molds, acrylic paints as well as rice paper. The You And Me Chipboard and Die Cut packages are the perfect sets for adding elegant embellishments to your wedding projects or stunning wedding themed cards, scrapbooks, journals or like my mixed media wedding card box. These sets contains designs including bridal dresses, wedding cake, flowers, tags and labels. 

Also, I am showcasing the gorgeous Prima Marketing Baroque Frame silicon mold which is perfect to make gorgeous frames with amazing intricate details that you will want in your mold collection and I used for the front and inside of this box.  


I covered the box with the Stamperia You and Me paper pad and glue. Also, I added the ribbon behind the paper on the inside so the inside of the top will not fall completely back to show off the photo.  I did that as well on the outside with the pink ribbon to be tied together to hold the box together since the magnets are too weak to hold the box closed.  

I prepared overnight the Zuri Design rose and Prima Marketing square frame and label molds with resin epoxy.  Note:  Make sure to fill the Prima Marketing Baroque Frame rectangle part mold to the top and dab a little extra around this rectangle frame mold while scraping the sides, otherwise, the center of the rectangle mold will not come out as a whole frame (Photo Above: You will see where I didn't get enough resin in the bottom of the rectangle frame which I had to do over).  It took me three attempts to get it where the frame comes out right.  I sprayed the molds with a primer and let dry for an hour before brushing on the Stamperia You and Me acrylic paint and let dry before using my fingers to dab the Prima Marketing Rose Gold wax. I used a hot glue gun to adhere to card. 

For the finishing touch, I used the Stickles Twinkle glitter drops to the flowers and around the box and glued on the Prima Marketing pearls for that special shabby chic vintage style box.


Supplies:
Venice Lace Ribbon
Additional lace, feathers, doily
9 1/2" x 9 1/2" x 2 1/2"  gift box that I got at a discount store
Rustoleum Primer Spray
Font die set

So get crafting and have a fabulous  day and thanks for visiting.

 The Rubber Buggy has the crafting supplies for your next project. So have fun crafting this weekend with these products.   My cards and projects are always posted on Saturday.  Keep watching and thank you so much for those wonderful comments as well as suggestions. 

Enjoy and Happy Crafting!