Translate

Saturday, November 30, 2019

Stamperia Blue Land Gift Box

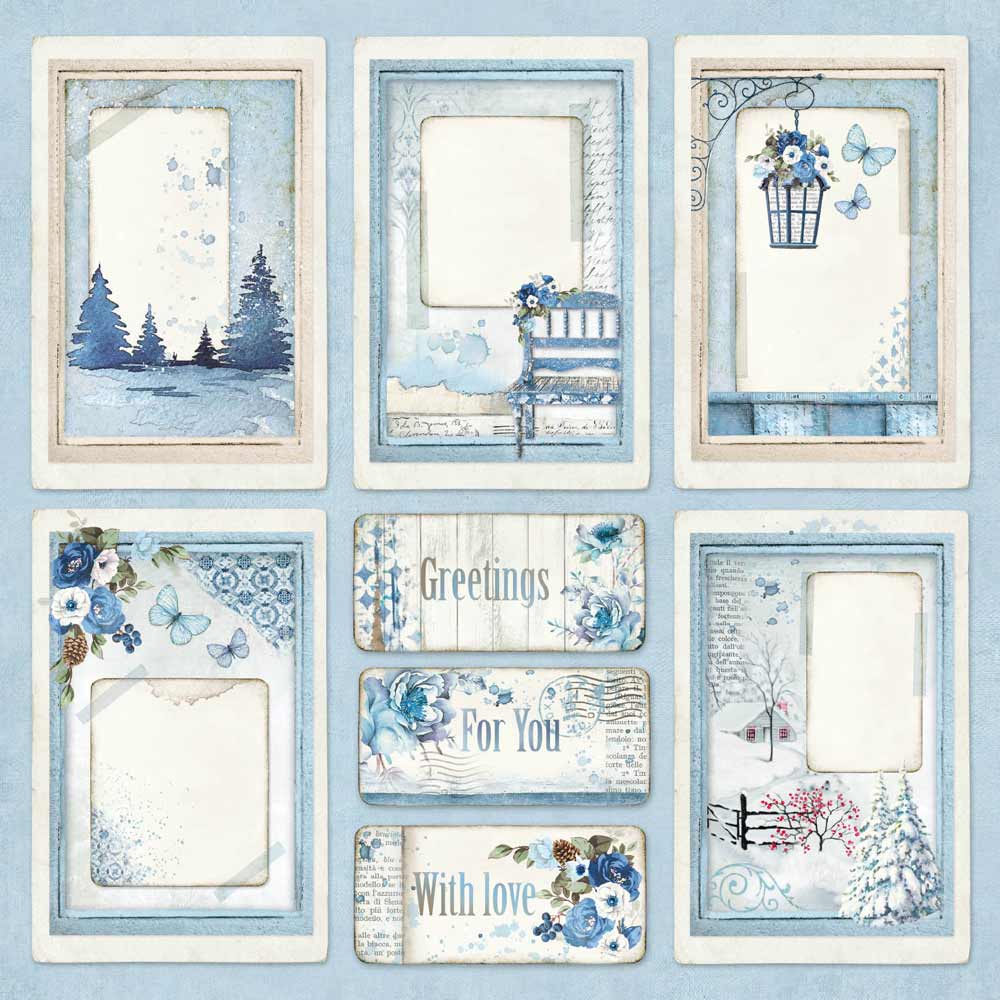
Welcome back and Nancy, here, to share my gift box for my granddaughter with the gorgeous Stamperia Blue Land paper collection.   I am showcasing Stamperia Blue Land paper collection for the next couple weeks which should be in everyone's supplies for cards and projects this winter season as well as for Christmas!  These products are available at The Rubber Buggy on-line store.  The Rubber Buggy carries all of the name-brand products and supplies you will need to create those amazing keepsake cards, scrapbook pages and beautiful craft projects!


I handmade the flowers with the Heartfelt Creations Classic Rose die.  I added flat back pearls and colored one with a blue Copic Marker.  

I cut out the butterfly found in the Stamperia Blue Land paper and glue it to a silver wire that was twisted.  I glued the end of the wire to make it look like the butterfly was flying.  

I typed my grand daughter's name and printed it out and glued behind the Tim Holtz Decorative Plate/Frame.  
I used Scor-Tape around the paper and added Beacon 3-n-1 Advanced glue to adhere the Stamperia paper inside the box as well as the sentiments in this collection.
I added Prima Marketing white gesso to the knob and used a hot glue gun to glue to box.


I glue the pieces that could be thrown away to the back of my projects and added the Post Card image in the Stamperia Blue Land collection my name for a personal touch to my projects and cards.


Supplies:

box or decorate box to alter
Venice Lace
Beacon 3 n 1 Advance Glue
Prima Marketing-Memory Hardware Chambery Antique Knobs
Tim Holtz-Ideology-Ornate Corner Plates
flatback pearls (center of flowers)
Heartfelt Creations Flower Stamens Bridal Bouquet
Heartfelt Creations Classic Rose Die
NUVO White Blizzard Glitter Drops
Prima Marketing Finnabiar Art - White Gesso
Stamperia Blue Land Paper Collection

I hope I have inspired you try out these products available at The Rubber Buggy on-line store.  My cards and projects are always posted on Saturday.  Keep watching and thank you so much for those wonderful comments as well as suggestions. 
Enjoy and Happy Crafting!


Saturday, November 23, 2019

Christmas Scallop Circle Easel Card Tutorial

Nancy, here.  Back to today's inspiration for a scallop circle easel tutorial that I created for you as well as I am showcasing Stamperia Blue Land paper collection for the next couple weeks which should be in everyone's stash for cards this winter season as well as for Christmas!  I love the wintery scenes for Christmas with these blue tones and wintery pictures.  


This is actually a scallop circle easel card but my easel card will also have a traditional part for a Christmas sentiment on another layer.  This style of easel card is very simple to make with my step-by-step tutorial.  I am a visual person and like to see step-by-step pictures plus I added a lot of photos to guide you through this since words in these instructions can't always describe well for everyone. There are other tutorials of a scallop circle easel card but I think my tutorial with a scallop doily may be easier for beginners to follow along.  You will need a score tool like Scor-Pal.  So let's get started!

Putting Together The Circle Easel Card


Step 1: Choose your card base 8" x 11"  and and score it in half and fold.  Do this again for the second card base.  Use a Bone Folder to sharpen the score line.  Any size circles will work  and a couple sizes smaller so you can layer patterned paper on top and decorate.  

Place the  circle die just like the nestabilities in Spellbinder which my circle was 4 1/4" diameter and lay the circle die slightly overlapping the folded cardstock and cut through your press (as below).  Make sure the fold of the card base is not cut within the die, so as to leave a card "hinge". Cut two of these bases which one for the easel card and one that will be glued on the bottom of the easel card for the traditional inside of a card with your sentiment.

Step 2: Open your card base and fold one side of the circle in half, back into the center (as below on left side).  Stamp your Christmas sentiment for the inside of the card (as below on right side).  I used two stamps on the right photo below to give the sentiment a background.

Step 3: Cut two single circle (circle size 4 1/4") one from white cardstock and the other  one from a glitter cardstock  and two doily dies.  

Step 4:  I used a 3 3/4" circle die to cut the Stamperia Blue Land patterned paper out and adhered it to the glitter circle that was cut with the 4 1/4" circle die which will be glued together and then glued to a doily (See sample above photo of the circle on top right of photo of patterned paper glued to glitter circle.  This will be on the easel section of the card. Add adhesive to the folded half of the circle you just scored down and glue this doily to it (see photo below).  I used my ole Cheery Lynn Design doily die along with the Tutti Design stitched circle dies for this project.

Step 5:  Adhere the other doily behind the bottom of the easel card.  Align the other card  and glue the two cards together.  

Photo below is another sample of the other card.


Sample of scoring and folding.  Birthday sentiment was typed and printed and then die cut and adhered to the last layer of this easel card.

Step 6:  Using the 4 1/4" circle die slightly over lapping on top (see section 1 as a sample), cut out a blue patterned paper from the Stamperia Blue Land paper collection and glue to the inside of the easel card.


Step 7:  I glued on a snowflake and then glued  the label with the "Merry Christmas" that was embossed with NUVO Embossing Silver powder.  Note: Adhere some 3D foam pads or foam dots to act as a stopper for the front panel of the easel card to lock in behind the Merry Christmas Label when the card is being displayed. 

This is the easel card turned sideways so that you can see the layers as well as the 3D foam tape behind the label. I can mail this card this way but will continue to add more embellishments to finish this project which will cost more to mail.  I figure that if I make a card for a special person, the extra cost of mailing is a no-brainer.
When closed, this cheery circle easel card will fit into 5" square envelope 
If you have any questions, don’t hesitate to leave me a comment below. I would love to hear from you. And do share with me your very own handmade Easel Card photos.


I am entering this project in the following challenge:


So get off your computers and start making one of these fun scalloped circle easel card like these!  My cards and projects are always posted on Saturday.  Keep watching and thank you so much for those wonderful comments as well as suggestions. 

Enjoy and Happy Crafting!


Stamperia Blue Land Jeannie card

Welcome back and excited to share a birthday card made for a special friend using the gorgeous Stamperia Blue Land paper as well as using gorgeous flower and leave dies from Sue Wilson Design flower dies and Cheery Lynn Doily die.  For all of my Christmas and wintery scene cards, I add the NUVO White Blizzard glitter drops to accent the snow on the patterned paper to give a shimmer and texture of snow.  

Instructions:  Cut out a 6" x 9" white cardstock and score at three inches on the left.  Cut out two 2 3/4" x 5 3/4" blue card stocks (one for the front and one behind on the inside of the card.  Cut out two 2 1/2" x 5 1/2" of Stamperia Blue Land paper and adhere together and then adhere one of the rectangles to the left side of the white cardstock and the other to the inside of the card.  Cut a 6" x 6" blue cardstock and 5 3/4" x 5 3/4" Stamperia Lue Land paper and adhere with glue. 
Cut out one of the tags (photo shown below) and stamp your sentiment in the opening.   Adhere to inside of card.  
Cut out two doilies.  I cut out the circle with the church found in the Stamperia Blue Land paper pad (12" x 12") and used the Beacon 3-n-1 Advance glue to adhere to the doily die.  Print out the sentiment on the patterned paper and adhere to the other doily.  Glue one doily on the front of the card and the other behind it to the back side of the card.  Try to match the front and back of the doily when gluing the doilies together.


Flower Instructions:   I die cut several flowers with an ole Heartfelt Creations flower die with white cardstock and shaped the flowers.  I tried to coordinate and match with the flowers in the patterned paper.  I used a 6mm flat back pearl and adhered in the center of each flower and colored the pearl with a dark blue Copic marker.  I handmade the blue seaming bow with additional leaves in the back of the bow.  I added the gorgeous NUVO White Blizzard drops to the snow on the picture for an additional shimmer and appearance of snow.  


I typed a personal message and printed it out on the Stamperia Blue Land paper and used a Stitched Circle die to cut it out and adhere behind the doily.  I love this gorgeous page in this collection to stamp my sentiment on one of the tags and adhere it to the inside of the card.  I plan on using this page to add a Christmas sentiment and use it for the front of a Christmas card.  I cut out a butterfly in this paper collection and adhered it to the top of the tag to blend in to part of a butterfly on the patterned paper behind the tag.  

Image result for images of Stamperia Blue Land paper"
STAMPERIA - Double-Sided Paper Pad 12"X12" 10/Pkg Blue Land, 10 Designs/1 Each (SBBL47) 8024273998538
Stamperia Blue Land Paper Pad

I am entering this card in the following challenges
 My cards and projects are always posted on Saturday.  Keep watching and thank you so much for those wonderful comments as well as suggestions. 
Enjoy and Happy Crafting!


Saturday, November 16, 2019

Ho Ho Christmas

Welcome back and I am so excited to share my Christmas card.  I just love these cute bunnies and inside with an adorable Christmas scene all made with the Lawn Fawn dies and stamp sets along with other dies.  


Supplies:
Lawn Fawn Ho Ho Holidays Stamp
Lawn Fawn Tiny Christmas
Lawn Fawn Upon A Star Stamp
Lawn Fawn Leafy Tree Background Landscape die
Lawn Fawn Fancy Wavy Banner die set
Lawn Fawn Winter Wavy Stamp set
Lawn Fawn White Embossing Powder
Memory Box Madison Window die Substitute Lawn Fawn Wonderful Window
Heartfelt Creations O Holy Night Scroll die and Hearfelt Creation O Holy Night  Silent Night Stamp
Lawn Fawn Christmas Dreams Stamp 
NUVO Grand Red Berry Drops
NUVO Pure Sheen Diamond Glitter
Uni-Ball Medium White Gel Pen
Beacon 3-in-1 Advanced Glue
Copic Markers
NUVO Aqua Shimmer Glitter Gloss Pen
NUVO White Blizzard Glitter Drops
Snow embossing folder
Ranger Gold Tinsel Embossing Powder
Tim Holtz Icicles

Front:
I die cut the Lawn Fawn Fancy Wavy Banner die set and used my stamp tool to stamped the Lawn Fawn Winter Wavy Stamp set with embossing ink and used the Lawn Fawn White Embossing Powder.  I cut out the white cardstock and used a snow embossing folder.  I cut out the Lawn Fawn Leafy Tree Background Landscape die and sprayed the die cut with a spray adhesive and then covered it with the NUVO Pure Sheen Diamond Glitter.  I used the Beacon 3-in-1 Advanced Glue to adhere all together.  I cut out the  bunny using the Lawn Fawn Upon A Star Stamp and fussy cut three out.  I adhered the Tim Holtz Icicles on top of window die cut out with white cardstock.  I rubbed on glue on the icicles and added the NUVO Pure Sheen Diamond Glitter for additional glitter.  I used the NUVO White Blizzard Glitter Drops around the window.

Inside:

I used the Heartfelt Creations O Holy Night Scroll die and Hearfelt Creation O Holy Night  Silent Night Stamp and colored with Copic markers.  I added the NUVO Grand Red Berry Drops to the berries and Ranger Gold Tinsel Embossing Powder to "Merry Christmas".  I stamped the   Lawn Fawn Ho Ho Holidays StampLawn Fawn Tiny Christmas and Lawn Fawn Christmas Dreams Stamp  and fussy cut them out.  I used Copic markers to color and  the Uni-Ball Medium White Gel Pen.  I used a patterned paper and grayist green cardstock.  I always use the NUVO Aqua Shimmer Glitter Gloss Pen to add shimmer around the images especially to bring out the Christmas lights and fire place to give the images some glow.  I also added the NUVO glitter gloss to the top of the dog and cat to highlight the glow of the fireplace on their backs.

I am entering this card in the following challenges
  My cards and projects are always posted on Saturday.  Keep watching and thank you so much for those wonderful comments as well as suggestions. 

Enjoy and Happy Crafting!


Saturday, November 9, 2019

Stamperia Santa Claus

Welcome back and Nancy and excited to share my Christmas card using the Stamperia Christmas Vintage papers.  I love to brag about the Stamperia Christmas Vintage paper collection since the Christmas colors are so vibrant as well as the images are very beautiful.  


This is the Santa I cut out from this paper pad.  You can see each of these sections would make for a beautiful  Christmas card or project.   With the sentiment and beautiful frame around each section would make for an easy peasy card.  You wouldn't need to add any embellishment to make for a gorgeous Christmas card with this paper.
Image result for Stamperia Christmas Vintage"
This is the other gorgeous sheet from this paper pad that is also perfect for your Christmas cards.


I cut out two different patterned papers behind the Santa and used white and red cardstock for additional frame.  I had an ole snowflake chipboard that is very similar to the Laserowe Love Chipboard - Shabby Ornaments.  I sponged on Lawn Fawn White Yeti ink to the chipboard snowflake which was glued on with Beacon 3-in-1 Advanced glue.


I fussy cut the holly leafs from the Stamperia Christmas Vintage paper and adhered around the Santa and added NUVO Gloss Red Berry to the berries on the patterned paper. I tied the Lawn Fawn Baker twine  around the Santa.  I love using the Memory Box Blooming Poinsettia die, Sue Wilson Design leaf, Impression Obsession pine and Spellbinder Poinsettia die set.  I cut out the berry stems with gold metallic card stock and use NUVO Glitter drops on the tip.
Memory Box Blooming Poinsettia die set


I am entering this card in the following challenges

 
My cards and projects are always posted on Saturday.  Keep watching and thank you so much for those wonderful comments as well as suggestions. 
Enjoy and Happy Crafting!


Saturday, November 2, 2019

Sisterly Love


 Welcome back and I am so excited to share my easel box card with my tutorial on how to make with boxes and I am using the beautiful Lemon Craft My Sweet Provence paper collection which comes in two different paper pads available at The Rubber Buggy on-line store.  The Rubber Buggy carries all of the name-brand products and supplies you will need to create those amazing keepsake cards, scrapbook pages and beautiful craft projects!

Lemon Craft My Sweet Provence and Lemon Craft My Sweet Provence Basic

The circle rose wreath is part of this Lemon Craft My Sweet Provence along with the background.  I cut out this wreath with a circle die and adhered it on the background.  Since I will be adding chocolates to this gift box, I will put out a 6" x 6" wax paper to cover this background before adding the chocolates in case some chocolates smear the paper.  I used a stamp for the sentiment from an  ole stamp collection.  I used a Frantic Stamper stitched die to cut out the circle.
I love using the Heartfelt Creations Classic Rose die with the Heartfelt Creation Rose mold to make most of my flowers that I use on my projects. I used a Sue Wilson Design leaf die for the back of my flower along with the center of the handmade flower.   I used part of this Lemon Craft My Sweet Provence patterned paper to cut out the petals for the rose.  I cut out the leaves with this same Lemon Craft paper collection and sponged on some green ink on the edges of the leaves before molding the leaves.  I added two clear Prima Marketing Melange Art Pebbles on the top and bottom of the lamp and then used NUVO Gloss Glitter Pen on the lamp to bring out the light.  I had some old stickers for the sentiment.  I framed the top with a scallop border.  I made a handmade bow and added 10mm Wild Orchid Craft rose in the center of the rhinestone heart.
I adhered the sides of the box with the Lemon Craft My Sweet Provence.  On three sides, I cut out the lace from one of the patterned papers of this Lemon Craft collection and adhered it on raspberry colored cardstock.  I used a 1" punch to cut out the front of the box to open it up.
Instructions

Top and Bottom For Drawer

Use your Scor-Pal tool to score these lines.

I highly recommend heavy card stock and if the pattern paper isn't heavy, just use heavy card stock for the frame and glue the pattern paper on it.  

This is the bottom for drawer.  Cut a 7 3/8" x 8 1/2 using heavy cardstock.  Score 1 1/4" on the three sides with one of the long sides not scored.  Fold the score lines.   As shown on the photo below, cut along the score line of the corners.  You will add double-sided self adhesive tape and tape the tabs to this box (see photo below).  I like using 1" Scor-Tape which is very adhesives and wonderful for heavy cardstock.  See below.  


Cut the top for drawer at 7 5/16" x 8 7/16" and score 1 1/4" on the three sides with one of the long sides not scored.  Follow the same instruction above for the drawer.  Afterwards, add double-sided self adhesive tape on the outside of this drawer on three sides and adhere to the bottom drawer.


Drawer
This is the drawer that will pull out.  Using heavy weight cardstock, cut 8 1/8" x 8 1/8" and score 1 1/8" on all four sides and fold.  Cut the top and bottom of each fold like in the corners as shown above.  Using double-sided self adhesive tape, tape the box.    
Easel Card to Attach to Drawer
Make sure to use heavy cardstock or one solid cardstock and at patterned paper adhere to the cardstock.  I found that if you don't do this and add flowers, the easel part of the card will droop due to the weight.  

Cut a 6" x 12" cardstock and score at 3" and 6" and fold the score lines.  This is what it may look like gluing or using 1" double-sided adhesive tape of the easel card to the drawer. 

I liked adding my flowers and finishing the easel card  before adhering this to the drawer.  Cut a 6" x 6" square and add your flower, etc. and adhere from the 3" fold to the bottom.  
Cut another 6" x 6" square for the inside of the easel card and adhere. Add your sentiment on a decorative frame and use 3D foam tape or dots to give the height  of the decorative frame for the inside so that the top with  slide on and stay when the easel card is opened.  

I used two Sue Wilson Design oval dies to cut out the inside frame and stacked for height.  2 samples of using 3D foam tape or dots to give the height of the frame on the inside for the top of the card to slide and sit/fit on the inside.  

I am entering this project in the following challenge:

I hope I have inspired you try out these products available at The Rubber Buggy on-line store.  My cards and projects are always posted on Saturday.  Keep watching and thank you so much for those wonderful comments as well as suggestions. 
Enjoy and Happy Crafting!