For the center, I used my Scor-Pal with bone to score three times and fold the W-shaped for the inside of the card.
 |
| Zuri Design Mould-Wings in Wind |
This card measures 6" x 7". I used the beautiful Stamperia Hortsenia paper for this card. The colors of lavender, purple and greens of the beautiful Hortensia flowers coupled with butterflies and dragon flies bring a delightful reminder of the smells of these beautiful flowers and sights of fluttering butterflies and birds around our area for this time of year. I leave our windows open on our farm house and every room has the wonder scent of these beautiful flowers.
Click on my U-Tube video of tips and techniques of using epoxy resin in a mould but suggest to continue to view other tutorials by masters that have used moulds for a long time. I love using resin for my moulds since I get the full detail and it doesn't break or crack compared to problems that I encounter with clay. The Rubber Buggy is now selling the A1 Creative Resin with so many colors which I will try on my next mould project. I am fairly new with moulds but having so much fun experiencing this new craft for my cards and projects. I use a hot glue gun to adhere the dragon fly mould to my card. I used a clear gesso first and applied the gorgeous Prima Marketing Mint Sparkle gilding waxes along with rubbing on NUVO White Blizzard glitter drops and using NUVO Gloss White drops to the dragon fly. I would highly recommend getting the NUVO White Blizzard drops now for you Christmas cards while supplies last before people start on their Christmas cards soon.
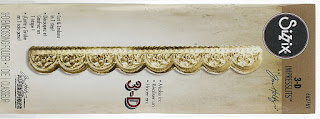
I used my fingers to apply on the surface of the embossed part with the gorgeous Prima Marketing Mint Sparkle wax. I am loving the Tim Holtz 3D Impresslit Embossing folder die borders and used the Tim Holtz/Sizzix 3D Impresslit Embossing Mini Scallop border die that is 5" in length after cutting. I created a Sizzix 3D Impresslit Embossing Folder die Tutorial and click on my U-Tube on how to emboss and cut these dies as well as suggestions on using acrylic paints and gilding waxes to bring out the detail of these gorgeous embossed dies. My instructions explains the use of spraying water on the cardstock before inserting into the die to get full embossing while it die cut. This time, I cut out a thin lace border to adhere to the top of the die cut which adds a little shabby chic to it.
 |
| Tutti Design Celebrate |
 | |
| Stamperia Hortensia is available 12" x 12" or 8" x 8" So get crafting and have a fabulous day and thanks for visiting. The Rubber Buggy has the crafting supplies for your next project. So have fun crafting this weekend with these products. My cards and projects are always posted on Saturday. Keep watching and thank you so much for those wonderful comments as well as suggestions. Enjoy and Happy Crafting! |


No comments:
Post a Comment