Translate

Thursday, March 29, 2018

Shabby Chic Wooden Box With Stamperia Lilac Papr

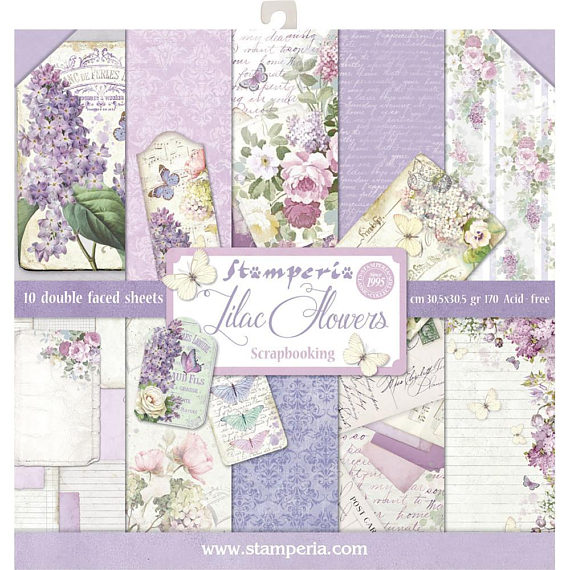
My family means the world to me and I had to make something really special for one of my sisters' birthday.  I found this unfinished wooden box at a thrift store and decided to cover it with the gorgeous Stamperia Lilac Paper that was purchased at The Rubber Buggy on-line store.  This paper collection has all you need to cover this box including the envelope, card, border and butterfly.  I added handmade chocolates inside the box.

The details on how I made this project will be found in this link:  How to Cover a Wooden Box With Stamperia Lilac Paper by Nancy Hill on Snapguide.

I used the papers found in the Stamperia Lilac Flower collection.


I made these roses and rose buds from foamiran and Heartfelt Creations Classic Rose die set. I added NUVO Glitter Gloss Pen to the butterfly.  Behind the flowers is cheese cloth that has been unraveled a little.  Also, I handmade my hat pin that was glued to the bow.  
This Prima Marketing resin frames are gorgeous.  Check out the new arrivals and especially the Prima Marketing - Frank Garcia - Chantilly Royal Frame.  I covered this frame with Prima Marketing Gesso Paint and NUVO Embellishment Mousse Indian Gold.  I cut out the lady from the Pion Design Scent of Lavender collection and glued on the back of this frame.
This is another gorgeous page found in the Stamperia Lilac Paper.  This bottom will be filled with handmade chocolates.
I cut out this gorgeous envelope from the Stamperia Lilac Collection and glued it together.  I stamped one of the cards in this collection using a Heartfelt Creations sentiment.
You better hurry to order while supplies last on this gorgeous Stamperia Lilac Paper and especially lowered the price.  Check out the other Stamperia paper pads and products that just came in this month to The Rubber Buggy on-line store.  


Nancy Hill
The Rubber Buggy Design Team

Friday, March 23, 2018

Criss Cross Card with Stamperia Lavender Paper

Welcome and hope you are enjoying the wonder cards and projects by The Rubber Buggy Design Team.  Check out the latest and best products that The Rubber Buggy is selling  lately like this gorgeous Stamperia Lilac Flowers paper. The paper had the tags, printed cards and even a gorgeous envelope that could be cut out and used. You better hurry while supplies last and check out the other Stamperia paper pads and products that just came in this month to The Rubber Buggy on-line store.  

The Criss Cross card is fairly easy to make.  I cut out two 6" x 12 " with  white cardstock and score at 6".  Glue one 6" to the other 6".  Cut the front at a 45 degree angle and decorate by cutting two 6" squares of patterned.  Take one square for the center of the card.  The one 6" will be cut at a 45 degree angle and glue each part to the front of the card.  If you google by typing "images of criss cross cards" you will see lots of these cards and a few tutorials to help you.  I thought this card was easier to make than my normal cards and plus you made a decorative envelope.  If you are giving this to a person by hand, just use tissue paper to cover it up plus a ribbon on top and what a gorgeous card to give to your special person.  The border on top of the card is from the Heartfelt Creations Regal Border and Pocket die set.  I added the stunning ivory Venise Lace the front of the card.

Stamperia Lilac Flowers Paper Pad


I cut out the card, butterfly and book marker out of the Stamperia Lilac paper collection and added ribbon and Wild Orchid Roses 10mm.  I applied NUVO Glitter Gloss Pen to the butterfly and some of the printed flowers. 
I made the flower using foamiran foam and Heartfelt Creations Classic Rose die.  I used the largest rose die in this set. 

This card was cut out from the Stamperia Lilac paper collection.  Isn't it beautiful with the printed lilacs and pansy.   The butterfly was cut out and I applied NUVO Glitter Gloss Pen to the butterfly to make it stand out.  
Nancy Hill
The Rubber Buggy Design Team

Saturday, March 17, 2018

Easter Box


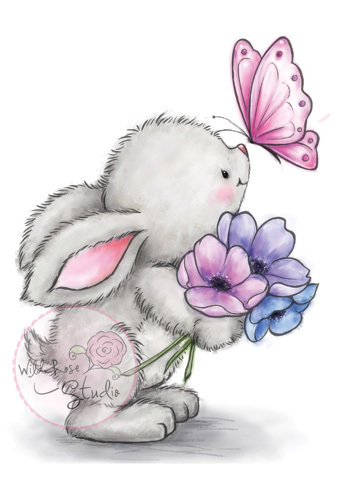
Easter is close by and I made another Easter Egg box using the instructions I made for you on my tutorial, click HERE.  I love the little Wild Rose Studio Easter Bunny stamp.  I colored it with PanPastels and Copic Markers.
Wild Rose Studio Easter Bunny
I handmade the yellow rose with Foamiran foam.  The leaves are from the Heartfelt Creations Classic Rose die set and the Happy Easter sentiment came from the Heartfelt Creations Dogwood Chapel.

I glued Venise lace on the edge of the egg.
The Rubber Buggy is taking pre-orders for the LeCrea Design Foam Flower sheets and it comes in many colors to make your foamiran flowers.
So I hope I have inspired you to make an Easter Box with the adorable Wild Rose Studio Easter Bunny stamp, foamiran roses along with the gorgeous Heartfelt Creations Dogwood Chapel stamp sets.  You can purchase these  supplies from The Rubber Buggy on-line store.

Entering the following challenges
CWS March Mid-Month Challenge - Bunny
Papercraft Business Challenge #4 - March
Sweet Stamper Challenge #18  - Spring or Easter
Crafty Gals Corner #161 - Make It Green

Enjoy and Happy Crafting!

Nancy Hill
The Rubber Buggy Design Team

Saturday, March 10, 2018

Happy Easter

I couldn't wait to share with you another card made with the Wild Rose Studio Bunny and Butterfly stamp.  This very adorable bunny and butterfly can be stamped on many occasion cards like birthdays, thinking of you, get well soon, etc.  I just love the little smile on this bunny.  Makes me think of our own bunnies running wild around our farm.

Also, be sure to check out the new Wild Rose Studio stamps, paper and dies that are coming in very soon for The Rubber Buggy on-line store. Select "What's New" on the left side and you will fall in love with all of the new Wild Rose Studio stamps.  

I stamped it with Memento Tuxedo Black ink and colored this with Pan Pastels and Copic Markers.  handmade my flowers using the Heartfelt Creations Dogwood Flower die set with foamiran foam.  The background paper is the Heartfelt Creations Flowering Dogwood paper and the sentiment, "Happy Easter" is in the Heartfelt Creations Dogwood Chapel stamp set.  The gorgeous lace is found under Venise Lace in The Rubber Buggy lace section. 
Wild Rose Studio Bunny and Butterfly Stamp
The Rubber Buggy is taking pre-orders for the LeCrea Design Foam Flower sheets and it comes in many colors to make your foamiran flowers.
Heartfelt Creations Flowering Dogwood paper  Heartfelt Creations Dogwood Flower die set
Heartfelt Creations Dogwood Chapel stamp

So I hope I have inspired you to make a card with the adorable Wild Rose Studio Bunny and Butterfly stamp along with the gorgeous Heartfelt Creations Flowering Dogwood paper, dies and stamp sets.  You can purchase these dies and supplies from The Rubber Buggy on-line store.

Entering Challenges:
Creative With Stamps #24 - Bunny
2 Crafty Critter Crazies #12 - Must use a Critter
Craft-Dee BowZ:  March
Crea Chicky's Challenge - Easter
The Flower Challenge #18 - Anything Goes

Enjoy and Happy Crafting!


Nancy Hill
The Rubber Buggy Design Team


Saturday, March 3, 2018

Lavender and Lilacs

Welcome back and every Saturday I have something to share with you with wonderful supplies on The Rubber Buggy blog.  It is a must that you check out all of the new line of papers, dies, stamps and supplies that are arriving every day at The Rubber Buggy.  Also, many new tutorials are on The Rubber Buggy Facebook and blog on how to use these supplies as well as create the gorgeous cards that the owner, Kellie, and design team have created for you.


Supplies:
Pion Design Scent of Lavender Paper
Lemon Craft Violet Silence Paper
Venise Lace
Heartfelt Creations Regal Border and Pocket die
Prima Marketing Double Sided 1" wide Self Adhesive  tape
Tattered Lace Leaf die set

Others:
Martha Stewart Lilac punch

So I hope I have inspired you to make a card using the gorgeous Pion Design Scent of Lavender Paper and Lemon Craft Violet Silence Paper.  You can purchase these dies and supplies from The Rubber Buggy on-line store.
Enjoy and Happy Crafting!


Saturday, February 24, 2018

Springtime Bunnies

Before I begin with my card, make sure to check out all of the new arrivals at The Rubber Buggy!  New paper crafting supplies are coming in almost everyday and will sell fast!!!!

When I think of springtime, I think of baby bunnies and gorgeous pastel colors of the flowers such as the dogwood flowers around our house and fields.  Welcome, and I am excited to share a fun card made with Heartfelt Creations Flowering Dogwood collection and Wild Rose Studio Spring Bunny stamp.  Card measures 6 1/2" square.  
The Wild Rose Studio Spring Bunny was stamped with Memento Tuxedo Black ink on the Heartfelt Creations Flowering Dogwood paper and glued again on another Heartfelt Creations Flowering Dogwood paper.  The bunnies were  colored with PanPastels and a little bit of Copic Markers. 

These dogwood flowers were made from the foamiran foam and colored with PanPastels before shaping each flower.   I used a hot glue gun to add the stamen and adhere the flower to the card.  I added the NUVO Glitter Pen to the cut out butterfly found in the Lemon Craft Violet Silence Vintage paper. 


NUVO Glitter Gloss Pens

So I hope I have inspired you to make a card with the adorable Wild Rose Studio Spring Bunny stamp along with the gorgeous Heartfelt Creations Flowering Dogwood paper, dies and stamp sets.  You can purchase these dies and supplies from The Rubber Buggy on-line store.
Enjoy and Happy Crafting!

Nancy Hill
The Rubber Buggy Design Team

Thursday, February 15, 2018

Easter Egg Tutorial

I love making boxes and adding gorgeous patterned paper, embellishments and handmade flowers.  I add jewelry, chocolates and other gifts inside each box.  I couldn't find a tutorial on how to make an Easter Egg box so I made one for you and tried to simplify the steps plus add as many pictures for examples and help explain the written instructions.  
I have two Easter Egg boxes.  The top Easter Egg measures 7" high and the egg below measures 6" in height.  
Wild Rose Studio Easter Bunny and Heartfelt Creations Classic Rose flower handmade with foamiran

Supplies for Basic Egg Shaped Box:
Heavy white cardstock around 110 lbs weight cardstock for the box frame. Tape, Hot glue gun and glue, Egg Template shown on Instruction, egg shape die sets or trace another, egg box

Optional After Frame is Made for Decorating Egg Shaped Box:  
Ribbon
Instructions:  
I found many egg templates free on the web to copy.  If you want to use my template, copy this template by using your right mouse button and select copy.  Go to your photo editing or Microsoft Word and select Paste.  I used the height as 7" for the first Easter Egg and 6" for the height for the Easter Egg with the bunny.  You will cut out two cardstocks shaped as eggs using heavy weight cardstock.  
Also, you can trace another Easter egg box that you saved from last year and cut it out.  There are a couple die companies that make egg shaped die sets for cutting out with cardstock but I found these die sets too small for my boxes.

Top of Easter Egg Box:  I found it difficult to try to glue the 1" wide strips around the edge of the egg.  Therefore, I used strips of tape behind one egg before adding the strip.  Don't worry about the tape buckling since it will be covered up with patterned paper in the final steps.

 I cut out two strips of the heavy weight cardstock measuring 1" x 11 and will cut off any excess after going around the egg. I used my fingers to bend the 1" wide strips before placing the strip around the outside edge of the egg.
I start with placing the end of the strip on the outside edge of the egg and then attach the tape to the strip about every 2 inches as I go around the egg with the strip (see photo below).  Don't worry about the tape buckling since it will be covered up again with another piece of cardstock that will go around the edge again.
After running out of first strip to finish going around the egg , I attach the second strip with additional tape to the end of the first strip and continue going around the egg.  I cut off any excess strip tand use tape to attach it to the end of the other strip.  Use a hot glue gun and apply the hot glue along the strip on the inside of the egg.
Bottom of the Easter Egg Box:   You can draw a line about 1/4" around the egg to use as a guideline to glue the strips on the bottom.  More complicated, I used the same template in Microsoft Word or Adobe Photoshop and sized the egg 1/4" smaller.  I cut it out and centered it the egg  that will face the bottom of the box.   I traced around this smaller egg.  I will follow this line and glue the strip to the egg. 
 Cut out two strips measuring 3/4" wide and 11" long.  I aligned the strip along the black line on the inside of the bottom egg and applied hot glue (optional or regular fast grab adhesive glue).  I ended up cutting some of the second strip off that wasn't needed after going around the egg.
Images of inside of the bottom and top.  

Top of Box:  Adding the patterned paper and embellishments
Before adding the strip around the edge, trace the egg behind the patterned paper and cut it out.  In the past, I used a template to trace on the patterned paper and after cutting it out, the patterned paper egg  was small enough that it didn't fit. 
First, cut out two strips of patterned or plain cardstock measuring 1" x 11".  I used a hot glue gun but if you have glue that will adhere the cardstock to the tape, I would use that instead of a hot glue because the hot glue dries too quickly.   When using the hot glue gun, just apply about 1" inch of glue at a time and then stick the strip to it 

Second:  Optional, I used a ribbon around the top of the box before gluing my patterned paper with a hot glue gun.
The patterned paper from the Heartfelt Creations Flowering Dogwood and cut out the Dogwood tree from the same paper collection.
I stamped the crosses and sentiment using the Heartfelt Creations Dogwood Chapel stamp set with Memento Tuxedo Black ink and colored it with PanPastels and Copic markers.  I cut out 10 Dogwood flowers from the Heartfelt Creations Flowering Dogwood flowers set with foamiran foam.  I put each flower on an iron for five seconds and shaped each petal with a flower shaping tool.   I used a light green PanPastel powder on the tips of each petal and glued the stamens in the center of each flower that were cut out from the Dogwood Flowering die set with light green cardstock.  I stamped and die cut  the bird using the Heartfelt Creations Flowering Dogwood and Dove stamp and die set and adhere it to the paper.  I used light green cardstock for the Dogwood leaves that were cut out from the same die set.  I used a flower shaping tool on the leaves and colored each leaf with PanPastels before gluing the leaves behind the flowers.   

 So I hope I have inspired you to make an Easter Egg Box.  You can purchase these dies and supplies from The Rubber Buggy on-line store.
Enjoy and Happy Crafting!

Nancy Hill
The Rubber Buggy Design Team