Translate

Saturday, May 30, 2020

Stamping Bella Cocktail

Hello to all of The Rubber Buggy bloggers family.  Thanks for joining us and it's Saturday so I think we should all drink to that like the Stamping Bella Curvy Girl With Cocktail stamp.  How beautiful is her maroon dress and she looks like she is giving a toast to someone.  The Rubber Buggy has this adorable stamp and other supplies available at fast delivery and wonderful customer service to have your day a fun-filled crafting day.  


I often view the Stamping Bella Marker Geek videos to learn more techniques and their color guides on how they color their stamps. I colored her with Copic Markers and cut her out. I colored the  backgrounds with Tim Holtz Distress Oxide Inks using the Picket Fence Studio brushes to sponge on the ink.  I strongly recommend the Picket Fence Studio brushes for sponging since the brushes are easy to clean as well as blending the inks.  I added some sequins from the 28 Lilac Lane Shaker Mixes.  A used the Beacon 3-in-1 Advanced glue to adhere this card.  I used a glitter pen to add some sparkles in the cocktail.

The background paper is from the Graphic 45 Forward Forward Patterned and Solid paper collection which contains patterned and solid paper of 8 beautiful colors and designs in a variety of vibrant colors.
Graphic 45 12in x 12in Patterns & Solids Papers | Fashion ForwardGraphic 45 12in x 12in Patterns & Solids Papers | Fashion Forward
I am loving this new arrival at The Rubber Buggy of  the Donna Downey Signature Stencil - Bubbles along with their other stencils.  I used the Picket Fence Studio brush with Distress Oxide ink with various parts of this stencil to get this background.  If you apply light colors of Distress ink to the background, you can then stamp these girls with Memento Tuxedo Black ink  and then color her with Copic Markers. 


I had so much fun making these cards and hope you will too.  So have fun crafting this weekend with these products.   My cards and projects are always posted on Saturday.  Keep watching and thank you so much for those wonderful comments as well as suggestions. 

Enjoy and Happy Crafting!


Thursday, May 28, 2020

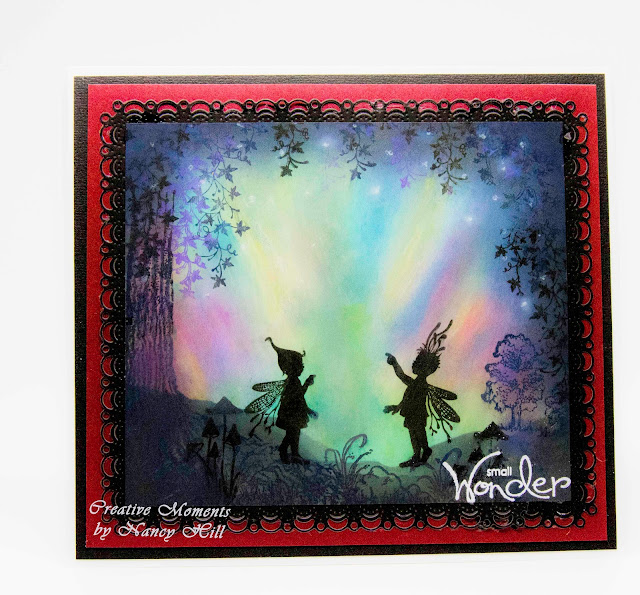
Small Wonder

Learned a few techniques for doing my card.  Really love learning some of the wonderful tutorials throughout different websites on creating different backgrounds, especially the Northern Lights.  Highly recommended on one tutorial and from one design team member was too use smooth glossy cardstock.  I found that my Distress Oxide and Distress inks were easier to apply on the glossy cardstock to create the northern lights which were sponged using the Picket Fence Blending brushes and some paint brushes.  Also, I learned a different way of doing stars by just using a white pen and then use a cotton swab and tap some white inks which I used the Lawn Fawn Yeti ink.  Tap the tip of the cotton swab with the white ink a few times on scrap paper before tapping it once on a top of a few of the stars to give them a glow.  

Entering this card in Lavinia World Challenge #27

Lavinia Stamps:
Slender Mushrooms (Mini)
Creeping Vine
Tree Root
Rory and Darcy

Other Supplies:
Cheery Lynn Design Die for Frame
Distress Oxide Inks
Altenew Crispy Black Ink
Shimmer Smooth Cardstock
Heartfelt Creations Woodsy Landscape
Uniball White Pen
Cotton Swab
Picket Studio Blending Brushes


Enjoy and Happy Crafting!

Sunday, May 24, 2020

Share Time

Welcome and Nancy, here.  I am loving my  Lavinia stamps and excited to share my card with you.

I sponged on the Ranger Distress Oxide inks:  Dusty Concord, Ripe Persimmon and Squeezed Lemonade on white cardstocks with my Picket Studio Blending brushes.  I used the Altenew Obsidian Black ink for the fairy and each time I stamped one image, I used my hot embossing gun to dry the ink before stamping the next image, otherwise, I was getting black ink smeared often on my fingers and then to parts of the card.

I used a circle for my sun and sponged around it.  I sponged on Distress Oxide Ripe Persimmons and Squeezed Lemonade lightly around the sun. I tore out some paper and used it as a stencil for my hillside sponging lightly the Distress Dusty Concord and Distress Green inks.

I stamped on the Levania Fairy Hive set with Distress Walnut ink and use a white pen and dotted around the windows to add some light.

Supplies:
Lavania Stamps:  Tree Root, Fairy Hive Set, Creeping Vine, Felicity, Fairy Foragers, Slender Mushroom Small, Sea Bubbles
Additional Stamps:  Heartfelt Creations Woodsy Woodland,
Tools and Adhesive:  Beacon 3 n 1 Advance Glue, Misti Stamp Tool, NUVO Gloss Red and Yellow, NUVO Glitter Drops

I am entering this card in the Lavinia World Challenge #27.

thank you so much for those wonderful comments as well as suggestions. 


Enjoy and Happy Crafting!

Make a Wish

Welcome and Nancy, here.  I am loving my new Lavinia stamps and excited to share my card with you.

I sponged on the Ranger Distress Oxide inks:  Dusty Concord, Fired Brick, Ripe Persimmon and Squeezed Lemonade on Neenah Classic Crest Solar White cardstock.  I find this certain brand cardstock works much better for me with blending  the Oxide inks with my Picket Studio Blending brushes.  I used the Altenew Obsidian Black ink for the fairy and sentiment but each time I stamped one image, I used my hot embossing gun to dry the ink before stamping the next image, otherwise, I was getting black ink smeared often on my fingers and then to parts of the card.

Supplies:
Lavania Stamps:  Tree Root, Aurora, Creeping Vine, Miniature Leaf #5
Additional Stamps:  Heartfelt Creations Woodsy Woodland, Lawn Fawn Fairy Friend sentiment
Tools and Adhesive:  Beacon 3 n 1 Advance Glue, Misti Stamp Tool, NUVO Gloss Red and Yellow

I am entering this card in the Lavinia World Challenge #27.

thank you so much for those wonderful comments as well as suggestions. 


Enjoy and Happy Crafting!

Saturday, May 23, 2020

Stamping Bella Curvy Girl Gardener

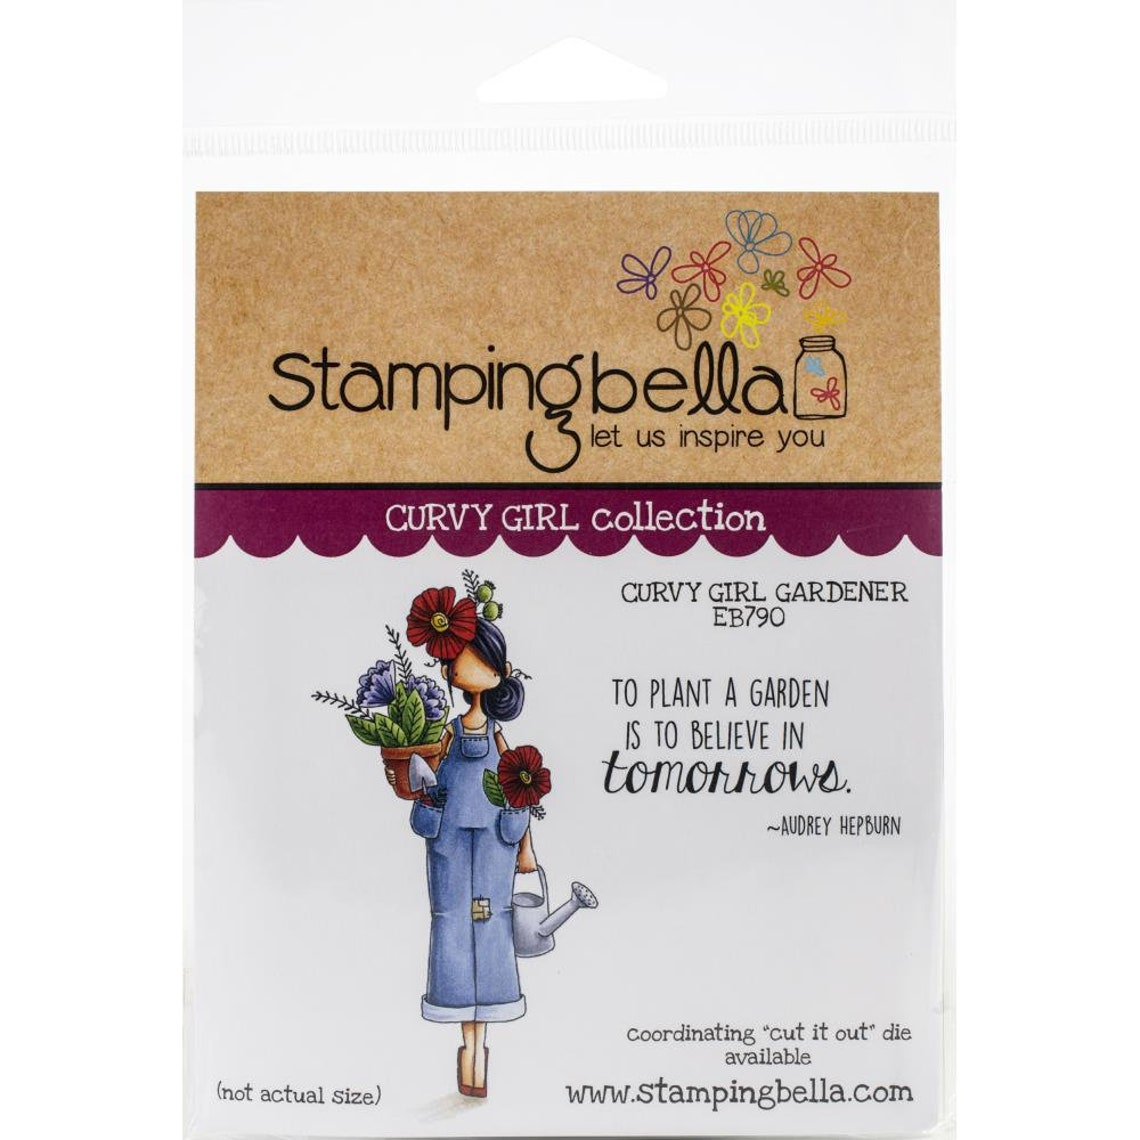
Welcome back and Nancy, here, excited to share a fun card made with the Stamping Bella Curvy Girl Gardener stamp set available at The Rubber Buggy.  This is the perfect time of year for a card that has the gardening theme since so many people are now planting their flowers and gardens this time of year.  She is so adorable with her pot of flowers and flowers in her pocket and what a beautiful sentiment that is included in this stamp set.  

CURVY GIRL GARDENER   Set by STAMPiNG BeLLA   All New   2 image 0
Stamping Bella Curvy Girl Gardener stamp 

I stamped her with Memento Black Tuxedo ink and colored her with Copic Markers.  I used my Brothers Scan and Cut to cut her out but you can also fussy cut her out.

I used the Picket Fence Studio Blender brushes and sponged the background with Ranger Distress Oxide ink Tumbled Glass and Squeezed Lemonade colors.  You must always ink those brushes and tap the brushes on scrap paper a few times before sponging/brushing the colors on the paper to avoid the circles and stripes.  

Picket Fence Studios Blender Brushes 2/Pkg (BR-101)

I stamped and die cut the flowers twice using the Heartfelt Creations Woodsy Wonderland and also colored with Copic Markers.  I adhered the card with the Beacon 3 n 1 Advance Glue.
Heartfelt Creations Stamp & Die Combo WOODSY WONDERLAND ~ HCPC-3767,HCD1-7123


The turquoise blue background paper is from the Graphic 45 Fashion Forward Pattern and Solid paper pad.  I finished the card with a Wild Orchid Daisy flower with the jute behind it glued with a hot glue gun.

I had so much fun making these cards and hope you will too.  So have fun crafting this weekend with these products.   My cards and projects are always posted on Saturday.  Keep watching and thank you so much for those wonderful comments as well as suggestions. 

Enjoy and Happy Crafting!


Sunday, May 17, 2020

Lavinia Stamps - Wonderful You

Entering this card in Lavinia World Challenge #26

Lavinia Stamps:
Lavinia Paper - Harvest Festival
Meadow Mushrooms - Miniature
Mini Leaf 5 Miniature
Zemira Fairy
Creeping Vine
Mideela Dragon

Other Supplies:
Graphic 45 Fashion Forward Basic cardstock
Distress Inks
Altenew Crispy Black Ink


Enjoy and Happy Crafting!

Saturday, May 16, 2020

Birthday Card Steampuck Son-In-Law

Welcome back and hope you are having a wonderful weekend.  I made this birthday card for my son-in-law and wanted the steampuck theme.  The steam puck is also great for your Father's Day card.  If you are looking for vintage parts for your steam puck projects, The Rubber Buggy on-line store carries the supplies you will need from Prima Marketing, Tim Holtz, etc.  The Rubber Buggy carries these major name-brand craft supplies with fast delivery and wonderful customer services.


Sizzix 3D Tim Holtz Mechanic Embossing Folder 

I used some rustic wallpaper for the cardstock before embossing it but otherwise, you can cut out gold mirror metallic cardstock and embossed it with the Sizzix 3D Tim Holtz Mechanic Embossing Folder. I brush  the Prima Marketing Finnabair Black Gesso over the entire sheet.  If you use a brush and tap it on, you will get more of a rustic appearance rather than brushing it smoothly.   I used my hot embossing gun to dry the black gesso.  I used the Prima Marketing Art Alchemy Sparks Dragon Eyes along with the Prima Marketing Metallique Aged Brass, Rich Copper and Red Amber.  Occasionally, I used a dry wipe to spread or remove any excess colors.

I cut out the excess edges of the gold metallic cardstock before gluing and adding the gears that were also covered with black gesso and various colors if these Prima Marketing Metallique waxes.  I used a hot glue gun to adhere the gears to the card and used the Beacon 3-in-1 Advanced Glue.  I typed the name Josh and printed it on cream cardstock and used my fingers to sponge on the Ranger Distress Collage Vintage Medium to give it more of the aged look but also Distress Ink Antique Linen would work as well.  I cut it out and glued behind the Tim Holtz Idea-ology Ornate Label Frame which could be substituted with the new Tim Holtz Ideao-Ology Metal Adornament Plates that was also sponged with the Prima Marketing Aged Brass wax with my fingers.


I had so much fun making these cards and hope you will too.  So have fun crafting this weekend with these products.   My cards and projects are always posted on Saturday.  Keep watching and thank you so much for those wonderful comments as well as suggestions. 

Enjoy and Happy Crafting!


Thursday, May 14, 2020

Stamperia Paper


I made this card with the beautiful Stamperia papers and handmade foamiran flowers.  I added venice lace to the bottom. 

Join us for Let's Craft and Create Challenge.  

Wednesday, May 13, 2020

Imagine - Lavinia Stamps

My first  Lavinia stamps card.

Entering this card in Lavinia World Challenge #26

Lavinia Stamps:
Lavinia Paper - Pink Equinox
Slender Mushrooms (Mini)
Stars #2
Mini Leaf 5 Miniature
Rory and Darcy
Eden Fairy
Creeping Vine

Other Supplies:
Graphic 45 Fashion Forward Basic cardstock
Distress Inks
Altenew Crispy Black Ink
5mm flatback pearl

Enjoy and Happy Crafting!


Saturday, May 9, 2020

Happy Mother's Day

Welcome back Rubber Buggy Friends and Happy Mother's Day to you as well as those women who are expecting a baby! Nancy, here and excited to share more Mother's Day cards using the adorable Stamperia Little Girl Paper.   The Stamperia Little Girl 12" x 12" is available in individual cardstock or in a pad with 10 double-sided sheets.  Also, there is a Stamperia Little Boy paper collection.  The entire collections are now available at The Rubber Buggy.  


These cards didn't need much embellishments to be added with the embellishments built into the designs.  I could have used the beautiful ribbon design on the paper rather than adding my ribbon and flowers to make this card cheaper to mail but these cards will be hand delivered.
I adhered the Wild Orchid Craft flowers with a hot glue gun.  The frame, stamp and corners are from an old die and stamp set.


I had so much fun making these cards and hope you will too.  So have fun crafting this weekend with these products.   My cards and projects are always posted on Saturday.  Keep watching and thank you so much for those wonderful comments as well as suggestions. 

Enjoy and Happy Crafting!


Friday, May 8, 2020

Ahoy, Matey Birthday Card

Ahoy, Matey and Arrrrgh you ready to find the treasure?   Nancy, here, with a fun popup Happy Birthday card made this fun  Lawn Fawn Ahoy, Matey and Lawn Fawn Really High Five stamps, die and Lawn Fawn Hello Sunshine paper collection with cute rainbows, sunshine, clouds, and buzzing bees perfect for spring and all available at The Rubber Buggy on-line and retail stores.  
These adorable little pirates are so much fun to play with and you will want this in your treasure of craft supplies. I stamped them with Memento Tuxedo Black ink.   My card measures 5" x 5 1/2".  I cut out the cream cardstock and tore around the edges and crumbled the paper before sponging with the Picket Studio brushes the Distress Oxide inks of a medium and dark brown and the adhered it on brown cardstock measuring 5" x 5 1/2".

 I sprayed the brown edges with water and used my fingers to curl the edges and used Distress Oxide ink and and my Picket Studio brushes to darken the edges again.  I used the same Distress Oxide inks to color the Lawn Fawn Stitched Hillside die.

I cut out two different hillside borders and glued together with the treasure chest in the front hillside border.  Also, I glued the palm trees tucked behind the hillside.  I cut out several balloons from the Lawn Fawn Really High Five  stamp set, colored and die cut used a ink pen for some of the string along stamping one string to the little girl pirate.  The little presents are also from the Lawn Fawn Really High Five stamp set that was colored and used scissors to cut it out.
I am really loving the Lawn Fawn Popup Happy Birthday die along with the Lawn Fawn Oliver Stitched Alphabet die set that coordinates with this popup.  These alphabet cut outs can be used on anything besides this popup die and also coordinates with the Lawn Fawn Hello Popup die set.  Normally, you would want to use a wire cutter to cut the dies apart since they come attached with a thin wire but I left mine together since I didn't want one lost and it makes it easier to find the alphabet than sifting through the dies.

The yellow sunshine paper and beautiful rainbow paper is from the Lawn Fawn Hello Sunshine Paper  collection with cute rainbows, sunshine, clouds, and buzzing bees, so this collection is perfect for spring.

Supplies
Paper: 
White, Cream and brown cardstock
Various colors of cardstocks for alphabet
Stamps: 
Dies:
Inks:
Copic Markers for coloring images
Tools: 
Picket Fence Studio Brushes for sponging the brown
Sizzix Big Shot

I hope I have inspired you try out these products available at The Rubber Buggy on-line store.  My cards and projects are always posted on Saturday.  Keep watching and thank you so much for those wonderful comments as well as suggestions. 
Enjoy and Happy Crafting!


Saturday, May 2, 2020

Your Future Is Reveal Wheel Card

Welcome back and excited to share a fun card made with Lawn Fawn stamp and die sets.  I predict that you will love the Lawn Fawn Fortune Teller Tabby Stamp Set along with the Lawn Fawn Upon A Star.  This cute fortune teller tabby cat is great for anyone who needs a pawsitive prediction along with these critters gazing up at the cat.  All of these wonderful name-brand products are available at The Rubber Buggy on-line store.


The Lawn Fawn Fortune Teller Tabby Stamp and Lawn Fawn Upon A Star sentiments could be used celebrating graduations, friendship, love, and for sending a message of encouragement.  
Lawn Fawn Clear Stamps - Fortune Teller Tabby

I created a U-Tube on how I did my clouds with the beautiful Ranger Distress Ink pads and Lawn Fawn Puffy Cloud Border die which could be substituted for the Lawn Fawn Cloud Stencil..  I just love using the Picket Fence Studio brushes for sponging now.


Lawn Fawn has made a nice tutorial on instructions for the reveal wheel and if you haven't done this before, I would highly recommend you watching it.  I colored the critters in Copic markers.

The cut out the Lawn Fawn Flower Border die with green cardstock and used the die to cut out the pink and yellow flowers.  

I added in the front the Lawn Fawn Stitched Hillside Border die using green cardstock


I applied Nuvo White Gloss to the center of the smaller flowers when the card was completely finished and let the gloss drops dry for a few hours. 


I am into foiling my sentiments as well as decorating the inside of my card.  I used the Wild Rose Studio Bunny and Butterfly stamp.  I used a laser printer for my sentiment and then used transfer foil over it to give it a very professional appearance.

In case you want to do this for you cards, have a office supply store make me a personalize stamp which is very cheap.  I always stamp the back of my cards with my name on it but this time added a stamp to frame my name.  Recipients always like this when I do it.  This time, I stamped a bunch on cardstock, copied on my laser printer on cardstock and then used a transfer foil and laminator to foil it.    I punch it out and then glue it on back of my cards and projects.

I hope I have inspired you try out these products available at The Rubber Buggy on-line store.  My cards and projects are always posted on Saturday.  Keep watching and thank you so much for those wonderful comments as well as suggestions. 
Enjoy and Happy Crafting!