Translate

Showing posts with label The Rubber Buggy. Show all posts

Saturday, March 18, 2017

Peacock Card


I love making flowers and during these winter days, crafting with the Heartfelt Creations Peacock Paisley Collection brighten my days with the gorgeous daisies and peacocks.
The Rubber Buggy Supplies:
Other Supplies:
Heartfelt Creations Arianna Blooms Stamp set, Heartfelt Creations Arianna Blooms Die set, Heartfelt Creations Peacock Paisley Paper, Heartfelt Creations Arianna Lace 
Adhesive, Spray Adhesive, White Feather, White/Gold Glimmer card stock, 5mm flat back pearl, Pink and Yellow ink, 

Instructions:

From the Heartfelt Creations Peacock Paisley paper, cut 4 ¾” x 6 /4”.  Cut yellow card stock 5” x 7”.  Cut green paper 5 ¼” x 7 ¼”.  Cut cream paper 5 ¾” x 7 ¾”.  Adhere using the 3D Foam Tape the Peacock Paisley page to the yellow paper and adhere the rest of the layers as shown on the photo of the card.
Videos for Heartfelt Creations Flower Shaping Kit:  https://www.youtube.com/watch?v=rdsIOVMXjIQ
Stamp the Arianna Bloom flowers with pink ink and color the center with
Copic Marker Y13. Cut the Arianna Bloom flowers and small stamen.   Use the Flower Shaping Kit to shape the two flowers and apply adhesive to form the flower layers.  Apply NUVO Crystal Drops (Dandelion) on the tip of each stamen and apply NUVO Crystal Drops Copper glitter in the center.  Adhere the stamen to the flower.  Stamp the Classic Rose with yellow ink and cut it out.  Use the Flower Shaping Kit to shape the flower and apply adhesive to form the flower layers.  Adhere the flat back pearl to the center of the flower. Stamp the Delightful Daisy with white embossing powder and heat with the embossing gun.  Apply NUVO Crystal Drops (Dandelion) in the center of each daisy. 

Spray a small amount of adhesive spray to each flower and sprinkle diamond dust glitter around the flowers.  Cut two white feather about 2” and adhere to flowers on the peacock.  Adhere daisies on top of the feathers. Stamp two Classic Rose leaves on green card stock and use the Flower Shaping Kit to shape the leaves.  Cut out two Arianna Lace dies.  Adhere the Arianna Bloom flower on the leaves and then adhere it on the Arianna Lace.  Adhere this to the top right corner of the card.  Adhere the other Arianna Bloom and Classic Rose flower to the leaves and adhere it on the Arianna Lace.  Adhere this to the bottom left corner with a Birthday Wishes tab from the Peacock Paisley paper.  

Now it is your turn to try these products out from 
The Rubber Buggy and see what you create! 


Remember to visit The Rubber Buggy store to shop for those gorgeous dies, stamp supplies and other supplies for all of your projects, scrap booking and card making.  


The Rubber Buggy Design Team has something new to share here.   Pop in often and see for yourself what is being shared by this talented group of inspiring designers!!
Have a fabulous crafting day!


I'll be back again next Saturday with a new card or project.


In the meantime, here are all The Rubber Buggy quick links you will need:


Thank you again for stopping by 


Nancy Hill


Designer for The Rubber Buggy

Tuesday, February 21, 2017

Heartfelt Creations Pampered Pooch Sick Card for a Friend

Welcome back to my blog site, Nancy Hill, design team for The Rubber Buggy on-line store.  I have a friend that has been sick with this cold that has been going around and I made her this card using the following supplies from The Rubber Buggy on-line store:

Would have loved to have the Heartfelt Creations Delightful Daisy die and stamp set for this card to coordinate with the paper but used older punches and a die set at this time.  


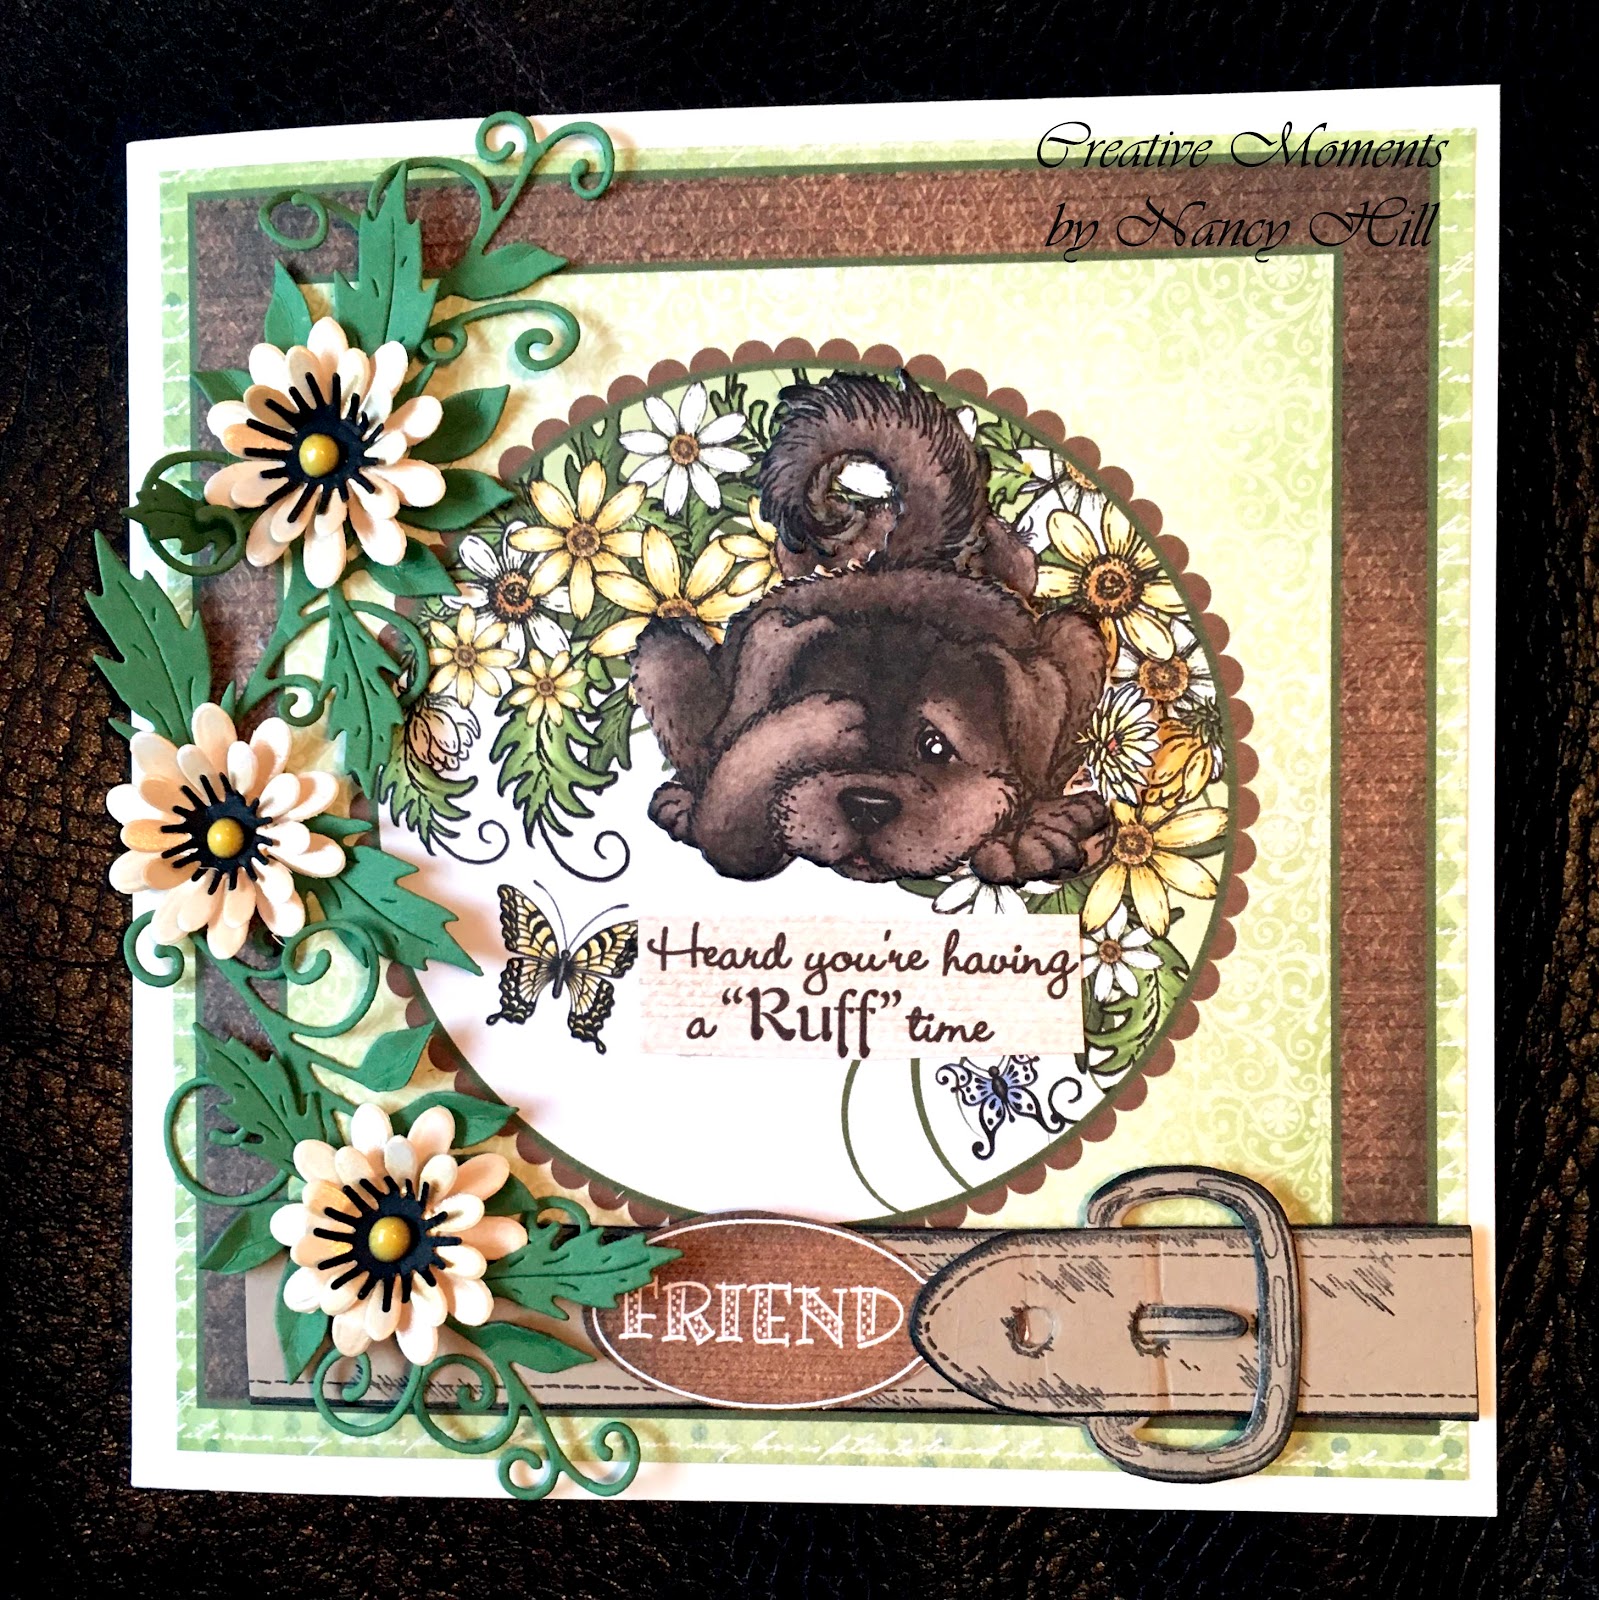
Instructions for front of card:  Cut out the frame with the picture of the dog and bone (Lower right corner) and it should almost measure  a 5 1/2" square.
Since I am making a 6 x 6 card, I love using this Ghostline Poster Board that you can buy almost any where that they sell poster board.  It is heavier weight and I use this for my main foundation of each of my cards since it holds up very well and won't warp.  Cut a 6" x 12" of this poster board and score 6" in the center. Fold the poster board and center the Heartfelt Creation picture of the dog with the bone onto the poster board and glue it.


Using the Heartfelt Creations Pampered Pooch Pal die set, cut out the dog in the first column, second row. Using a molding ball for flowers, I used a medium size molding ball for the back of this dog to give it a 3D shape and make it stand out.  Glue only the edges of the dog and stick it to the top of the dog with the bone.

Using the Heartfelt Creations Pampered Pooch Pal die and Heartfelt Creations Pampered Pooch Stamp set, stamp and cut out the collar.  I used the black ink pad and rubbed it on the edges of the collar to cover up card stock edges and give it some dimension appearance.  I used the Scrapbook Adhesive 3D Foam Tape on the back of the collar and peel the strip off and stuck it to the card.

Inside the Heartfelt Creations Pampered Pooch paper are beautiful tags, labels and sentiments.  With scissors, I cut out the Friend label and glued it on the collar.


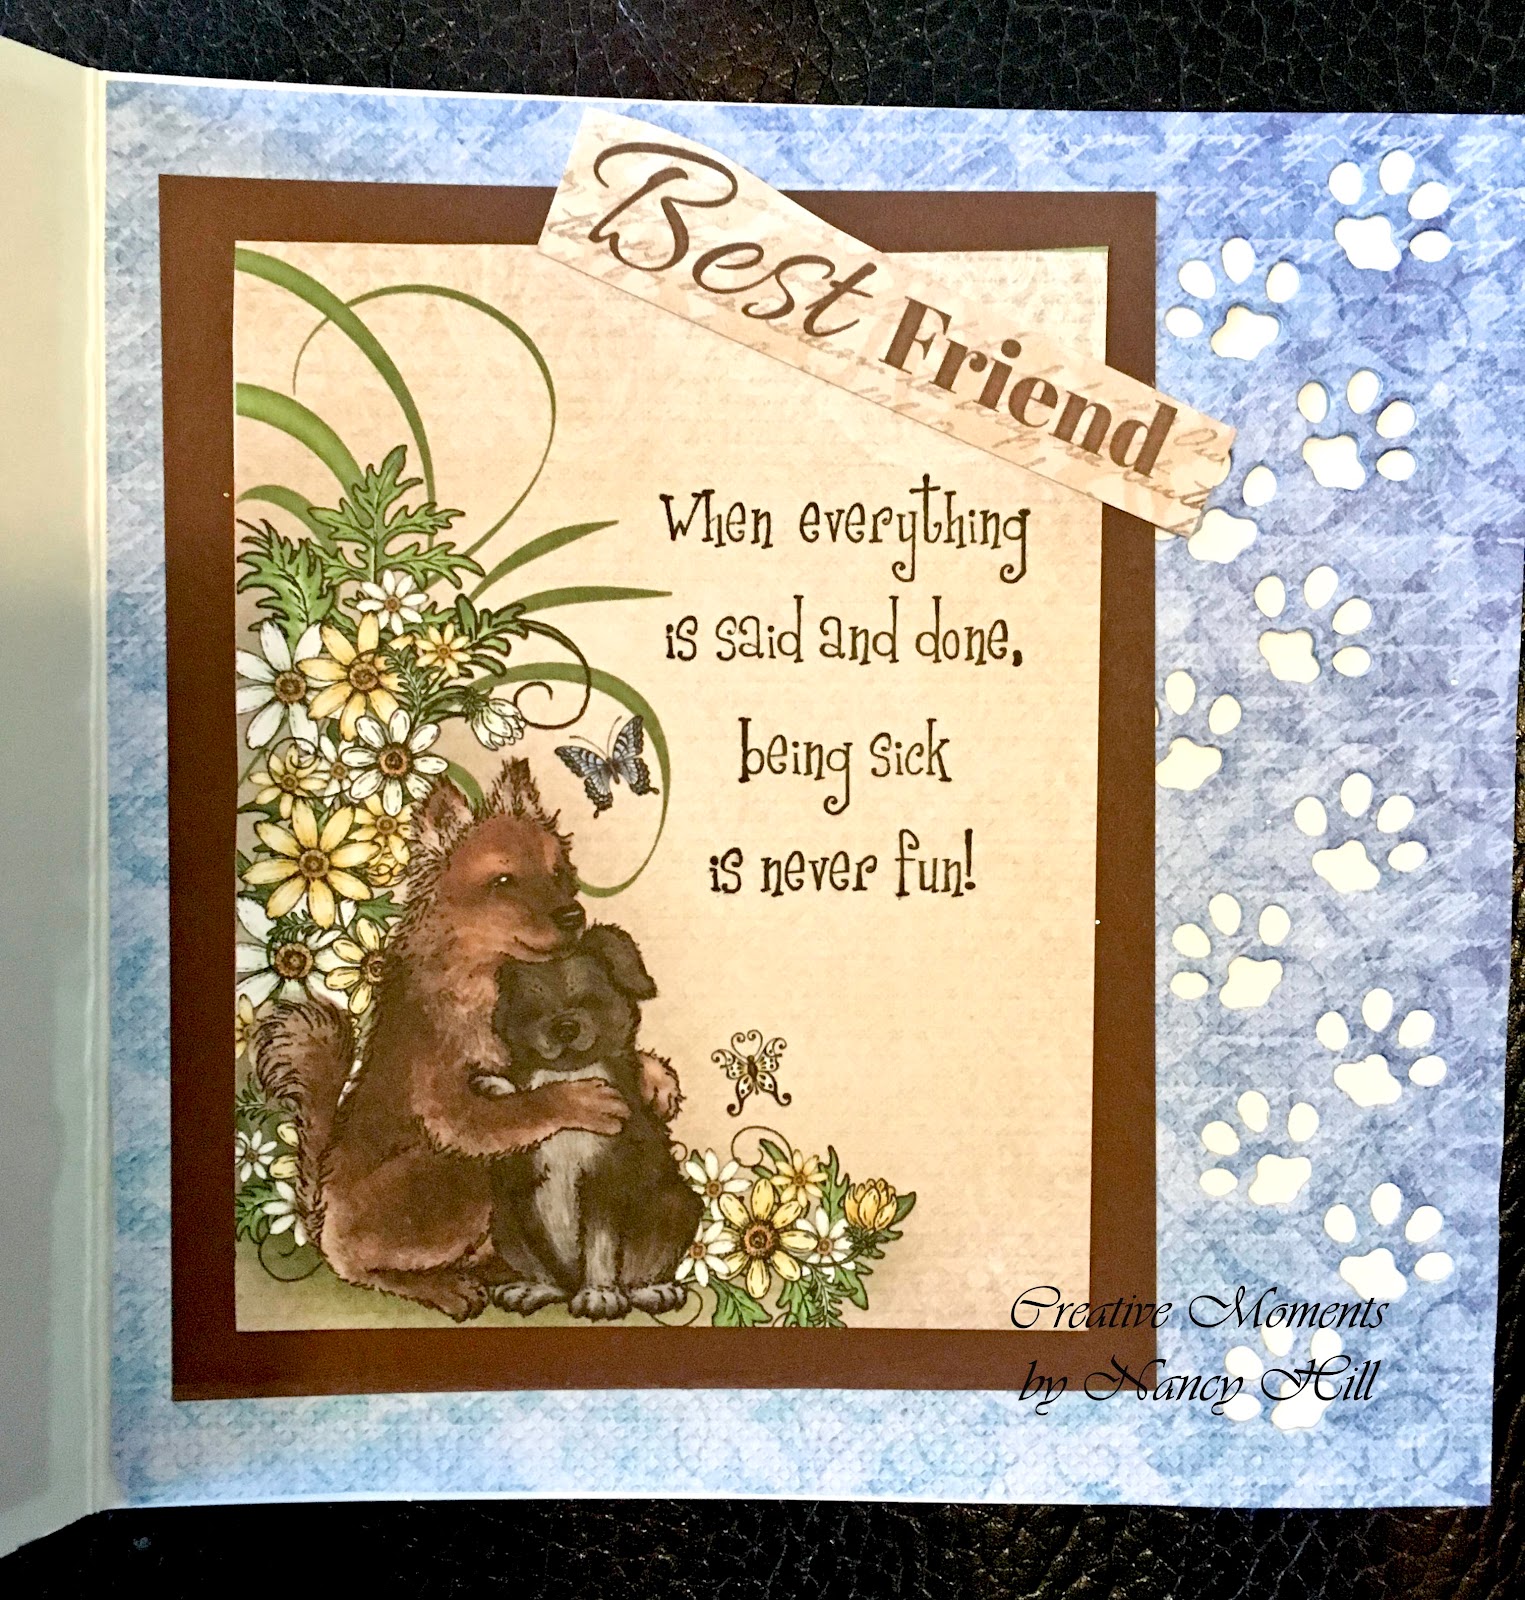
This is the inside of the card and you can find this picture in the Heartfelt Creations Pampered Pooch paper along with Best Friend and the blue paper.  Cut the blue paper 6" x 6" using the Heartfelt Creations Pampered Pooch paper and cut the paw prints with the Heartfelt Creations Pooch Pal die set.  
The brown paper is  4 1/4" x 5" and the measurement of the picture of the dogs is 3 3/4" x 4 3/4".  The sentiment "Best Friend" is in the Heartfelt Creations Pampered Pooch paper and I cut this 3/4" x 2".  
I made this flowers with another die but would have preferred the Heartfelt Creations Delightful Daisy die and stamp set.  What I wanted to show you were these beautiful beaded yellow pearls made with the NUVO Crystal Drops-Gloss-Dandelion.
 I just love how easy the NUVO Crystal Drops are about making gorgeous flat-back pearls in the center of my flowers or on the cards.  The NUVO Crystal Drops come in many colors and textures.  


Now it is your turn to try these products out from 
The Rubber Buggy and see what you create! 

Remember to visit The Rubber Buggy store to shop for those gorgeous dies, stamp supplies and other supplies for all of your projects, scrap booking and card making.  

The Rubber Buggy Design Team has something new to share here.   Pop in often and see for yourself what is being shared by this talented group of inspiring designers!!

I'll be back again next Saturday with a new card or project.

In the meantime, here are all The Rubber Buggy quick links you will need:
Thank you again for stopping by 

Nancy Hill

Designer for The Rubber Buggy


Saturday, February 11, 2017

Heartfelt Creations Blushing Rose Lavender Thank You Card

I love spending time in my craft room.  I have so many thank you cards to send after Christmas.  I wanted to share with you another Thank You tri-fold card that I made for our son's family. 

The Rubber Buggy On-Line store has all of the wonderful supplies you will need for this card:  

Heartfelt Creations Blushing Rose 12" x 12" Paper
Heartfelt Creations Blushing Rose Swirls Stamp Set
Heartfelt Creations Blushing Rose Swirls Emboss and Die Set
Heartfelt Creations Regal Borders and Pockets
Scor Pal Score-Tape  1/2" wide
Small brad painted yellow
Ranger Dye Ink Pad - Lavender Field
Tim Holtz Distress Ink - Antique Linen

Instructions:  I made this instructions for you to follow with steps and measurements:  

How to Make a Heartfelt Creations Blushing Rose Collection Tri-Fold Card by Nancy Hill on Snapguide


I typed this sentiment on my computer and printed it out.  I sponged around the print out with  Ranger Distress Antique Linen ink.


I cut this label out of the Heartfelt Creations Blushing Rose Collection, punched a hole on top and stuck a yellow brad in the hole. If you don't have a yellow brad, you can color any brad with your Copic markers or paints.   I used Scor-Tape to tape the label on the card.  

Now it is your turn to try these products out from 
The Rubber Buggy and see what you create! 

Remember to visit The Rubber Buggy store to shop for those gorgeous dies, stamp supplies and other supplies for all of your projects, scrap booking and card making.  

The Rubber Buggy Design Team has something new to share here.   Pop in often and see for yourself what is being shared by this talented group of inspiring designers!!

I'll be back again next Saturday with a new card or project.

In the meantime, here are all The Rubber Buggy quick links you will need:
Thank you again for stopping by 

Nancy Hill
Designer for The Rubber Buggy


Saturday, February 4, 2017

Tri-Fold Card Tutorial and Heartfelt Creations Blushing Rose Collections


I am so excited to share my tutorial with you on how I made my Tri-Fold Card with the gorgeous Heartfelt Creations:  Blushing Rose Paper Collection, Blushing Rose Stem, Heartfelt Creations Regal Borders and Pockets, and
NUVO Crystal Drops-Gloss-Dandelion and Scor-Tape 1/2" width. All of these wonderful supplies came from The Rubber Buggy on-line store.  


Check out How to Make a Tri-Fold Card by Nancy Hill on Snapguide and see the rest of the card.  


Now it is your turn to try these products out from 
The Rubber Buggy and see what you create! 

Remember to visit The Rubber Buggy store to shop for those gorgeous dies, stamp supplies and other supplies for all of your projects, scrap booking and card making.  

The Rubber Buggy Design Team has something new to share here.   Pop in often and see for yourself what is being shared by this talented group of inspiring designers!!

I'll be back again next Saturday with a new card or project.

In the meantime, here are all The Rubber Buggy quick links you will need:
Thank you again for stopping by 

Nancy Hill

Designer for The Rubber Buggy


Saturday, December 24, 2016

Merry Christmas Card

 I hope your family and you will have a Very Merry Christmas.

Hopefully, you gave Santa your list after checking out all of the gorgeous supplies, dies, and stamps at The Rubber Buggy on-line store.  Don't forget the wonderful tools like the Misti-My Sweet Petunia stamp tools that come in different sizes.  If you never had the Misti stamp tool and Santa gave you one, you will ask yourself
"WHY DIDN'T ASK SANTA A LONG TIME AGO FOR THIS!!!"

I struggled with stamps and ink until I got the Misti Stamp Tool.  No mistakes or light stamping now!!!

 I made this card using the gorgeous Tattered Lace Essential Book die set.  I just got die set last month from 
The Rubber Buggy, and retailers struggle getting this die from Tattered Lace since it is in high demand.  I would suggest getting it now before The Rubber Buggy is out of this die set.   Just look at all of the dies in this set and the different sizes of books you could make along with the very adorable book marker dies.
Tattered Lace Essential Book Die Set


 Both of the saying and the picture of the little girl with the umbrella are from the beautiful
Pion Design-Images from the Past-The Night Before Christmas II.
The gorgeous green patterned paper is from the 
Heartfelt Creation-Snow Kissed Collection

Heartfelt Creations-Snow Kissed Collection

I added the NUVO-Glitter Paste-Moonstone to this photo.  Doesn't this glitter paste look so much like snow.  Also, I like how this same glitter lights up the trees behind the girl.  
NUVO Glitter Paste Moonstone
I love making my flowers and I used the Memory Box-Holiday Poinsettia die.  I added Copic Marker Green/Yellow to the poinsettia and added NUVO-Golden Sunset to the center.
Memory Box-Holiday Poinsettia die set
NUVO-Glitter-Golden Sunset
Inside of the Card

For those who have been following my postings every Saturday, I have been using the Heartfelt Creations Celebrate the Season Gift Wrapped Stamp Set on almost all of my Christmas cards.  Isn't this gorgeous and I love the sentiments.  


Now it is your turn to try these products out from The Rubber Buggy and see what you create! 

Remember to visit The Rubber Buggy store to shop for those gorgeous dies, stamp supplies and other supplies for all of your projects, scrap booking and card making.  

The Rubber Buggy Design Team has something new to share here   Pop in often and see for yourself what is being shared by this talented group of inspiring designers!!

I'll be back again next Saturday with a new card or project.

In the meantime, here are all The Rubber Buggy quick links you will need:


Thank you again for stopping by and
MERRY CHRISTMAS

Nancy Hill
Designer for The Rubber Buggy


Saturday, December 17, 2016

Twelve Days of Christmas Book Card


I love making a personal Christmas card for each person.  What a great way to try something different and make a book card using the fantastic 

Just look at how many dies are in this set.  For more ideas, just google 'images of Tattered Lace Book' to see other cards people have made with this gorgeous die set.  I just used the beautiful Graphic 45 Twelve Days of Christmas Collection and used an oval die to cut it out and glue it onto a Spellbinder die.   


Also, I bend each book page and added  premium double side adhesive 1/4 "Scor-Tape on each of the pages to hold its book shape. 


I cut out the drum on this patterned paper and added NUVO Crystal Glitter Drops Golden Sunset to the drum and used 3D CORP Crafty foam tape to tape it to the card.  The 3D foam tape makes it stand out more.  


I just love the NUVO products and I added the beautiful NUVO Crystal Drops Glitter Sherbert Shimmer dots around the Spellbinder oval frame.  I love how the NUVO drops dry fast and stay rounded without going flat nor does will it have a point to it when I apply it to my cards.


NUVO Crystal Glitter Drops Sherbert Shimmer and NUVO Crystal Glitter Drops Golden Sunset
I added Wild Orchid craft flowers and made the pink rose from the gorgeous 
Heartfelt Creations Classic Rose stamp and Heartfelt Creations Classic Rose die sets. 


Heartfelt Creations Classic Rose Stamp and Heartfelt Creations Classic Rose Die


I used pink ink to stamp my roses and sponged more pink ink around the tip of the rose petal.  I used the same size petals to make each rose including the bud in the rose.  I used my fingers to bend the ends of each petal and squished each petal before gluing the layers together to make this rose.  It really only took about a minute to make this flower.

I am not sure if this book die is meant to have an inside but I made it that way so that it will stand and I am able to add another sentiment inside the card with my name.


 I have made a book card last Saturday and if you missed it, just click HERE.  The following Saturdays,  I will be also making other Christmas book card for Baby's First Christmas for my daughter and hopefully get one made for puppy's First Christmas for my son. 

The Tattered Lace Essential Book die sets at The Rubber Buggy will sell out quickly!!! 

Now it is your turn to try these products out from The Rubber Buggy and see what you create! 

Remember to visit The Rubber Buggy store to shop for those gorgeous dies, stamp supplies and other supplies for all of your projects, scrap booking and card making.  


The Rubber Buggy Design Team has something new to share here   Pop in often and see for yourself what is being shared by this talented group of inspiring designers!!

I'll be back again next Saturday with a new card or project.


In the meantime, here are all The Rubber Buggy quick links you will need:


Thank you again for stopping by!

Nancy Hill